Lighthouse Book
Documentation for Lighthouse users and developers.
Lighthouse is an Ethereum consensus client that connects to other Ethereum consensus clients to form a resilient and decentralized proof-of-stake blockchain.
We implement the specification as defined in the ethereum/consensus-specs repository.
Topics
You may read this book from start to finish, or jump to some of these topics:
- Follow the Installation Guide to install Lighthouse.
- Run your very own beacon node.
- Learn about becoming a mainnet validator.
- Get hacking with the Development Environment Guide.
- Utilize the whole stack by starting a local testnet.
- Query the RESTful HTTP API using
curl.
Prospective contributors can read the Contributing section to understand how we develop and test Lighthouse.
About this Book
This book is open source, contribute at github.com/sigp/lighthouse/book.
The Lighthouse CI/CD system maintains a hosted version of the unstable branch
at lighthouse-book.sigmaprime.io.
📦 Installation
Lighthouse runs on Linux, macOS, and Windows*.
* Lighthouse does not officially support Windows platform. However, Lighthouse can still run natively on Windows until it does not at some point in the future. Windows users may also switch to using Docker, Windows Subsystem for Linux or other supported operating systems.
There are three core methods to obtain the Lighthouse application:
Additionally, there are two extra guides for specific uses:
- Raspberry Pi 4 guide. (Archived)
- Cross-compiling guide for developers.
There are also community-maintained installation methods:
- Homebrew package.
- Arch Linux AUR packages: source, binary.
Recommended System Requirements
Before The Merge, Lighthouse was able to run on its own with low to mid-range consumer hardware, but would perform best when provided with ample system resources.
After The Merge on 15th September 2022, it is necessary to run Lighthouse together with an execution client (Nethermind, Besu, Erigon, Geth, Reth). The following system requirements listed are therefore for running a Lighthouse beacon node combined with an execution client , and a validator client with a modest number of validator keys (less than 100):
- CPU: Quad-core AMD Ryzen, Intel Broadwell, ARMv8 or newer
- Memory: 32 GB RAM*
- Storage: 2 TB solid state drive
- Network: 100 Mb/s download, 20 Mb/s upload broadband connection
*Note: 16 GB RAM is becoming rather limited due to the increased resources required. 16 GB RAM would likely result in out of memory errors in the case of a spike in computing demand (e.g., caused by a bug) or during periods of non-finality of the beacon chain. Users with 16 GB RAM also have a limited choice when it comes to selecting an execution client, which does not help with the client diversity. We therefore recommend users to have at least 32 GB RAM for long term health of the node, while also giving users the flexibility to change client should the thought arise.
Blob storage
The storage recommendation above assumes blob pruning, which is the default setting. To retain blobs history, it is recommended to run with a fast CPU and to have significantly more disk space available, see Blobs for more information.
Pre-built Binaries
Each Lighthouse release contains several downloadable binaries in the “Assets” section of the release. You can find the releases on Github.
Platforms
Binaries are supplied for the following platforms:
x86_64-unknown-linux-gnu: AMD/Intel 64-bit processors (most desktops, laptops, servers)aarch64-unknown-linux-gnu: 64-bit ARM processors (Raspberry Pi 4)aarch64-apple-darwin: macOS with ARM chips
Usage
Each binary is contained in a .tar.gz archive. For this example, lets assume the user needs
a x86_64 binary.
Steps
-
Go to the Releases page and select the latest release.
-
Download the
lighthouse-${VERSION}-x86_64-unknown-linux-gnu.tar.gzbinary. For example, to obtain the binary file for v4.0.1 (the latest version at the time of writing), a user can run the following commands in a linux terminal:cd ~ curl -LO https://github.com/sigp/lighthouse/releases/download/v4.0.1/lighthouse-v4.0.1-x86_64-unknown-linux-gnu.tar.gz tar -xvf lighthouse-v4.0.1-x86_64-unknown-linux-gnu.tar.gz -
Test the binary with
./lighthouse --version(it should print the version). -
(Optional) Move the
lighthousebinary to a location in yourPATH, so thelighthousecommand can be called from anywhere. For example, to copylighthousefrom the current directory tousr/bin, runsudo cp lighthouse /usr/bin.
Docker Guide
There are two ways to obtain a Lighthouse Docker image:
Once you have obtained the docker image via one of these methods, proceed to Using the Docker image.
Docker Hub
Lighthouse maintains the sigp/lighthouse Docker Hub repository which provides an easy way to run Lighthouse without building the image yourself.
Obtain the latest image with:
docker pull sigp/lighthouse
Download and test the image with:
docker run sigp/lighthouse lighthouse --version
If you can see the latest Lighthouse release version (see example below), then you’ve successfully installed Lighthouse via Docker.
Example Version Output
Lighthouse vx.x.xx-xxxxxxxxx
BLS Library: xxxx-xxxxxxx
Available Docker Images
There are several images available on Docker Hub.
Most users should use the latest tag, which corresponds to the latest stable release of
Lighthouse with optimizations enabled.
To install a specific tag (in this case latest), add the tag name to your docker commands:
docker pull sigp/lighthouse:latest
Image tags follow this format:
${version}${arch}${stability}
The version is:
vX.Y.Zfor a tagged Lighthouse release, e.g.v2.1.1latestfor thestablebranch (latest release) orunstablebranch
The arch is:
-amd64for x86_64, e.g. Intel, AMD-arm64for aarch64, e.g. Raspberry Pi 4- empty for a multi-arch image (works on either
amd64orarm64platforms)
The stability is:
-unstablefor theunstablebranch- empty for a tagged release or the
stablebranch
Examples:
latest-unstable: most recentunstablebuildlatest-amd64: most recent Lighthouse release for older x86_64 CPUslatest-amd64-unstable: most recentunstablebuild for older x86_64 CPUs
Building the Docker Image
To build the image from source, navigate to the root of the repository and run:
docker build . -t lighthouse:local
The build will likely take several minutes. Once it’s built, test it with:
docker run lighthouse:local lighthouse --help
Using the Docker image
You can run a Docker beacon node with the following command:
docker run -p 9000:9000/tcp -p 9000:9000/udp -p 9001:9001/udp -p 127.0.0.1:5052:5052 -v $HOME/.lighthouse:/root/.lighthouse sigp/lighthouse lighthouse --network mainnet beacon --http --http-address 0.0.0.0
To join the Hoodi testnet, use
--network hoodiinstead.
The
-v(Volumes) and-p(Ports) and values are described below.
Volumes
Lighthouse uses the /root/.lighthouse directory inside the Docker image to
store the configuration, database and validator keys. Users will generally want
to create a bind-mount volume to ensure this directory persists between docker run commands.
The following example runs a beacon node with the data directory mapped to the users home directory:
docker run -v $HOME/.lighthouse:/root/.lighthouse sigp/lighthouse lighthouse beacon
Ports
In order to be a good peer and serve other peers you should expose port 9000 for both TCP and UDP, and port 9001 for UDP.
Use the -p flag to do this:
docker run -p 9000:9000/tcp -p 9000:9000/udp -p 9001:9001/udp sigp/lighthouse lighthouse beacon
If you use the --http flag you may also want to expose the HTTP port with -p 127.0.0.1:5052:5052.
docker run -p 9000:9000/tcp -p 9000:9000/udp -p 9001:9001/udp -p 127.0.0.1:5052:5052 sigp/lighthouse lighthouse beacon --http --http-address 0.0.0.0
Build from Source
Lighthouse builds on Linux, macOS, and Windows. Install the Dependencies using the instructions below, and then proceed to Building Lighthouse.
Dependencies
First, install Rust using rustup:
curl --proto '=https' --tlsv1.2 -sSf https://sh.rustup.rs | sh
The rustup installer provides an easy way to update the Rust compiler, and works on all platforms.
Tips:
- During installation, when prompted, enter
1for the default installation.- After Rust installation completes, try running
cargo version. If it cannot be found, runsource $HOME/.cargo/env. After that, runningcargo versionshould return the version, for examplecargo 1.68.2.- It’s generally advisable to append
source $HOME/.cargo/envto~/.bashrc.
With Rust installed, follow the instructions below to install dependencies relevant to your operating system.
Note: For Linux OS, general Linux File Systems such as Ext4 or XFS are fine. We recommend to avoid using Btrfs file system as it has been reported to be slow and the node will suffer from performance degradation as a result.
Ubuntu
Install the following packages:
sudo apt update && sudo apt install -y git gcc g++ make cmake pkg-config llvm-dev libclang-dev clang
Tips:
- If there are difficulties, try updating the package manager with
sudo apt update.
Note: Lighthouse requires CMake v3.12 or newer, which isn’t available in the package repositories of Ubuntu 18.04 or earlier. On these distributions CMake can still be installed via PPA: https://apt.kitware.com/
After this, you are ready to build Lighthouse.
Fedora/RHEL/CentOS
Install the following packages:
yum -y install git make perl clang cmake
After this, you are ready to build Lighthouse.
macOS
- Install the Homebrew package manager.
- Install CMake using Homebrew:
brew install cmake
After this, you are ready to build Lighthouse.
Windows
Note: Lighthouse no longer officially supports Windows binary. However, users will still be able to build the binary from source according to the instructions below. The instructions may no longer work at some point in the future.
-
Install Git.
-
Install the Chocolatey package manager for Windows.
Tips:
- Use PowerShell to install. In Windows, search for PowerShell and run as administrator.
- You must ensure
Get-ExecutionPolicyis not Restricted. To test this, runGet-ExecutionPolicyin PowerShell. If it returnsrestricted, then runSet-ExecutionPolicy AllSigned, and then run
Set-ExecutionPolicy Bypass -Scope Process -Force; [System.Net.ServicePointManager]::SecurityProtocol = [System.Net.ServicePointManager]::SecurityProtocol -bor 3072; iex ((New-Object System.Net.WebClient).DownloadString('https://community.chocolatey.org/install.ps1'))- To verify that Chocolatey is ready, run
chocoand it should return the version.
-
Install Make, CMake and LLVM using Chocolatey:
choco install make
choco install cmake --installargs 'ADD_CMAKE_TO_PATH=System'
choco install llvm
These dependencies are for compiling Lighthouse natively on Windows. Lighthouse can also run successfully under the Windows Subsystem for Linux (WSL). If using Ubuntu under WSL, you should follow the instructions for Ubuntu listed in the Dependencies (Ubuntu) section.
After this, you are ready to build Lighthouse.
Build Lighthouse
Once you have Rust and the build dependencies you’re ready to build Lighthouse:
git clone https://github.com/sigp/lighthouse.git
cd lighthouse
git checkout stable
make
Compilation may take around 10 minutes. Installation was successful if lighthouse --help displays
the command-line documentation.
If you run into any issues, please check the Troubleshooting section, or reach out to us on Discord.
Update Lighthouse
You can update Lighthouse to a specific version by running the commands below. The lighthouse
directory will be the location you cloned Lighthouse to during the installation process.
${VERSION} will be the version you wish to build in the format vX.X.X.
cd lighthouse
git fetch
git checkout ${VERSION}
make
Feature Flags
You can customise the features that Lighthouse is built with using the FEATURES environment
variable. E.g.
FEATURES=gnosis,slasher-lmdb,beacon-node-leveldb make
Commonly used features include:
gnosis: support for the Gnosis Beacon Chain.portable: the default feature as Lighthouse now uses runtime detection of hardware CPU features.slasher-lmdb: support for the LMDB slasher backend. Enabled by default.slasher-mdbx: support for the MDBX slasher backend.beacon-node-leveldb: support for the leveldb backend. Enabled by default.sysmalloc: use the system memory allocator rather than jemalloc. This is always enabled on Windows.spec-minimal: support for the minimal preset (useful for testing).
Default features (e.g. slasher-lmdb, beacon-node-leveldb) may be opted out of using the --no-default-features
argument for cargo, which can be plumbed in via the CARGO_INSTALL_EXTRA_FLAGS environment variable.
E.g.
CARGO_INSTALL_EXTRA_FLAGS="--no-default-features" make
Compilation Profiles
You can customise the compiler settings used to compile Lighthouse via Cargo profiles.
Lighthouse includes several profiles which can be selected via the PROFILE environment variable.
release: default for source builds, enables most optimisations while not taking too long to compile.maxperf: default for binary releases, enables aggressive optimisations including full LTO. Although compiling with this profile improves some benchmarks by around 20% compared torelease, it imposes a significant cost at compile time and is only recommended if you have a fast CPU.
To compile with maxperf:
PROFILE=maxperf make
Troubleshooting
Command is not found
Lighthouse will be installed to CARGO_HOME or $HOME/.cargo. This directory
needs to be on your PATH before you can run $ lighthouse.
See “Configuring the PATH environment variable” for more information.
Compilation error
Make sure you are running the latest version of Rust. If you have installed Rust using rustup, simply run rustup update.
If you can’t install the latest version of Rust you can instead compile using the Minimum Supported
Rust Version (MSRV) which is listed under the rust-version key in Lighthouse’s
Cargo.toml.
If compilation fails with (signal: 9, SIGKILL: kill), this could mean your machine ran out of
memory during compilation. If you are on a resource-constrained device you can
look into cross compilation, or use a pre-built
binary.
If compilation fails with error: linking with cc failed: exit code: 1, try running cargo clean.
Cross-compiling
Lighthouse supports cross-compiling, allowing users to run a binary on one
platform (e.g., aarch64) that was compiled on another platform (e.g.,
x86_64).
Instructions
Cross-compiling requires Docker,
rustembedded/cross and for the
current user to be in the docker group.
The binaries will be created in the target/ directory of the Lighthouse
project.
Targets
The Makefile in the project contains two targets for cross-compiling:
build-x86_64: builds an optimized version for x86_64 processors (suitable for most users).build-aarch64: builds an optimized version for 64-bit ARM processors (suitable for Raspberry Pi 4/5).build-riscv64: builds an optimized version for 64-bit RISC-V processors.
Example
cd lighthouse
make build-aarch64
The lighthouse binary will be compiled inside a Docker container and placed
in lighthouse/target/aarch64-unknown-linux-gnu/release.
Feature Flags
When using the makefile the set of features used for building can be controlled with
the environment variable CROSS_FEATURES. See Feature
Flags for available features.
Compilation Profiles
When using the makefile the build profile can be controlled with the environment variable
CROSS_PROFILE. See Compilation Profiles for
available profiles.
Homebrew package
Lighthouse is available on Linux and macOS via the Homebrew package manager.
Please note that this installation method is maintained by the Homebrew community. It is not officially supported by the Lighthouse team.
Installation
Install the latest version of the lighthouse formula with:
brew install lighthouse
Usage
If Homebrew is installed to your PATH (default), simply run:
lighthouse --help
Alternatively, you can find the lighthouse binary at:
"$(brew --prefix)/bin/lighthouse" --help
Maintenance
The formula is kept up-to-date by the Homebrew community and a bot that lists for new releases.
The package source can be found in the homebrew-core repository.
Update Priorities
When publishing releases, Lighthouse will include an “Update Priority” section in the release notes. As an example, see the release notes from v2.1.2).
The “Update Priority” section will include a table which may appear like so:
| User Class | Beacon Node | Validator Client |
|---|---|---|
| Staking Users | Medium Priority | Low Priority |
| Non-Staking Users | Low Priority | — |
To understand this table, the following terms are important:
- Staking users are those who use
lighthouse bnandlighthouse vcto stake on the Beacon Chain. - Non-staking users are those who run a
lighthouse bnfor non-staking purposes (e.g., data analysis or applications). - High priority updates should be completed as soon as possible (e.g., hours or days).
- Medium priority updates should be completed at the next convenience (e.g., days or a week).
- Low priority updates should be completed in the next routine update cycle (e.g., two weeks).
Therefore, in the table above, staking users should update their BN in the next days or week and their VC in the next routine update cycle. Non-staking should also update their BN in the next routine update cycle.
Run a Node
This section provides the detail for users who want to run a Lighthouse beacon node. You should be finished with one Installation method of your choice to continue with the following steps:
- Create a JWT secret file
- Set up an execution node;
- Set up a beacon node;
- Check logs for sync status;
Step 1: Create a JWT secret file
A JWT secret file is used to secure the communication between the execution client and the consensus client. In this step, we will create a JWT secret file which will be used in later steps.
sudo mkdir -p /secrets
openssl rand -hex 32 | tr -d "\n" | sudo tee /secrets/jwt.hex
Step 2: Set up an execution node
The Lighthouse beacon node must connect to an execution engine in order to validate the transactions present in blocks. The execution engine connection must be exclusive, i.e. you must have one execution node per beacon node. The reason for this is that the beacon node controls the execution node. Select an execution client from the list below and run it:
Note: Each execution engine has its own flags for configuring the engine API and JWT secret to connect to a beacon node. Please consult the relevant page of your execution engine as above for the required flags.
Once the execution client is up, just let it continue running. The execution client will start syncing when it connects to a beacon node. Depending on the execution client and computer hardware specifications, syncing can take from a few hours to a few days. You can safely proceed to Step 3 to set up a beacon node while the execution client is still syncing.
Step 3: Set up a beacon node using Lighthouse
In this step, we will set up a beacon node. Use the following command to start a beacon node that connects to the execution node:
Staking
lighthouse bn \
  --network mainnet \
  --execution-endpoint http://localhost:8551 \
  --execution-jwt /secrets/jwt.hex \
  --checkpoint-sync-url https://mainnet.checkpoint.sigp.io \
  --http
Note: If you download the binary file, you need to navigate to the directory of the binary file to run the above command.
Notable flags:
--networkflag, which selects a network:-
lighthouse(no flag): Mainnet. -
lighthouse --network mainnet: Mainnet. -
lighthouse --network hoodi: Hoodi (testnet). -
lighthouse --network sepolia: Sepolia (testnet). -
lighthouse --network chiado: Chiado (testnet). -
lighthouse --network gnosis: Gnosis chain.Note: Using the correct
--networkflag is very important; using the wrong flag can result in penalties, slashings or lost deposits. As a rule of thumb, always provide a--networkflag instead of relying on the default.
-
--execution-endpoint: the URL of the execution engine API. If the execution engine is running on the same computer with the default port, this will behttp://localhost:8551.--execution-jwt: the path to the JWT secret file shared by Lighthouse and the execution engine. This is a mandatory form of authentication which ensures that Lighthouse has the authority to control the execution engine.--checkpoint-sync-url: Lighthouse supports fast sync from a recent finalized checkpoint. Checkpoint sync is optional; however, we highly recommend it since it is substantially faster than syncing from genesis while still providing the same functionality. The checkpoint sync is done using public endpoints provided by the Ethereum community. For example, in the above command, we use the URL for Sigma Prime’s checkpoint sync server for mainnethttps://mainnet.checkpoint.sigp.io.--http: to expose an HTTP server of the beacon chain. The default listening address ishttp://localhost:5052. The HTTP API is required for the beacon node to accept connections from the validator client, which manages keys.
If you intend to run the beacon node without running the validator client (e.g., for non-staking purposes such as supporting the network), you can modify the above command so that the beacon node is configured for non-staking purposes:
Non-staking
lighthouse bn \
  --network mainnet \
  --execution-endpoint http://localhost:8551 \
  --execution-jwt /secrets/jwt.hex \
  --checkpoint-sync-url https://mainnet.checkpoint.sigp.io
Once Lighthouse runs, we can monitor the logs to see if it is syncing correctly.
Step 4: Check logs for sync status
Several logs help you identify if Lighthouse is running correctly.
Logs - Checkpoint sync
If you run Lighthouse with the flag --checkpoint-sync-url, Lighthouse will print a message to indicate that checkpoint sync is being used:
INFO Starting checkpoint sync remote_url: http://remote-bn:8000/, service: beacon
After a short time (usually less than a minute), it will log the details of the checkpoint loaded from the remote beacon node:
INFO Loaded checkpoint block and state state_root: 0xe8252c68784a8d5cc7e5429b0e95747032dd1dcee0d1dc9bdaf6380bf90bc8a6, block_root: 0x5508a20147299b1a7fe9dbea1a8b3bf979f74c52e7242039bd77cbff62c0695a, slot: 2034720, service: beacon
Once the checkpoint is loaded, Lighthouse will sync forwards to the head of the chain.
If a validator client is connected to the beacon node it will be able to start its duties as soon as forwards sync completes, which typically takes 1-2 minutes.
Note: If you have an existing Lighthouse database, you will need to delete the database by using the
--purge-db-forceflag or manually delete the database withsudo rm -r /path_to_database/beacon. If you do use a--purge-db-forceflag, once checkpoint sync is complete, you can remove the flag upon a restart.
Security Note: You should cross-reference the
block_rootandslotof the loaded checkpoint against a trusted source like another public endpoint, a friend’s node, or a block explorer.
Backfilling Blocks
Once forwards sync completes, Lighthouse will commence a “backfill sync” to download the blocks from the checkpoint back to genesis.
The beacon node will log messages similar to the following each minute while it completes backfill sync:
INFO Downloading historical blocks est_time: 5 hrs 0 mins, speed: 111.96 slots/sec, distance: 2020451 slots (40 weeks 0 days), service: slot_notifier
Once backfill is complete, a INFO Historical block download complete log will be emitted.
Check out the FAQ for more information on checkpoint sync.
Logs - Syncing
You should see that Lighthouse remains in sync and marks blocks
as verified indicating that they have been processed successfully by the execution engine:
INFO Synced, slot: 3690668, block: 0x1244…cb92, epoch: 115333, finalized_epoch: 115331, finalized_root: 0x0764…2a3d, exec_hash: 0x929c…1ff6 (verified), peers: 78
Once you see the above message - congratulations! This means that your node is synced and you have contributed to the decentralization and security of the Ethereum network.
Further readings
Several other resources are the next logical step to explore after running your beacon node:
- If you intend to run a validator, proceed to become a validator;
- Explore how to manage your keys;
- Research on validator management;
- Dig into the APIs that the beacon node and validator client provide;
- Study even more about checkpoint sync; or
Finally, if you are struggling with anything, join our Discord. We are happy to help!
Become an Ethereum Consensus Mainnet Validator
Becoming an Ethereum consensus validator is rewarding, but it’s not for the faint of heart. You’ll need to be familiar with the rules of staking (e.g., rewards, penalties, etc.) and also configuring and managing servers. You’ll also need at least 32 ETH!
Being educated is critical to a validator’s success. Before submitting your mainnet deposit, we recommend:
- Thoroughly exploring the Staking Launchpad website, try running through the deposit process using a testnet launchpad such as the Hoodi staking launchpad.
- Running a testnet validator.
- Reading through this documentation, especially the Slashing Protection section.
- Performing a web search and doing your own research.
Please note: the Lighthouse team does not take any responsibility for losses or damages occurred through the use of Lighthouse. We have an experienced internal security team and have undergone multiple third-party security-reviews, however the possibility of bugs or malicious interference remains a real and constant threat. Validators should be prepared to lose some rewards due to the actions of other actors on the consensus layer or software bugs. See the software license for more detail on liability.
Become a validator
There are five primary steps to become a validator:
- Create validator keys
- Start an execution client and Lighthouse beacon node
- Import validator keys into Lighthouse
- Start Lighthouse validator client
- Submit deposit
Important note: The guide below contains both mainnet and testnet instructions. We highly recommend all users to run a testnet validator prior to staking mainnet ETH. By far, the best technical learning experience is to run a testnet validator. You can get hands-on experience with all the tools and it’s a great way to test your staking hardware. 32 ETH is a significant outlay and joining a testnet is a great way to “try before you buy”.
Never use real ETH to join a testnet! Testnet such as the Hoodi testnet uses Hoodi ETH which is worthless. This allows experimentation without real-world costs.
Step 1. Create validator keys
EthStaker provides the ethstaker-deposit-cli for creating validator keys. Download and run the ethstaker-deposit-cli with the command:
./deposit new-mnemonic
and follow the instructions to generate the keys. When prompted for a network, select mainnet if you want to run a mainnet validator, or select hoodi if you want to run a Hoodi testnet validator. A new mnemonic will be generated in the process.
Important note: A mnemonic (or seed phrase) is a 24-word string randomly generated in the process. It is highly recommended to write down the mnemonic and keep it safe offline. It is important to ensure that the mnemonic is never stored in any digital form (computers, mobile phones, etc) connected to the internet. Please also make one or more backups of the mnemonic to ensure your ETH is not lost in the case of data loss. It is very important to keep your mnemonic private as it represents the ultimate control of your ETH.
Upon completing this step, the files deposit_data-*.json and keystore-m_*.json will be created. The keys that are generated from ethstaker-deposit-cli can be easily loaded into a Lighthouse validator client (lighthouse vc) in Step 3. In fact, both of these programs are designed to work with each other.
Lighthouse also supports creating validator keys, see Validator Manager Create for more info.
Step 2. Start an execution client and Lighthouse beacon node
Start an execution client and Lighthouse beacon node according to the Run a Node guide. Make sure that both execution client and consensus client are synced.
Step 3. Import validator keys to Lighthouse
In Step 1, the ethstaker-deposit-cli will generate the validator keys into a validator_keys directory. Let’s assume that
this directory is $HOME/ethstaker-deposit-cli/validator_keys. Using the default validators directory in Lighthouse (~/.lighthouse/mainnet/validators), run the following command to import validator keys:
Mainnet:
lighthouse --network mainnet account validator import --directory $HOME/ethstaker-deposit-cli/validator_keys
Hoodi testnet:
lighthouse --network hoodi account validator import --directory $HOME/ethstaker-deposit-cli/validator_keys
Note: The user must specify the consensus client network that they are importing the keys by using the
--networkflag.
Note: If the validator_keys directory is in a different location, modify the path accordingly.
Note:
~/.lighthouse/mainnetis the default directory which contains the keys and database. To specify a custom directory, see Custom Directories.
Docker users should use the command from the Docker documentation.
The user will be prompted for a password for each keystore discovered:
Keystore found at "/home/{username}/ethstaker-deposit-cli/validator_keys/keystore-m_12381_3600_0_0_0-1595406747.json":

 - Public key: 0xa5e8702533f6d66422e042a0bf3471ab9b302ce115633fa6fdc5643f804b6b4f1c33baf95f125ec21969a3b1e0dd9e56
 - UUID: 8ea4cf99-8719-43c5-9eda-e97b8a4e074f

If you enter the password it will be stored as plain text in validator_definitions.yml so that it is not required each time the validator client starts.

Enter the keystore password, or press enter to omit it:
The user can choose whether or not they’d like to store the validator password
in the validator_definitions.yml file. If the
password is not stored here, the validator client (lighthouse vc)
application will ask for the password each time it starts. This might be nice
for some users from a security perspective (i.e., if it is a shared computer),
however it means that if the validator client restarts, the user will be subject
to offline penalties until they can enter the password. If the user trusts the
computer that is running the validator client and they are seeking maximum
validator rewards, we recommend entering a password at this point.
Once the process is done the user will see:
Successfully imported keystore.
Successfully updated validator_definitions.yml.

Successfully imported 1 validators (0 skipped).

WARNING: DO NOT USE THE ORIGINAL KEYSTORES TO VALIDATE WITH ANOTHER CLIENT, OR YOU WILL GET SLASHED.
Once you see the above message, you have successfully imported the validator keys. You can now proceed to the next step to start the validator client.
Step 4. Start Lighthouse validator client
After the keys are imported, the user can start performing their validator duties
by starting the Lighthouse validator client lighthouse vc:
Mainnet:
lighthouse vc --network mainnet --suggested-fee-recipient YourFeeRecipientAddress
Hoodi testnet:
lighthouse vc --network hoodi --suggested-fee-recipient YourFeeRecipientAddress
The validator client manages validators using data obtained from the beacon node via a HTTP API. You are highly recommended to enter a fee-recipient by changing YourFeeRecipientAddress to an Ethereum address under your control.
When lighthouse vc starts, check that the validator public key appears
as a voting_pubkey as shown below:
INFO Enabled validator voting_pubkey: 0xa5e8702533f6d66422e042a0bf3471ab9b302ce115633fa6fdc5643f804b6b4f1c33baf95f125ec21969a3b1e0dd9e56
Once this log appears (and there are no errors) the lighthouse vc application
will ensure that the validator starts performing its duties and being rewarded
by the protocol.
Step 5: Submit deposit (a minimum of 32ETH to activate one validator)
After you have successfully run and synced the execution client, beacon node and validator client, you can now proceed to submit the deposit. Go to the mainnet Staking launchpad (or Hoodi staking launchpad for testnet validator) and carefully go through the steps to becoming a validator. Once you are ready, you can submit the deposit by sending ETH to the deposit contract. Upload the deposit_data-*.json file generated in Step 1 to the Staking launchpad.
Important note: Double check that the deposit contract for mainnet is
0x00000000219ab540356cBB839Cbe05303d7705Fabefore you confirm the transaction.
Once the deposit transaction is confirmed, it will take a minimum of ~13 minutes to a few days to activate your validator, depending on the queue.
Once your validator is activated, the validator client will start to publish attestations each epoch:
Dec 03 08:49:40.053 INFO Successfully published attestation slot: 98, committee_index: 0, head_block: 0xa208…7fd5,
If you propose a block, the log will look like:
Dec 03 08:49:36.225 INFO Successfully published block slot: 98, attestations: 2, deposits: 0, service: block
Congratulations! Your validator is now performing its duties and you will receive rewards for securing the Ethereum network.
What is next?
After the validator is running and performing its duties, it is important to keep the validator online to continue accumulating rewards. However, there could be problems with the computer, the internet or other factors that cause the validator to be offline. For this, it is best to subscribe to notifications, e.g., via beaconcha.in which will send notifications about missed attestations and/or proposals. You will be notified about the validator’s offline status and will be able to react promptly.
The next important thing is to stay up to date with updates to Lighthouse and the execution client. Updates are released from time to time, typically once or twice a month. For Lighthouse updates, you can subscribe to notifications on Github by clicking on Watch. If you only want to receive notification on new releases, select Custom, then Releases. You could also join Lighthouse Discord where we will make an announcement when there is a new release.
You may also want to try out Siren, a UI developed by Lighthouse to monitor validator performance.
Once you are familiar with running a validator and server maintenance, you’ll find that running Lighthouse is easy. Install it, start it, monitor it and keep it updated. You shouldn’t need to interact with it on a day-to-day basis. Happy staking!
Docker users
Import validator keys
The import command is a little more complex for Docker users, but the example
in this document can be substituted with:
docker run -it \
	-v $HOME/.lighthouse:/root/.lighthouse \
	-v $(pwd)/validator_keys:/root/validator_keys \
	sigp/lighthouse \
	lighthouse --network mainnet account validator import --directory /root/validator_keys
Here we use two -v volumes to attach:
~/.lighthouseon the host to/root/.lighthousein the Docker container.- The
validator_keysdirectory in the present working directory of the host to the/root/validator_keysdirectory of the Docker container.
Start Lighthouse beacon node and validator client
Those using Docker images can start the processes with:
$ docker run \
	--network host \
	-v $HOME/.lighthouse:/root/.lighthouse sigp/lighthouse \
	lighthouse --network mainnet bn --staking --http-address 0.0.0.0
$ docker run \
	--network host \
	-v $HOME/.lighthouse:/root/.lighthouse \
	sigp/lighthouse \
	lighthouse --network mainnet vc
If you get stuck you can always reach out on our Discord or create an issue.
Validator Management
The lighthouse vc command starts a validator client instance which connects
to a beacon node to perform the duties of a staked validator.
This document provides information on how the validator client discovers the validators it will act for and how it obtains their cryptographic signatures.
Users that create validators using the lighthouse account tool in the
standard directories and do not start their lighthouse vc with the
--disable-auto-discover flag should not need to understand the contents of
this document. However, users with more complex needs may find this document
useful.
The lighthouse validator-manager command can be used to create and import validators to a Lighthouse VC. It can also be used to move validators between two Lighthouse VCs.
Introducing the validator_definitions.yml file
The validator_definitions.yml file is located in the validator-dir, which
defaults to ~/.lighthouse/{network}/validators. It is a
YAML encoded file defining exactly which
validators the validator client will (and won’t) act for.
Example
Here’s an example file with two validators:
---
- enabled: true
  voting_public_key: "0x87a580d31d7bc69069b55f5a01995a610dd391a26dc9e36e81057a17211983a79266800ab8531f21f1083d7d84085007"
  type: local_keystore
  voting_keystore_path: /home/paul/.lighthouse/validators/0x87a580d31d7bc69069b55f5a01995a610dd391a26dc9e36e81057a17211983a79266800ab8531f21f1083d7d84085007/voting-keystore.json
  voting_keystore_password_path: /home/paul/.lighthouse/secrets/0x87a580d31d7bc69069b55f5a01995a610dd391a26dc9e36e81057a17211983a79266800ab8531f21f1083d7d84085007
- enabled: false
  voting_public_key: "0xa5566f9ec3c6e1fdf362634ebec9ef7aceb0e460e5079714808388e5d48f4ae1e12897fed1bea951c17fa389d511e477"
  type: local_keystore
  voting_keystore_path: /home/paul/.lighthouse/validators/0xa5566f9ec3c6e1fdf362634ebec9ef7aceb0e460e5079714808388e5d48f4ae1e12897fed1bea951c17fa389d511e477/voting-keystore.json
  voting_keystore_password: myStrongpa55word123&$
In this example we can see two validators:
- A validator identified by the
0x87a5...public key which is enabled. - Another validator identified by the
0x0xa556...public key which is not enabled.
Fields
Each permitted field of the file is listed below for reference:
enabled: Atrue/falseindicating if the validator client should consider this validator “enabled”.voting_public_key: A validator public key.type: How the validator signs messages (this can belocal_keystoreorweb3signer(see Web3Signer)).voting_keystore_path: The path to a EIP-2335 keystore.voting_keystore_password_path: The path to the password for the EIP-2335 keystore.voting_keystore_password: The password to the EIP-2335 keystore.
Note: Either
voting_keystore_password_pathorvoting_keystore_passwordmust be supplied. If both are supplied,voting_keystore_password_pathis ignored.
If you do not wish to have
voting_keystore_passwordbeing stored in thevalidator_definitions.ymlfile, you can add the fieldvoting_keystore_password_pathand point it to a file containing the password. The file can be, e.g., on a mounted portable drive that contains the password so that no password is stored on the validating node.
Populating the validator_definitions.yml file
When a validator client starts and the validator_definitions.yml file doesn’t
exist, a new file will be created. If the --disable-auto-discover flag is
provided, the new file will be empty and the validator client will not start
any validators. If the --disable-auto-discover flag is not provided, an
automatic validator discovery routine will start (more on that later). To
recap:
lighthouse vc: validators are automatically discovered.lighthouse vc --disable-auto-discover: validators are not automatically discovered.
Automatic validator discovery
When the --disable-auto-discover flag is not provided, the validator client will search the
validator-dir for validators and add any new validators to the
validator_definitions.yml with enabled: true.
The routine for this search begins in the validator-dir, where it obtains a
list of all files in that directory and all sub-directories (i.e., recursive
directory-tree search). For each file named voting-keystore.json it creates a
new validator definition by the following process:
- Set
enabledtotrue. - Set
voting_public_keyto thepubkeyvalue from thevoting-keystore.json. - Set
typetolocal_keystore. - Set
voting_keystore_pathto the full path of the discovered keystore. - Set
voting_keystore_password_pathto be a file in thesecrets-dirwith a name identical to thevoting_public_keyvalue.
Discovery Example
Let’s assume the following directory structure:
~/.lighthouse/{network}/validators
├── john
│   └── voting-keystore.json
├── sally
│   ├── one
│   │   └── voting-keystore.json
│   ├── three
│   │   └── my-voting-keystore.json
│   └── two
│       └── voting-keystore.json
└── slashing_protection.sqlite
There is no validator_definitions.yml file present, so we can run lighthouse vc (without --disable-auto-discover) and it will create the following validator_definitions.yml:
---
- enabled: true
  voting_public_key: "0xa5566f9ec3c6e1fdf362634ebec9ef7aceb0e460e5079714808388e5d48f4ae1e12897fed1bea951c17fa389d511e477"
  type: local_keystore
  voting_keystore_path: /home/paul/.lighthouse/validators/sally/one/voting-keystore.json
  voting_keystore_password_path: /home/paul/.lighthouse/secrets/0xa5566f9ec3c6e1fdf362634ebec9ef7aceb0e460e5079714808388e5d48f4ae1e12897fed1bea951c17fa389d511e477
- enabled: true
  voting_public_key: "0xaa440c566fcf34dedf233baf56cf5fb05bb420d9663b4208272545608c27c13d5b08174518c758ecd814f158f2b4a337"
  type: local_keystore
  voting_keystore_path: /home/paul/.lighthouse/validators/sally/two/voting-keystore.json
  voting_keystore_password_path: /home/paul/.lighthouse/secrets/0xaa440c566fcf34dedf233baf56cf5fb05bb420d9663b4208272545608c27c13d5b08174518c758ecd814f158f2b4a337
- enabled: true
  voting_public_key: "0x87a580d31d7bc69069b55f5a01995a610dd391a26dc9e36e81057a17211983a79266800ab8531f21f1083d7d84085007"
  type: local_keystore
  voting_keystore_path: /home/paul/.lighthouse/validators/john/voting-keystore.json
  voting_keystore_password_path: /home/paul/.lighthouse/secrets/0x87a580d31d7bc69069b55f5a01995a610dd391a26dc9e36e81057a17211983a79266800ab8531f21f1083d7d84085007
All voting-keystore.json files have been detected and added to the file.
Notably, the sally/three/my-voting-keystore.json file was not added to the
file, since the file name is not exactly voting-keystore.json.
In order for the validator client to decrypt the validators, they will need to
ensure their secrets-dir is organised as below:
~/.lighthouse/{network}/secrets
├── 0xa5566f9ec3c6e1fdf362634ebec9ef7aceb0e460e5079714808388e5d48f4ae1e12897fed1bea951c17fa389d511e477
├── 0xaa440c566fcf34dedf233baf56cf5fb05bb420d9663b4208272545608c27c13d5b08174518c758ecd814f158f2b4a337
└── 0x87a580d31d7bc69069b55f5a01995a610dd391a26dc9e36e81057a17211983a79266800ab8531f21f1083d7d84085007
Manual configuration
The automatic validator discovery process works out-of-the-box with validators
that are created using the lighthouse account validator create command. The
details of this process are only interesting to those who are using keystores
generated with another tool or have a non-standard requirements.
If you are one of these users, manually edit the validator_definitions.yml
file to suit your requirements. If the file is poorly formatted or any one of
the validators is unable to be initialized, the validator client will refuse to
start.
How the validator_definitions.yml file is processed
If a validator client were to start using the first example
validator_definitions.yml file it would print the following log,
acknowledging there are two validators and one is disabled:
INFO Initialized validators enabled: 1, disabled: 1
The validator client will simply ignore the disabled validator. However, for the active validator, the validator client will:
- Load an EIP-2335 keystore from the
voting_keystore_path. - If the
voting_keystore_passwordfield is present, use it as the keystore password. Otherwise, attempt to read the file atvoting_keystore_password_pathand use the contents as the keystore password. - Use the keystore password to decrypt the keystore and obtain a BLS keypair.
- Verify that the decrypted BLS keypair matches the
voting_public_key. - Create a
voting-keystore.json.lockfile adjacent to thevoting_keystore_path, indicating that the voting keystore is in-use and should not be opened by another process. - Proceed to act for that validator, creating blocks and attestations if/when required.
If there is an error during any of these steps (e.g., a file is missing or corrupt), the validator client will log an error and continue to attempt to process other validators.
When the validator client exits (or the validator is deactivated), it will
remove the voting-keystore.json.lock to indicate that the keystore is free for use again.
Validator Manager
Introduction
The lighthouse validator-manager tool provides utilities for managing validators on a running
Lighthouse Validator Client. The validator manager performs operations via the HTTP API of the
validator client (VC). Due to limitations of the
keymanager-APIs, only Lighthouse VCs are fully
supported by this command.
The validator manager tool is similar to the lighthouse account-manager tool,
except the latter creates files that will be read by the VC next time it starts
whilst the former makes instant changes to a live VC.
The account-manager is ideal for importing keys created with the
ethstaker-deposit-cli. On the
other hand, the validator-manager is ideal for moving existing validators
between two VCs or for advanced users to create validators at scale with less
downtime.
The validator-manager boasts the following features:
- One-line command to arbitrarily move validators between two VCs, maintaining the slashing protection database.
- Generates deposit files compatible with the Ethereum Staking Launchpad.
- Generally involves zero or very little downtime.
- The “key cache” is preserved whenever a validator is added with the validator manager, preventing long waits at start up when a new validator is added.
Guides
- Creating and importing validators using the
createandimportcommands. - Moving validators between two VCs using the
movecommand. - Managing validators such as exit, delete, import and list validators.
Creating and Importing Validators
The lighthouse validator-manager create command derives validators from a
mnemonic and produces two files:
validators.json: the keystores and passwords for the newly generated validators, in JSON format.deposits.json: a JSON file of the same format as ethstaker-deposit-cli which can be used for deposit submission via the Ethereum Staking Launchpad.
The lighthouse validator-manager import command accepts a validators.json
file (from the create command) and submits those validators to a running
Lighthouse Validator Client via the HTTP API.
These two commands enable a workflow of:
- Creating the validators via the
createcommand. - Importing the validators via the
importcommand. - Depositing validators via the Ethereum Staking Launchpad.
The separation of the create and import commands allows for running the
create command on an air-gapped host whilst performing the import command on
an internet-connected host.
The create and import commands are recommended for advanced users who are
familiar with command line tools and the practicalities of managing sensitive
cryptographic material. We recommend that novice users follow the workflow on
Ethereum Staking Launchpad rather than using the create and import
commands.
Simple Example
Create validators from a mnemonic with:
lighthouse \
    validator-manager \
    create \
    --network mainnet \
    --first-index 0 \
    --count 2 \
    --eth1-withdrawal-address <ADDRESS> \
    --suggested-fee-recipient <ADDRESS> \
    --output-path ./
If the flag
--first-indexis not provided, it will default to using index 0. The--suggested-fee-recipientflag may be omitted to use whatever default value the VC uses. It does not necessarily need to be identical to--eth1-withdrawal-address. The command will create thedeposits.jsonandvalidators.jsonin the present working directory. If you would like these files to be created in a different directory, change the value ofoutput-path, for example--output-path /desired/directory. The directory will be created if the path does not exist.
Then, import the validators to a running VC with:
lighthouse \
    validator-manager \
    import \
    --validators-file validators.json \
    --vc-token <API-TOKEN-PATH>
This is assuming that
validators.jsonis in the present working directory. If it is not, insert the directory of the file. Be sure to remove./validators.jsonafter the import is successful since it contains unencrypted validator keystores.
Note: To import validators with validator-manager using keystore files created using the
ethstaker-deposit-cli, refer to Managing Validators.
Detailed Guide
This guide will create two validators and import them to a VC. For simplicity,
the same host will be used to generate the keys and run the VC. In reality,
users may want to perform the create command on an air-gapped machine and then
move the validators.json and deposits.json files to an Internet-connected
host. This would help protect the mnemonic from being exposed to the Internet.
1. Create the Validators
Run the create command, substituting <ADDRESS> for an execution address that
you control. This is where all the staked ETH and rewards will ultimately
reside, so it’s very important that this address is secure, accessible and
backed-up. The create command:
lighthouse \
    validator-manager \
    create \
    --first-index 0 \
    --count 2 \
    --eth1-withdrawal-address <ADDRESS> \
    --output-path ./
If successful, the command output will appear like below:
Running validator manager for mainnet network

Enter the mnemonic phrase:
<REDACTED>
Valid mnemonic provided.

Starting derivation of 2 keystores. Each keystore may take several seconds.
Completed 1/2: 0x8885c29b8f88ee9b9a37b480fd4384fed74bda33d85bc8171a904847e65688b6c9bb4362d6597fd30109fb2def6c3ae4
Completed 2/2: 0xa262dae3dcd2b2e280af534effa16bedb27c06f2959e114d53bd2a248ca324a018dc73179899a066149471a94a1bc92f
Keystore generation complete
Writing "./validators.json"
Writing "./deposits.json"
This command will create validators at indices 0, 1. The exact indices created
can be influenced with the --first-index and --count flags. Use these flags
with caution to prevent creating the same validator twice, this may result in a
slashing!
The command will create two files:
./deposits.json: this file does not contain sensitive information and may be uploaded to the Ethereum Staking Launchpad../validators.json: this file contains sensitive unencrypted validator keys, do not share it with anyone or upload it to any website.
2. Import the validators
The VC which will receive the validators needs to have the following flags at a minimum:
--http--enable-doppelganger-protection
Therefore, the VC command might look like:
lighthouse \
    vc \
    --http \
    --enable-doppelganger-protection
In order to import the validators, the location of the VC api-token.txt file
must be known. The location of the file varies, but it is located in the
“validator directory” of your data directory. For example:
~/.lighthouse/mainnet/validators/api-token.txt. We will use <API-TOKEN-PATH>
to substitute this value. If you are unsure of the api-token.txt path, you can run curl http://localhost:5062/lighthouse/auth which will show the path.
Once the VC is running, use the import command to import the validators to the VC:
lighthouse \
    validator-manager \
    import \
    --validators-file validators.json \
    --vc-token <API-TOKEN-PATH>
If successful, the command output will appear like below:
Running validator manager for mainnet network
Validator client is reachable at http://localhost:5062/ and reports 0 validators
Starting to submit 2 validators to VC, each validator may take several seconds
Uploaded keystore 1 of 2 to the VC
Uploaded keystore 2 of 2 to the VC
The user should now securely delete the validators.json file (e.g., shred -u validators.json).
The validators.json contains the unencrypted validator keys and must not be
shared with anyone.
At the same time, lighthouse vc will log:
INFO Importing keystores via standard HTTP API, count: 1
WARN No slashing protection data provided with keystores
INFO Enabled validator                       voting_pubkey: 0xab6e29f1b98fedfca878edce2b471f1b5ee58ee4c3bd216201f98254ef6f6eac40a53d74c8b7da54f51d3e85cacae92f, signing_method: local_keystore
INFO Modified key_cache saved successfully
The WARN message means that the validators.json file does not contain the slashing protection data. This is normal if you are starting a new validator. The flag --enable-doppelganger-protection will also protect users from potential slashing risk.
The validators will now go through 2-3 epochs of doppelganger
protection and will automatically start performing
their duties when they are deposited and activated.
If the host VC contains the same public key as the validators.json file, an error will be shown and the import process will stop:
Duplicate validator   0xab6e29f1b98fedfca878edce2b471f1b5ee58ee4c3bd216201f98254ef6f6eac40a53d74c8b7da54f51d3e85cacae92f already exists on the destination validator client. This may indicate that some validators are running in two places at once, which can lead to slashing. If you are certain that there is no risk, add the --ignore-duplicates flag.
Err(DuplicateValidator(0xab6e29f1b98fedfca878edce2b471f1b5ee58ee4c3bd216201f98254ef6f6eac40a53d74c8b7da54f51d3e85cacae92f))
If you are certain that it is safe, you can add the flag --ignore-duplicates in the import command. The command becomes:
lighthouse \
    validator-manager \
    import \
    --validators-file validators.json \
    --vc-token <API-TOKEN-PATH> \
    --ignore-duplicates
and the output will be as follows:
Duplicate validators are ignored, ignoring 0xab6e29f1b98fedfca878edce2b471f1b5ee58ee4c3bd216201f98254ef6f6eac40a53d74c8b7da54f51d3e85cacae92f which exists on the destination validator client
Re-uploaded keystore 1 of 6 to the VC
The guide is complete.
Moving Validators
The lighthouse validator-manager move command uses the VC HTTP API to move
validators from one VC (the “src” VC) to another VC (the “dest” VC). The move
operation is comprehensive; it will:
- Disable the validators on the src VC.
- Remove the validator keystores from the src VC file system.
- Export the slashing database records for the appropriate validators from the src VC to the dest VC.
- Enable the validators on the dest VC.
- Generally result in very little or no validator downtime.
It is capable of moving all validators on the src VC, a count of validators or a list of pubkeys.
The move command is only guaranteed to work between two Lighthouse VCs (i.e.,
there is no guarantee that the commands will work between Lighthouse and Teku, for instance).
The move command only supports moving validators using a keystore on the local
file system, it does not support Web3Signer validators.
Although all efforts are taken to avoid it, it’s possible for the move command
to fail in a way that removes the validator from the src VC without adding it to the
dest VC. Therefore, it is recommended to never use the move command without
having a backup of all validator keystores (e.g. the mnemonic).
Simple Example
The following command will move all validators from the VC running at
http://localhost:6062 to the VC running at http://localhost:5062.
lighthouse \
	validator-manager \
	move \
	--src-vc-url http://localhost:6062 \
	--src-vc-token ~/src-token.txt \
	--dest-vc-url http://localhost:5062 \
	--dest-vc-token ~/.lighthouse/mainnet/validators/api-token.txt \
	--validators all
Detailed Guide
This guide describes the steps to move validators between two validator clients (VCs) which are able to SSH between each other. This guide assumes experience with the Linux command line and SSH connections.
There will be two VCs in this example:
- The source VC which contains the validators/keystores to be moved.
- The destination VC which is to take the validators/keystores from the source.
There will be two hosts in this example:
- Host 1 (“source host”): Is running the
src-vc. - Host 2 (“destination host”): Is running the
dest-vc.
The example assumes that Host 1 is able to SSH to Host 2.
In reality, many host configurations are possible. For example:
- Both VCs on the same host.
- Both VCs on different hosts and the
validator-managerbeing used on a third host.
1. Configure the Source VC
The source VC needs to have the following flags at a minimum:
--http--http-allow-keystore-export
Therefore, the source VC command might look like:
lighthouse \
    vc \
    --http \
    --http-allow-keystore-export
2. Configure the Destination VC
The destination VC needs to have the following flags at a minimum:
--http--enable-doppelganger-protection
Therefore, the destination VC command might look like:
lighthouse \
    vc \
    --http \
    --enable-doppelganger-protection
The
--enable-doppelganger-protectionflag is not strictly required, however it is recommended for an additional layer of safety. It will result in 2-3 epochs of downtime for the validator after it is moved, which is generally an inconsequential cost in lost rewards or penalties.Optionally, users can add the
--http-store-passwords-in-secrets-dirflag if they’d like to have the import validator keystore passwords stored in separate files rather than in thevalidator-definitions.ymlfile. If you don’t know what this means, you can safely omit the flag.
3. Obtain the Source API Token
The VC API is protected by an API token. This is stored in a file on each of the hosts. Since we’ll be running our command on the destination host, it will need to have the API token for the source host on its file-system.
On the source host, find the location of the api-token.txt file and copy the contents. The
location of the file varies, but it is located in the “validator directory” of your data directory,
alongside validator keystores. For example: ~/.lighthouse/mainnet/validators/api-token.txt. If you are unsure of the api-token.txt path, you can run curl http://localhost:5062/lighthouse/auth which will show the path.
Copy the contents of that file into a new file on the destination host at ~/src-token.txt. The
API token is a random string, e.g., hGut6B8uEujufDXSmZsT0thnxvdvKFBvh.
4. Create an SSH Tunnel
In the source host, open a terminal window, SSH to the destination host and establish a reverse-SSH connection between the destination host and the source host.
ssh dest-host
ssh -L 6062:localhost:5062 src-host
It’s important that you leave this session open throughout the rest of this tutorial. If you close this terminal window then the connection between the destination and source host will be lost.
5. Move
With the SSH tunnel established between the dest-host and src-host, from the destination
host run the command to move the validators:
lighthouse \
	validator-manager \
	move \
	--src-vc-url http://localhost:6062 \
	--src-vc-token ~/src-token.txt \
	--dest-vc-url http://localhost:5062 \
	--dest-vc-token ~/.lighthouse/mainnet/validators/api-token.txt \
	--validators all
The command will provide information about the progress of the operation and
emit Done. when the operation has completed successfully. For example:
Running validator manager for mainnet network
Validator client is reachable at http://localhost:5062/ and reports 2 validators
Validator client is reachable at http://localhost:6062/ and reports 0 validators
Moved keystore 1 of 2
Moved keystore 2 of 2
Done.
At the same time, lighthouse vc will log:
INFO Importing keystores via standard HTTP API, count: 1
INFO Enabled validator                       voting_pubkey: 0xab6e29f1b98fedfca878edce2b471f1b5ee58ee4c3bd216201f98254ef6f6eac40a53d74c8b7da54f51d3e85cacae92f, signing_method: local_keystore
INFO Modified key_cache saved successfully
Once the operation completes successfully, there is nothing else to be done. The
validators have been removed from the src-host and enabled at the dest-host.
If the --enable-doppelganger-protection flag was used it may take 2-3 epochs
for the validators to start attesting and producing blocks on the dest-host.
If you would only like to move some validators, you can replace the flag --validators all with one or more validator public keys. For example:
lighthouse \
	validator-manager \
	move \
	--src-vc-url http://localhost:6062 \
	--src-vc-token ~/src-token.txt \
	--dest-vc-url http://localhost:5062 \
	--dest-vc-token ~/.lighthouse/mainnet/validators/api-token.txt \
	--validators 0x9096aab771e44da149bd7c9926d6f7bb96ef465c0eeb4918be5178cd23a1deb4aec232c61d85ff329b54ed4a3bdfff3a,0x90fc4f72d898a8f01ab71242e36f4545aaf87e3887be81632bb8ba4b2ae8fb70753a62f866344d7905e9a07f5a9cdda1
Note: If you have the
validator-monitor-autoturned on, the source beacon node may still be reporting the attestation status of the validators that have been moved:
INFO Previous epoch attestation(s) success validators: ["validator_index"], epoch: 100000, service: val_mon, service: beacon
This is fine as the validator monitor does not know that the validators have been moved (it does not mean that the validators have attested twice for the same slot). A restart of the beacon node will resolve this.
Any errors encountered during the operation should include information on how to proceed. Assistance is also available on our Discord.
Managing Validators
The lighthouse validator-manager uses the Keymanager API to list, import and delete keystores via the HTTP API. This requires the validator client running with the flag --http. By default, the validator client HTTP address is http://localhost:5062. If a different IP address or port is used, add the flag --vc-url http://IP:port_number to the command below.
Exit
The exit command exits one or more validators from the validator client. To exit:
Important note: Once the –beacon-node flag is used, it will publish the voluntary exit to the network. This action is irreversible.
lighthouse vm exit --vc-token <API-TOKEN-PATH> --validators pubkey1,pubkey2 --beacon-node http://beacon-node-url:5052
Example:
lighthouse vm exit --vc-token ~/.lighthouse/mainnet/validators/api-token.txt --validators 0x8885c29b8f88ee9b9a37b480fd4384fed74bda33d85bc8171a904847e65688b6c9bb4362d6597fd30109fb2def6c3ae4,0xa262dae3dcd2b2e280af534effa16bedb27c06f2959e114d53bd2a248ca324a018dc73179899a066149471a94a1bc92f --beacon-node http://localhost:5052
If successful, the following log will be returned:
Successfully validated and published voluntary exit for validator 0x8885c29b8f88ee9b9a37b480fd4384fed74bda33d85bc8171a904847e65688b6c9bb4362d6597fd30109fb2def6c3ae4
Successfully validated and published voluntary exit for validator
0xa262dae3dcd2b2e280af534effa16bedb27c06f2959e114d53bd2a248ca324a018dc73179899a066149471a94a1bc92f
To exit all validators on the validator client, use the keyword all:
lighthouse vm exit --vc-token ~/.lighthouse/mainnet/validators/api-token.txt --validators all --beacon-node http://localhost:5052
To check the voluntary exit status, refer to the list command.
The following command will only generate a presigned voluntary exit message and save it to a file named {validator_pubkey}.json. It will not publish the voluntary exit to the network.
To generate a presigned exit message and save it to a file, use the flag --presign:
lighthouse vm exit --vc-token ~/.lighthouse/mainnet/validators/api-token.txt --validators all --presign
To generate a presigned exit message for a particular (future) epoch, use the flag --exit-epoch:
lighthouse vm exit --vc-token ~/.lighthouse/mainnet/validators/api-token.txt --validators all --presign --exit-epoch 1234567
The generated presigned exit message will only be valid at or after the specified exit-epoch, in this case, epoch 1234567.
Delete
The delete command deletes one or more validators from the validator client. It will also modify the validator_definitions.yml file automatically so there is no manual action required from the user after the delete. To delete:
lighthouse vm delete --vc-token <API-TOKEN-PATH> --validators pubkey1,pubkey2
Example:
lighthouse vm delete --vc-token ~/.lighthouse/mainnet/validators/api-token.txt --validators 0x8885c29b8f88ee9b9a37b480fd4384fed74bda33d85bc8171a904847e65688b6c9bb4362d6597fd30109fb2def6c3ae4,0xa262dae3dcd2b2e280af534effa16bedb27c06f2959e114d53bd2a248ca324a018dc73179899a066149471a94a1bc92f
To delete all validators on the validator client, use the keyword all:
lighthouse vm delete --vc-token ~/.lighthouse/mainnet/validators/api-token.txt --validators all
Import
The import command imports validator keystores generated by the ethstaker-deposit-cli. To import a validator keystore:
lighthouse vm import --vc-token <API-TOKEN-PATH> --keystore-file /path/to/json --password keystore_password
Example:
lighthouse vm import --vc-token ~/.lighthouse/mainnet/validators/api-token.txt --keystore-file keystore.json --password keystore_password
List
To list the validators running on the validator client:
lighthouse vm list --vc-token ~/.lighthouse/mainnet/validators/api-token.txt
The list command can also be used to check the voluntary exit status of validators. To do so, use both --beacon-node and --validators flags. The --validators flag accepts a comma-separated list of validator public keys, or the keyword all to check the voluntary exit status of all validators attached to the validator client.
lighthouse vm list --vc-token ~/.lighthouse/mainnet/validators/api-token.txt --validators 0x8de7ec501d574152f52a962bf588573df2fc3563fd0c6077651208ed20f24f3d8572425706b343117b48bdca56808416 --beacon-node http://localhost:5052
If the validator voluntary exit has been accepted by the chain, the following log will be returned:
Voluntary exit for validator 0x8de7ec501d574152f52a962bf588573df2fc3563fd0c6077651208ed20f24f3d8572425706b343117b48bdca56808416 has been accepted into the beacon chain, but not yet finalized. Finalization may take several minutes or longer. Before finalization there is a low probability that the exit may be reverted.
Current epoch: 2, Exit epoch: 7, Withdrawable epoch: 263
Please keep your validator running till exit epoch
Exit epoch in approximately 480 secs
When the exit epoch is reached, querying the status will return:
Validator 0x8de7ec501d574152f52a962bf588573df2fc3563fd0c6077651208ed20f24f3d8572425706b343117b48bdca56808416 has exited at epoch: 7
You can safely shut down the validator client at this point.
Slashing Protection
The security of the Ethereum proof-of-stake protocol depends on penalties for misbehaviour, known
as slashings. Validators that sign conflicting messages (blocks or attestations), can be slashed
by other validators through the inclusion of a ProposerSlashing or AttesterSlashing on chain.
The Lighthouse validator client includes a mechanism to protect its validators against accidental slashing, known as the slashing protection database. This database records every block and attestation signed by validators, and the validator client uses this information to avoid signing any slashable messages.
Lighthouse’s slashing protection database is an SQLite database located at
$datadir/validators/slashing_protection.sqlite which is locked exclusively when the validator
client is running. In normal operation, this database will be automatically created and utilized,
meaning that your validators are kept safe by default.
If you are seeing errors related to slashing protection, it’s important that you act slowly and carefully to keep your validators safe. See the Troubleshooting section.
Initialization
The database will be automatically created, and your validators registered with it when:
- Importing keys from another source (e.g. ethstaker-deposit-cli, Lodestar, Nimbus, Prysm, Teku, ethdo). See import validator keys.
- Creating keys using Lighthouse itself (
lighthouse account validator create) - Creating keys via the validator client API.
Avoiding Slashing
The slashing protection database is designed to protect against many common causes of slashing, but is unable to prevent against some others.
Examples of circumstances where the slashing protection database is effective are:
- Accidentally running two validator clients on the same machine with the same datadir. The exclusive and transactional access to the database prevents the 2nd validator client from signing anything slashable (it won’t even start).
- Deep re-orgs that cause the shuffling to change, prompting validators to re-attest in an epoch where they have already attested. The slashing protection checks all messages against the slashing conditions and will refuse to attest on the new chain until it is safe to do so (usually after one epoch).
- Importing keys and signing history from another client, where that history is complete. If you run another client and decide to switch to Lighthouse, you can export data from your client to be imported into Lighthouse’s slashing protection database. See Import and Export.
- Misplacing
slashing_protection.sqliteduring a datadir change or migration between machines. By default, Lighthouse will refuse to start if it finds validator keys that are not registered in the slashing protection database.
Examples where it is ineffective are:
- Running two validator client instances simultaneously. This could be two different clients (e.g. Lighthouse and Prysm) running on the same machine, two Lighthouse instances using different datadirs, or two clients on completely different machines (e.g. one on a cloud server and one running locally). You are responsible for ensuring that your validator keys are never running simultaneously – the slashing protection database cannot protect you in this case.
- Importing keys from another client without also importing voting history.
- If you use
--init-slashing-protectionto recreate a missing slashing protection database.
Import and Export
Lighthouse supports the slashing protection interchange format described in EIP-3076. An interchange file is a record of blocks and attestations signed by a set of validator keys – basically a portable slashing protection database!
To import a slashing protection database to Lighthouse, you first need to export your existing client’s database. Instructions to export the slashing protection database for other clients are listed below:
Once you have the slashing protection database from your existing client, you can now import the database to Lighthouse. With your validator client stopped, you can import a .json interchange file from another client
using this command:
lighthouse account validator slashing-protection import filename.json
When importing an interchange file, you still need to import the validator keystores themselves separately, using the instructions for import validator keys.
You can export Lighthouse’s database for use with another client with this command:
lighthouse account validator slashing-protection export filename.json
The validator client needs to be stopped in order to export, to guarantee that the data exported is up to date.
How Import Works
Since version 1.6.0, Lighthouse will ignore any slashable data in the import data and will safely update the low watermarks for blocks and attestations. It will store only the maximum-slot block for each validator, and the maximum source/target attestation. This is faster than importing all data while also being more resilient to repeated imports & stale data.
Troubleshooting
Misplaced Slashing Database
If the slashing protection database cannot be found, it will manifest in an error like this:
Oct 12 14:41:26.415 CRIT Failed to start validator client        reason: Failed to open slashing protection database: SQLError("Unable to open database: Error(Some(\"unable to open database file: /home/karlm/.lighthouse/mainnet/validators/slashing_protection.sqlite\"))").
Ensure that `slashing_protection.sqlite` is in "/home/karlm/.lighthouse/mainnet/validators" folder
Usually this indicates that during some manual intervention, the slashing database has been misplaced. This error can also occur if you have upgraded from Lighthouse v0.2.x to v0.3.x without moving the slashing protection database. If you have imported your keys into a new node, you should never see this error (see Initialization).
The safest way to remedy this error is to find your old slashing protection database and move
it to the correct location. In our example that would be
~/.lighthouse/mainnet/validators/slashing_protection.sqlite. You can search for your old database
using a tool like find, fd, or your file manager’s GUI. Ask on the Lighthouse Discord if you’re
not sure.
If you are absolutely 100% sure that you need to recreate the missing database, you can start
the Lighthouse validator client with the --init-slashing-protection flag. This flag is incredibly
dangerous and should not be used lightly, and we strongly recommend you try finding
your old slashing protection database before using it. If you do decide to use it, you should
wait at least 1 epoch (~7 minutes) from when your validator client was last actively signing
messages. If you suspect your node experienced a clock drift issue, you should wait
longer. Remember that the inactivity penalty for being offline for even a day or so
is approximately equal to the rewards earned in a day. You will get slashed if you use
--init-slashing-protection incorrectly.
Slashable Attestations and Re-orgs
Sometimes a re-org can cause the validator client to attempt to sign something slashable, in which case it will be blocked by slashing protection, resulting in a log like this:
Sep 29 15:15:05.303 CRIT Not signing slashable attestation error: InvalidAttestation(DoubleVote(SignedAttestation { source_epoch: Epoch(0), target_epoch: Epoch(30), signing_root: 0x0c17be1f233b20341837ff183d21908cce73f22f86d5298c09401c6f37225f8a })), attestation: AttestationData { slot: Slot(974), index: 0, beacon_block_root: 0xa86a93ed808f96eb81a0cd7f46e3b3612cafe4bd0367aaf74e0563d82729e2dc, source: Checkpoint { epoch: Epoch(0), root: 0x0000000000000000000000000000000000000000000000000000000000000000 }, target: Checkpoint { epoch: Epoch(30), root: 0xcbe6901c0701a89e4cf508cfe1da2bb02805acfdfe4c39047a66052e2f1bb614 } }
This log is still marked as CRIT because in general it should occur only very rarely,
and could indicate a serious error or misconfiguration (see Avoiding Slashing).
Limitation of Liability
The Lighthouse developers do not guarantee the perfect functioning of this software, or accept liability for any losses suffered. For more information see the Lighthouse license.
Voluntary Exits (Full Withdrawals)
A validator may chose to voluntarily stop performing duties (proposing blocks and attesting to blocks) by submitting a voluntary exit message to the beacon chain.
A validator can initiate a voluntary exit provided that the validator is currently active, has not been slashed and has been active for at least 256 epochs (~27 hours) since it has been activated.
Note: After initiating a voluntary exit, the validator will have to keep performing duties until it has successfully exited to avoid penalties.
It takes at a minimum 5 epochs (32 minutes) for a validator to exit after initiating a voluntary exit. This number can be much higher depending on how many other validators are queued to exit.
You can also perform voluntary exit for one or more validators using the validator manager, see Managing Validators for more details.
Initiating a voluntary exit
In order to initiate an exit, users can use the lighthouse account validator exit command.
-
The
--keystoreflag is used to specify the path to the EIP-2335 voting keystore for the validator. The path should point directly to the validator key.jsonfile, not the folder containing the.jsonfile. -
The
--beacon-nodeflag is used to specify a beacon chain HTTP endpoint that conforms to the Beacon Node API specifications. That beacon node will be used to validate and propagate the voluntary exit. The default value for this flag ishttp://localhost:5052. -
The
--networkflag is used to specify the network (default ismainnet). -
The
--password-fileflag is used to specify the path to the file containing the password for the voting keystore. If this flag is not provided, the user will be prompted to enter the password.
After validating the password, the user will be prompted to enter a special exit phrase as a final confirmation after which the voluntary exit will be published to the beacon chain.
The exit phrase is the following:
Exit my validator
Below is an example for initiating a voluntary exit on the Hoodi testnet.
$ lighthouse --network hoodi account validator exit --keystore /path/to/keystore --beacon-node http://localhost:5052

Running account manager for Hoodi network
validator-dir path: ~/.lighthouse/hoodi/validators

Enter the keystore password for validator in 0xabcd

Password is correct

Publishing a voluntary exit for validator 0xabcd

WARNING: WARNING: THIS IS AN IRREVERSIBLE OPERATION


PLEASE VISIT https://lighthouse-book.sigmaprime.io/validator_voluntary_exit.html
TO MAKE SURE YOU UNDERSTAND THE IMPLICATIONS OF A VOLUNTARY EXIT.

Enter the exit phrase from the above URL to confirm the voluntary exit:
Exit my validator

Successfully published voluntary exit for validator 0xabcd
Voluntary exit has been accepted into the beacon chain, but not yet finalized. Finalization may take several minutes or longer. Before finalization there is a low probability that the exit may be reverted.
Current epoch: 29946, Exit epoch: 29951, Withdrawable epoch: 30207
Please keep your validator running till exit epoch
Exit epoch in approximately 1920 secs
Generate pre-signed exit message without broadcasting
You can also generate a pre-signed exit message without broadcasting it to the network. To do so, use the --presign flag:
lighthouse account validator exit --network hoodi --keystore /path/to/keystore --presign
It will prompt for the keystore password, which, upon entering the correct password, will generate a pre-signed exit message:
Successfully pre-signed voluntary exit for validator 0x[redacted]. Not publishing.
{
  "message": {
    "epoch": "12959",
    "validator_index": "123456"
  },
  "signature": "0x97deafb740cd56eaf55b671efb35d0ce15cd1835cbcc52e20ee9cdc11e1f4ab8a5f228c378730437eb544ae70e1987cd0d2f925aa3babe686b66df823c90ac4027ef7a06d12c56d536d9bcd3a1d15f02917b170c0aa97ab102d67602a586333f"
}
Exit via the execution layer
The voluntary exit above is via the consensus layer. With the Pectra upgrade, validators with 0x01 and 0x02 withdrawal credentials can also exit their validators via the execution layer by sending a transaction using the withdrawal address. You can use Siren or the staking launchpad to send an exit transaction.
Full withdrawal of staked fund
After the Capella upgrade on 12th April 2023, if a user initiates a voluntary exit, they will receive the full staked funds to the withdrawal address, provided that the validator has withdrawal credentials of type 0x01. For more information on how fund withdrawal works, please visit Ethereum.org website.
FAQ
1. How to know if I have the withdrawal credentials type 0x01?
There are two types of withdrawal credentials, 0x00 and 0x01. To check which type your validator has, go to Staking launchpad, enter your validator index and click verify on mainnet:
withdrawals enabledmeans your validator is of type0x01, and you will automatically receive the full withdrawal to the withdrawal address that you set.withdrawals not enabledmeans your validator is of type0x00, and will need to update your withdrawal credentials from0x00type to0x01type (also known as BLS-to-execution-change, or BTEC) to receive the staked funds. The common way to do this is usingethstaker-deposit-cliorethdo, with the instructions available here.
2. What if my validator is of type 0x00 and I do not update my withdrawal credentials after I initiated a voluntary exit?
Your staked fund will continue to be locked on the beacon chain. You can update your withdrawal credentials anytime, and there is no deadline for that. The catch is that as long as you do not update your withdrawal credentials, your staked funds in the beacon chain will continue to be locked in the beacon chain. Only after you update the withdrawal credentials, will the staked funds be withdrawn to the withdrawal address.
3. How many times can I update my withdrawal credentials?
If your withdrawal credentials is of type 0x00, you can only update it once to type 0x01. It is therefore very important to ensure that the withdrawal address you set is an address under your control, preferably an address controlled by a hardware wallet.
If your withdrawal credentials is of type 0x01, it means you have set your withdrawal address previously, and you will not be able to change the withdrawal address.
3. When will my BTEC request (update withdrawal credentials to type 0x01) be processed ?
Your BTEC request will be included very quickly as soon as a new block is proposed. This should be the case most (if not all) of the time, given that the peak BTEC request time has now past (right after the Capella upgrade on 12th April 2023 and lasted for ~ 2 days) .
4. When will I get my staked fund after voluntary exit if my validator is of type 0x01?
There are 3 waiting periods until you get the staked funds in your withdrawal address:
-
An exit queue: a varying time that takes at a minimum 5 epochs (32 minutes) if there is no queue; or if there are many validators exiting at the same time, it has to go through the exit queue. The exit queue can be from hours to weeks, depending on the number of validators in the exit queue. During this time your validator has to stay online to perform its duties to avoid penalties.
-
A fixed waiting period of 256 epochs (27.3 hours) for the validator’s status to become withdrawable.
-
A varying time of “validator sweep” that take a few days. The “validator sweep” is the process of skimming through all eligible validators by index number for withdrawals (those with type
0x01and balance above 32ETH). Once the “validator sweep” reaches your validator’s index, your staked fund will be fully withdrawn to the withdrawal address set.
The total time taken is the summation of the above 3 waiting periods. After these waiting periods, you will receive the staked funds in your withdrawal address.
The voluntary exit and full withdrawal process is summarized in the Figure below.
Validator “Sweeping” (Automatic Partial Withdrawals)
After the Capella upgrade on 12th April 2023:
- if a validator has a withdrawal credential type
0x00, the rewards will continue to accumulate and will be locked in the beacon chain. - if a validator has a withdrawal credential type
0x01, any rewards above 32ETH will be periodically withdrawn to the withdrawal address. This is also known as the “validator sweep”, i.e., once the “validator sweep” reaches your validator’s index, your rewards will be withdrawn to the withdrawal address. The validator sweep is automatic and it does not incur any fees to withdraw.
Partial withdrawals via the execution layer
With the Pectra upgrade, validators with 0x02 withdrawal credentials can partially withdraw staked funds via the execution layer by sending a transaction using the withdrawal address. You can withdraw down to a validator balance of 32 ETH. For example, if the validator balance is 40 ETH, you can withdraw up to 8 ETH. You can use Siren or the staking launchpad to execute partial withdrawals.
FAQ
-
How to know if I have the withdrawal credentials type
0x00or0x01?Refer here.
-
My validator has withdrawal credentials type
0x00, is there a deadline to update my withdrawal credentials?No. You can update your withdrawal credentials anytime. The catch is that as long as you do not update your withdrawal credentials, your rewards in the beacon chain will continue to be locked in the beacon chain. Only after you update the withdrawal credentials, will the rewards be withdrawn to the withdrawal address.
-
Do I have to do anything to get my rewards after I update the withdrawal credentials to type
0x01?No. The “validator sweep” occurs automatically and you can expect to receive the rewards every n days, more information here.
Figure below summarizes partial withdrawals.
Validator Monitoring
Lighthouse allows for fine-grained monitoring of specific validators using the “validator monitor”. Generally users will want to use this function to track their own validators, however, it can be used for any validator, regardless of who controls it.
Note: If you are looking for remote metric monitoring, please see the docs on Prometheus Metrics.
Monitoring is in the Beacon Node
Lighthouse performs validator monitoring in the Beacon Node (BN) instead of the Validator Client (VC). This is contrary to what some users may expect, but it has several benefits:
- It keeps the VC simple. The VC handles cryptographic signing and the developers believe it should be doing as little additional work as possible.
- The BN has a better knowledge of the chain and network. Communicating all this information to the VC is impractical, we can provide more information when monitoring with the BN.
- It is more flexible:
- Users can use a local BN to observe some validators running in a remote location.
- Users can monitor validators that are not their own.
How to Enable Monitoring
The validator monitor is always enabled in Lighthouse, but it might not have any enrolled validators. There are two methods for a validator to be enrolled for additional monitoring; automatic and manual.
Automatic
When the --validator-monitor-auto flag is supplied, any validator which uses the
beacon_committee_subscriptions
API endpoint will be enrolled for additional monitoring. All active validators will use this
endpoint each epoch, so you can expect it to detect all local and active validators within several
minutes after start up.
Example
lighthouse bn --http --validator-monitor-auto
Manual
The --validator-monitor-pubkeys flag can be used to specify validator public keys for monitoring.
This is useful when monitoring validators that are not directly attached to this BN.
Note: when monitoring validators that aren’t connected to this BN, supply the
--subscribe-all-subnets --import-all-attestationsflags to ensure the BN has a full view of the network. This is not strictly necessary, though.
Example
Monitor the mainnet validators at indices 0 and 1:
lighthouse bn --validator-monitor-pubkeys 0x933ad9491b62059dd065b560d256d8957a8c402cc6e8d8ee7290ae11e8f7329267a8811c397529dac52ae1342ba58c95,0xa1d1ad0714035353258038e964ae9675dc0252ee22cea896825c01458e1807bfad2f9969338798548d9858a571f7425c
Note: The validator monitoring will stop collecting per-validator Prometheus metrics and issuing per-validator logs when the number of validators reaches 64. To continue collecting metrics and logging, use the flag
--validator-monitor-individual-tracking-threshold NwhereNis a number greater than the number of validators to monitor.
Observing Monitoring
Enrolling a validator for additional monitoring results in:
- Additional logs to be printed during BN operation.
- Additional Prometheus metrics from the BN.
Logging
Lighthouse will create logs for the following events for each monitored validator:
- A block from the validator is observed.
- An unaggregated attestation from the validator is observed.
- An unaggregated attestation from the validator is included in an aggregate.
- An unaggregated attestation from the validator is included in a block.
- An aggregated attestation from the validator is observed.
- An exit for the validator is observed.
- A slashing (proposer or attester) is observed which implicates that validator.
Example
Jan 18 11:50:03.896 INFO Unaggregated attestation validator: 0, src: gossip, slot: 342248, epoch: 10695, delay_ms: 891, index: 12, head: 0x5f9d603c04b5489bf2de3708569226fd9428eb40a89c75945e344d06c7f4f86a, service: beacon
Jan 18 11:32:55.196 INFO Attestation included in aggregate validator: 0, src: gossip, slot: 342162, epoch: 10692, delay_ms: 2193, index: 10, head: 0x9be04ecd04bf82952dad5d12c62e532fd13a8d42afb2e6ee98edaf05fc7f9f30, service: beacon
Jan 18 11:21:09.808 INFO Attestation included in block validator: 1, slot: 342102, epoch: 10690, inclusion_lag: 0 slot(s), index: 7, head: 0x422bcd14839e389f797fd38b01e31995f91bcaea3d5d56457fc6aac76909ebac, service: beacon
Metrics
The
ValidatorMonitor
dashboard contains most of the metrics exposed via the validator monitor.
Attestation Simulator Metrics
Lighthouse v4.6.0 introduces a new feature to track the performance of a beacon node. This feature internally simulates an attestation for each slot, and outputs a hit or miss for the head, target and source votes. The attestation simulator is turned on automatically (even when there are no validators) and prints logs in the debug level.
Note: The simulated attestations are never published to the network, so the simulator does not reflect the attestation performance of a validator.
The attestation simulation prints the following logs when simulating an attestation:
DEBG Simulating unagg. attestation production, service: beacon, module: beacon_chain::attestation_simulator:39
DEBG Produce unagg. attestation, attestation_target: 0x59fc…1a67, attestation_source: 0xc4c5…d414, service: beacon, module: beacon_chain::attestation_simulator:87
When the simulated attestation has completed, it prints a log that specifies if the head, target and source votes are hit. An example of a log when all head, target and source are hit:
DEBG Simulated attestation evaluated, head_hit: true, target_hit: true, source_hit: true, attestation_slot: Slot(1132616), attestation_head: 0x61367335c30b0f114582fe298724b75b56ae9372bdc6e7ce5d735db68efbdd5f, attestation_target: 0xaab25a6d01748cf4528e952666558317b35874074632550c37d935ca2ec63c23, attestation_source: 0x13ccbf8978896c43027013972427ee7ce02b2bb9b898dbb264b870df9288c1e7, service: val_mon, service: beacon, module: beacon_chain::validator_monitor:2051
An example of a log when the head is missed:
DEBG Simulated attestation evaluated, head_hit: false, target_hit: true, source_hit: true, attestation_slot: Slot(1132623), attestation_head: 0x1c0e53c6ace8d0ff57f4a963e4460fe1c030b37bf1c76f19e40928dc2e214c59, attestation_target: 0xaab25a6d01748cf4528e952666558317b35874074632550c37d935ca2ec63c23, attestation_source: 0x13ccbf8978896c43027013972427ee7ce02b2bb9b898dbb264b870df9288c1e7, service: val_mon, service: beacon, module: beacon_chain::validator_monitor:2051
With --metrics enabled on the beacon node, the following metrics will be recorded:
validator_monitor_attestation_simulator_head_attester_hit_total
validator_monitor_attestation_simulator_head_attester_miss_total
validator_monitor_attestation_simulator_target_attester_hit_total
validator_monitor_attestation_simulator_target_attester_miss_total
validator_monitor_attestation_simulator_source_attester_hit_total
validator_monitor_attestation_simulator_source_attester_miss_total
A Grafana dashboard to view the metrics for attestation simulator is available here.
The attestation simulator provides an insight into the attestation performance of a beacon node. It can be used as an indication of how expediently the beacon node has completed importing blocks within the 4s time frame for an attestation to be made.
The attestation simulator does not consider:
- the latency between the beacon node and the validator client
- the potential delays when publishing the attestation to the network
which are critical factors to consider when evaluating the attestation performance of a validator.
Assuming the above factors are ignored (no delays between beacon node and validator client, and in publishing the attestation to the network):
-
If the attestation simulator says that all votes are hit, it means that if the beacon node were to publish the attestation for this slot, the validator should receive the rewards for the head, target and source votes.
-
If the attestation simulator says that the one or more votes are missed, it means that there is a delay in importing the block. The delay could be due to slowness in processing the block (e.g., due to a slow CPU) or that the block is arriving late (e.g., the proposer publishes the block late). If the beacon node were to publish the attestation for this slot, the validator will miss one or more votes (e.g., the head vote).
Doppelganger Protection
From Lighthouse v1.5.0, the Doppelganger Protection feature is available for the Validator
Client. Taken from the German doppelgänger, which translates literally to “double-walker”, a
“doppelganger” in the context of Ethereum proof-of-stake refers to another instance of a validator running in a separate validator
process. As detailed in Slashing Protection, running the same validator twice will inevitably
result in slashing.
The Doppelganger Protection (DP) feature in Lighthouse imperfectly attempts to detect other instances of a validator operating on the network before any slashable offences can be committed. It achieves this by staying silent for 2-3 epochs after a validator is started so it can listen for other instances of that validator before starting to sign potentially slashable messages.
Note: Doppelganger Protection is not yet interoperable, so if it is configured on a Lighthouse validator client, the client must be connected to a Lighthouse beacon node.
Initial Considerations
There are two important initial considerations when using DP:
1. Doppelganger Protection is imperfect
The mechanism is best-effort and imperfect. Even if another validator exists on the network, there is no guarantee that your Beacon Node (BN) will see messages from it. It is feasible for doppelganger protection to fail to detect another validator due to network faults or other common circumstances.
DP should be considered as a last-line-of-defence that might save a validator from being slashed due to operator error (i.e. running two instances of the same validator). Users should never rely upon DP and should practice the same caution with regard to duplicating validators as if it did not exist.
Remember: even with doppelganger protection enabled, it is not safe to run two instances of the same validator.
2. Using Doppelganger Protection will always result in penalties
DP works by staying silent on the network for 2-3 epochs before starting to sign slashable messages. Staying silent and refusing to sign messages will cause the following:
- 2-3 missed attestations, incurring penalties and missed rewards.
- Potentially missed rewards by missing a block proposal (if the validator is an elected block proposer, which is unlikely).
Notably, sync committee contributions are not slashable and will continue to be produced even when DP is suppressing other messages.
The loss of rewards and penalties incurred due to the missed duties will be very small in dollar-values. Neglecting block proposals, generally they will equate to around 0.00002 ETH (equivalent to USD 0.04 assuming ETH is trading at USD 2000), or less than 1% of the reward for one validator for one day. Since DP costs so little but can protect a user from slashing, many users will consider this a worthwhile trade-off.
The 2-3 epochs of missed duties will be incurred whenever the VC is started (e.g., after an update or reboot) or whenever a new validator is added via the VC HTTP API.
Enabling Doppelganger Protection
If you understand that DP is imperfect and will cause some (generally, non-substantial) missed
duties, it can be enabled by providing the --enable-doppelganger-protection flag:
lighthouse vc --enable-doppelganger-protection
When enabled, the validator client will emit the following log on start up:
INFO Doppelganger detection service started service: doppelganger
Whilst DP is active, the following log will be emitted (this log indicates that one validator is staying silent and listening for validators):
INFO Listening for doppelgangers doppelganger_detecting_validators: 1, service: notifier
When a validator has completed DP without detecting a doppelganger, the following log will be emitted:
INFO Doppelganger protection complete validator_index: 42, msg: starting validator, service: notifier
What if a doppelganger is detected?
If a doppelganger is detected, logs similar to those below will be emitted (these logs indicate that
the validator with the index 42 was found to have a doppelganger):
CRIT Doppelganger(s) detected                doppelganger_indices: [42], msg: A doppelganger occurs when two different validator clients run the same public key. This validator client detected another instance of a local validator on the network and is shutting down to prevent potential slashable offences. Ensure that you are not running a duplicate or overlapping validator client, service: doppelganger
INFO Internal shutdown received              reason: Doppelganger detected.
INFO Shutting down..                         reason: Failure("Doppelganger detected.")
Observing a doppelganger is a serious problem and users should be very alarmed. The Lighthouse DP system tries very hard to avoid false-positives so it is likely that a slashing risk is present.
If a doppelganger is observed, the VC will shut down. Do not restart the VC until you are certain there is no other instance of that validator running elsewhere!
The steps to solving a doppelganger vary depending on the case, but some places to check are:
- Is there another validator process running on this host?
- Unix users can check by running the command
ps aux | grep lighthouse
- Unix users can check by running the command
- Has this validator recently been moved from another host? Check to ensure it’s not running.
- Has this validator been delegated to a staking service?
Doppelganger Protection FAQs
Should I use DP?
Yes, probably. If you don’t have a clear and well considered reason not to use DP, then it is a good idea to err on the safe side.
How long does it take for DP to complete?
DP takes 2-3 epochs, which is approximately 12-20 minutes.
How long does it take for DP to detect a doppelganger?
To avoid false positives from restarting the same VC, Lighthouse will wait until the next epoch before it starts detecting doppelgangers. Additionally, a validator might not attest till the end of the next epoch. This creates a 2 epoch delay, which is just over 12 minutes. Network delays or issues might lengthen this time more.
This means your validator client might take up to 20 minutes to detect a doppelganger and shut down.
Can I use DP to run redundant validator instances?
🙅 Absolutely not. 🙅 DP is imperfect and cannot be relied upon. The Internet is messy and lossy, there’s no guarantee that DP will detect a duplicate validator before slashing conditions arise.
Suggested Fee Recipient
The fee recipient is an Ethereum address nominated by a beacon chain validator to receive tips from user transactions. Given that all mainnet and testnets have gone through The Merge, if you run validators on a network, you are strongly recommended to nominate a fee recipient for your validators. Failing to nominate a fee recipient will result in losing the tips from transactions.
Background
During post-merge block production, the Beacon Node (BN) will provide a suggested_fee_recipient to
the execution node. This is a 20-byte Ethereum address which the execution node might choose to set as the recipient of other fees or rewards.
There is no guarantee that an execution node will use the suggested_fee_recipient to collect fees,
it may use any address it chooses. It is assumed that an honest execution node will use the
suggested_fee_recipient, but users should note this trust assumption.
The suggested_fee_recipient can be provided to the VC, which will transmit it to the BN. The BN also
has a choice regarding the fee recipient it passes to the execution node, creating another
noteworthy trust assumption.
To be sure you control your fee recipient value, run your own BN and execution node (don’t use third-party services).
How to configure a suggested fee recipient
The Lighthouse VC provides two methods for setting the suggested_fee_recipient (also known
simply as the “fee recipient”) to be passed to the execution layer during block production. The
Lighthouse BN also provides a method for defining this value, should the VC not transmit a value.
Assuming trustworthy nodes, the priority for the three methods is:
validator_definitions.yml--suggested-fee-recipientprovided to the VC.--suggested-fee-recipientprovided to the BN.
NOTE: It is not recommended to only set the fee recipient on the beacon node, as this results in sub-optimal block proposals. See this issue for details.
1. Setting the fee recipient in the validator_definitions.yml
Users can set the fee recipient in validator_definitions.yml with the suggested_fee_recipient
key. This option is recommended for most users, where each validator has a fixed fee recipient.
Below is an example of the validator_definitions.yml with suggested_fee_recipient values:
---
- enabled: true
  voting_public_key: "0x87a580d31d7bc69069b55f5a01995a610dd391a26dc9e36e81057a17211983a79266800ab8531f21f1083d7d84085007"
  type: local_keystore
  voting_keystore_path: /home/paul/.lighthouse/validators/0x87a580d31d7bc69069b55f5a01995a610dd391a26dc9e36e81057a17211983a79266800ab8531f21f1083d7d84085007/voting-keystore.json
  voting_keystore_password_path: /home/paul/.lighthouse/secrets/0x87a580d31d7bc69069b55f5a01995a610dd391a26dc9e36e81057a17211983a79266800ab8531f21f1083d7d84085007
  suggested_fee_recipient: "0x6cc8dcbca744a6e4ffedb98e1d0df903b10abd21"
- enabled: false
  voting_public_key: "0xa5566f9ec3c6e1fdf362634ebec9ef7aceb0e460e5079714808388e5d48f4ae1e12897fed1bea951c17fa389d511e477"
  type: local_keystore voting_keystore_path: /home/paul/.lighthouse/validators/0xa5566f9ec3c6e1fdf362634ebec9ef7aceb0e460e5079714808388e5d48f4ae1e12897fed1bea951c17fa389d511e477/voting-keystore.json
  voting_keystore_password: myStrongpa55word123&$
  suggested_fee_recipient: "0xa2e334e71511686bcfe38bb3ee1ad8f6babcc03d"
2. Using the “–suggested-fee-recipient” flag on the validator client
The --suggested-fee-recipient can be provided to the VC to act as a default value for all
validators where a suggested_fee_recipient is not loaded from another method.
Provide a 0x-prefixed address, e.g.
lighthouse vc --suggested-fee-recipient 0x25c4a76E7d118705e7Ea2e9b7d8C59930d8aCD3b ...
3. Using the “–suggested-fee-recipient” flag on the beacon node
The --suggested-fee-recipient can be provided to the BN to act as a default value when the
validator client does not transmit a suggested_fee_recipient to the BN.
lighthouse bn --suggested-fee-recipient 0x25c4a76E7d118705e7Ea2e9b7d8C59930d8aCD3b ...
This value should be considered an emergency fallback. You should set the fee recipient in the validator client in order for the execution node to be given adequate notice of block proposal.
Setting the fee recipient dynamically using the keymanager API
When the validator client API is enabled, the
standard keymanager API includes an endpoint
for setting the fee recipient dynamically for a given public key. When used, the fee recipient
will be saved in validator_definitions.yml so that it persists across restarts of the validator
client.
| Property | Specification |
|---|---|
| Path | /eth/v1/validator/{pubkey}/feerecipient |
| Method | POST |
| Required Headers | Authorization |
| Typical Responses | 202, 404 |
Example Request Body
{
    "ethaddress": "0x1D4E51167DBDC4789a014357f4029ff76381b16c"
}
Command:
DATADIR=$HOME/.lighthouse/mainnet
PUBKEY=0xa9735061c84fc0003657e5bd38160762b7ef2d67d280e00347b1781570088c32c06f15418c144949f5d736b1d3a6c591
FEE_RECIPIENT=0x1D4E51167DBDC4789a014357f4029ff76381b16c

curl -X POST \
    -H "Authorization: Bearer $(cat ${DATADIR}/validators/api-token.txt)" \
    -H "Content-Type: application/json" \
    -d "{ \"ethaddress\": \"${FEE_RECIPIENT}\" }" \
    http://localhost:5062/eth/v1/validator/${PUBKEY}/feerecipient | jq
Note that an authorization header is required to interact with the API. This is specified with the header -H "Authorization: Bearer $(cat ${DATADIR}/validators/api-token.txt)" which read the API token to supply the authentication. Refer to Authorization Header for more information. If you are having permission issue with accessing the API token file, you can modify the header to become -H "Authorization: Bearer $(sudo cat ${DATADIR}/validators/api-token.txt)".
Successful Response (202)
null
A null response indicates that the request is successful.
Querying the fee recipient
The same path with a GET request can be used to query the fee recipient for a given public key at any time.
| Property | Specification |
|---|---|
| Path | /eth/v1/validator/{pubkey}/feerecipient |
| Method | GET |
| Required Headers | Authorization |
| Typical Responses | 200, 404 |
Command:
DATADIR=$HOME/.lighthouse/mainnet
PUBKEY=0xa9735061c84fc0003657e5bd38160762b7ef2d67d280e00347b1781570088c32c06f15418c144949f5d736b1d3a6c591

curl -X GET \
    -H "Authorization: Bearer $(cat ${DATADIR}/validators/api-token.txt)" \
    -H "Content-Type: application/json" \
    http://localhost:5062/eth/v1/validator/${PUBKEY}/feerecipient | jq
Successful Response (200)
{
  "data": {
    "pubkey": "0xa9735061c84fc0003657e5bd38160762b7ef2d67d280e00347b1781570088c32c06f15418c144949f5d736b1d3a6c591",
    "ethaddress": "0x1d4e51167dbdc4789a014357f4029ff76381b16c"
  }
}
Removing the fee recipient
The same path with a DELETE request can be used to remove the fee recipient for a given public key at any time.
This is useful if you want the fee recipient to fall back to the validator client (or beacon node) default.
| Property | Specification |
|---|---|
| Path | /eth/v1/validator/{pubkey}/feerecipient |
| Method | DELETE |
| Required Headers | Authorization |
| Typical Responses | 204, 404 |
Command:
DATADIR=$HOME/.lighthouse/mainnet
PUBKEY=0xa9735061c84fc0003657e5bd38160762b7ef2d67d280e00347b1781570088c32c06f15418c144949f5d736b1d3a6c591

curl -X DELETE \
    -H "Authorization: Bearer $(cat ${DATADIR}/validators/api-token.txt)" \
    -H "Content-Type: application/json" \
    http://localhost:5062/eth/v1/validator/${PUBKEY}/feerecipient | jq
Successful Response (204)
null
FAQ
Why do I have to nominate an Ethereum address as the fee recipient?
You might wonder why the validator can’t just accumulate transactions fees in the same way that it accumulates other staking rewards. The reason for this is that transaction fees are computed and validated by the execution node, and therefore need to be paid to an address that exists on the execution chain. Validators use BLS keys which do not correspond to Ethereum addresses, so they have no “presence” on the execution chain. Therefore, it’s necessary for each validator to nominate a fee recipient address.
Validator Graffiti
Lighthouse provides four options for setting validator graffiti.
1. Using the “–graffiti-file” flag on the validator client
Users can specify a file with the --graffiti-file flag. This option is useful for dynamically changing graffitis for various use cases (e.g. drawing on the beaconcha.in graffiti wall). This file is loaded once on startup and reloaded every time a validator is chosen to propose a block.
Usage:
lighthouse vc --graffiti-file graffiti_file.txt
The file should contain key value pairs corresponding to validator public keys and their associated graffiti. The file can also contain a default key for the default case.
default: default_graffiti
public_key1: graffiti1
public_key2: graffiti2
...
Below is an example of a graffiti file:
default: Lighthouse
0x87a580d31d7bc69069b55f5a01995a610dd391a26dc9e36e81057a17211983a79266800ab8531f21f1083d7d84085007: mr f was here
0xa5566f9ec3c6e1fdf362634ebec9ef7aceb0e460e5079714808388e5d48f4ae1e12897fed1bea951c17fa389d511e477: mr v was here
Lighthouse will first search for the graffiti corresponding to the public key of the proposing validator, if there are no matches for the public key, then it uses the graffiti corresponding to the default key if present.
2. Setting the graffiti in the validator_definitions.yml
Users can set validator specific graffitis in validator_definitions.yml with the graffiti key. This option is recommended for static setups where the graffitis won’t change on every new block proposal.
You can also update the graffitis in the validator_definitions.yml file using the Lighthouse API. See example in Set Graffiti via HTTP.
Below is an example of the validator_definitions.yml with validator specific graffitis:
---
- enabled: true
  voting_public_key: "0x87a580d31d7bc69069b55f5a01995a610dd391a26dc9e36e81057a17211983a79266800ab8531f21f1083d7d84085007"
  type: local_keystore
  voting_keystore_path: /home/paul/.lighthouse/validators/0x87a580d31d7bc69069b55f5a01995a610dd391a26dc9e36e81057a17211983a79266800ab8531f21f1083d7d84085007/voting-keystore.json
  voting_keystore_password_path: /home/paul/.lighthouse/secrets/0x87a580d31d7bc69069b55f5a01995a610dd391a26dc9e36e81057a17211983a79266800ab8531f21f1083d7d84085007
  graffiti: "mr f was here"
- enabled: false
  voting_public_key: "0xa5566f9ec3c6e1fdf362634ebec9ef7aceb0e460e5079714808388e5d48f4ae1e12897fed1bea951c17fa389d511e477"
  type: local_keystore
  voting_keystore_path: /home/paul/.lighthouse/validators/0xa5566f9ec3c6e1fdf362634ebec9ef7aceb0e460e5079714808388e5d48f4ae1e12897fed1bea951c17fa389d511e477/voting-keystore.json
  voting_keystore_password: myStrongpa55word123&$
  graffiti: "somethingprofound"
3. Using the “–graffiti” flag on the validator client
Users can specify a common graffiti for all their validators using the --graffiti flag on the validator client.
Usage: lighthouse vc --graffiti example
4. Using the “–graffiti” flag on the beacon node
Users can also specify a common graffiti using the --graffiti flag on the beacon node as a common graffiti for all validators.
Usage: lighthouse bn --graffiti fortytwo
Note: The order of preference for loading the graffiti is as follows:
- Read from
--graffiti-fileif provided.- If
--graffiti-fileis not provided or errors, read graffiti fromvalidator_definitions.yml.- If graffiti is not specified in
validator_definitions.yml, load the graffiti passed in the--graffitiflag on the validator client.- If the
--graffitiflag on the validator client is not passed, load the graffiti passed in the--graffitiflag on the beacon node.- If the
--graffitiflag is not passed, load the default Lighthouse graffiti.
Set Graffiti via HTTP
Use the Lighthouse API to set graffiti on a per-validator basis. This method updates the graffiti
both in memory and in the validator_definitions.yml file. The new graffiti will be used in the next block proposal
without requiring a validator client restart.
Refer to Lighthouse API for API specification.
Example Command
DATADIR=/var/lib/lighthouse
curl -X PATCH "http://localhost:5062/lighthouse/validators/0xb0148e6348264131bf47bcd1829590e870c836dc893050fd0dadc7a28949f9d0a72f2805d027521b45441101f0cc1cde" \
-H "Authorization: Bearer $(cat ${DATADIR}/validators/api-token.txt)" \
-H "Content-Type: application/json" \
-d '{
    "graffiti": "Mr F was here"
}' | jq
A null response indicates that the request is successful.
Automatically append client version info to user graffiti
Note: this feature only works when a Lighthouse validator client is connected to a Lighthouse beacon node.
In the interest of obtaining client diversity data, Lighthouse will by default automatically append client version info to user graffiti in proposed blocks.
For example, you set the graffiti in the validator client as This is my graffiti. You are using Lighthouse (LH) v8.1.3
with commit hash 176cce5 and Reth (RH) v2.2.0 with commit hash 88505c7. The appended graffiti will include:
- Execution layer client code
- First two bytes of the execution layer commit hash
- Consensus layer client code
- First two bytes of the consensus layer commit hash
When the user graffiti is less than 20 characters, as in the above example, the appended graffiti when proposing a block
will be: This is my graffiti RH8850LH176c.
Given that the total size of the graffiti is 32 bytes, if the appended graffiti exceeds the size, the appended client version info will automatically be shortened. Some examples are as follows, where the last part of the graffiti is the appended client version info.
When the user graffiti is between 20-23 characters:
This is my graffiti yo RH88LH17
When the user graffiti is between 24-27 characters:
This is my graffiti string RHLH
When the user graffiti is between 28-29 characters:
This is my graffiti string yo RH
When the user graffiti is between 30-32 characters, no client version info will be appended:
This is my graffiti string yo yo
To opt out from this, when using a Lighthouse beacon node, use the flag --graffiti-append false on the validator client. This will retain your own graffiti when proposing a block, without appending any client version info.
Consolidation
With the Pectra upgrade, a validator can hold a stake of up to 2048 ETH. This is done by updating the validator withdrawal credentials to type 0x02. With 0x02 withdrawal credentials, it is possible to consolidate two or more validators into a single validator with a higher stake.
Let’s take a look at an example: Initially, validators A and B are both with 0x01 withdrawal credentials with 32 ETH. Let’s say we want to consolidate the balance of validator B to validator A, so that the balance of validator A becomes 64 ETH. These are the steps:
-
Update the withdrawal credentials of validator A to 0x02. You can do this using Siren or the staking launchpad. Select:
- source validator: validator A
- target validator: validator A
Note: After the update, the withdrawal credential type 0x02 cannot be reverted to 0x01, unless the validator exits and makes a fresh deposit.
-
Perform consolidation by selecting:
- source validator: validator B
- target validator: validator A
and then execute the transaction.
Depending on the exit queue and pending consolidations, the process could take from a day to weeks. The outcome is:
- validator A has 64 ETH
- validator B has 0 ETH (i.e., validator B has exited the beacon chain)
The consolidation process can be repeated to consolidate more validators into validator A. The request is made by signing a transaction using the withdrawal address of the source validator. The withdrawal credential of the target validator can be different from the source validator.
It is important to note that there are some conditions required to perform consolidation, a few common ones are:
- both source and target validator must be active (i.e., not exiting or slashed).
- the target validator must have a withdrawal credential type 0x02. The source validator could have a 0x01 or 0x02 withdrawal credential.
- the source validator must be active for at least 256 epochs to be able to perform consolidation.
Note that if a user were to send a consolidation transaction that does not meet the conditions, the transaction can still be accepted by the execution layer. However, the consolidation will fail once it reaches the consensus layer (where the checks are performed). Therefore, it is recommended to check that the conditions are fulfilled before sending a consolidation transaction.
APIs
Lighthouse allows users to query the state of Ethereum consensus using web-standard, RESTful HTTP/JSON APIs.
There are two APIs served by Lighthouse:
Beacon Node API
Lighthouse implements the standard Beacon Node API specification. Please follow that link for a full description of each API endpoint.
Starting the server
A Lighthouse beacon node can be configured to expose an HTTP server by supplying the --http flag. The default listen address is http://127.0.0.1:5052.
The following CLI flags control the HTTP server:
--http: enable the HTTP server (required even if the following flags are provided).--http-port: specify the listen port of the server.--http-address: specify the listen address of the server. It is not recommended to listen on0.0.0.0, please see Security below.--http-allow-origin: specify the value of theAccess-Control-Allow-Originheader. The default is to not supply a header.--http-enable-tls: serve the HTTP server over TLS. Must be used with--http-tls-certandhttp-tls-key. This feature is currently experimental, please see Serving the HTTP API over TLS below.--http-tls-cert: specify the path to the certificate file for Lighthouse to use.--http-tls-key: specify the path to the private key file for Lighthouse to use.
The schema of the API aligns with the standard Beacon Node API as defined at github.com/ethereum/beacon-APIs. An interactive specification is available here.
Security
Do not expose the beacon node API to the public internet or you will open your node to denial-of-service (DoS) attacks.
The API includes several endpoints which can be used to trigger heavy processing, and as
such it is strongly recommended to restrict how it is accessed. Using --http-address to change
the listening address from localhost should only be done with extreme care.
To safely provide access to the API from a different machine you should use one of the following standard techniques:
- Use an SSH tunnel, i.e. access
localhostremotely. This is recommended, and doesn’t require setting--http-address. - Use a firewall to limit access to certain remote IPs, e.g. allow access only from one other machine on the local network.
- Shield Lighthouse behind an HTTP server with rate-limiting such as NGINX. This is only recommended for advanced users, e.g. beacon node hosting providers.
Additional risks to be aware of include:
- The
node/identityandnode/peersendpoints expose information about your node’s peer-to-peer identity. - The
--http-allow-originflag changes the server’s CORS policy, allowing cross-site requests from browsers. You should only supply it if you understand the risks, e.g. malicious websites accessing your beacon node if you use the same machine for staking and web browsing.
CLI Example
Start a beacon node and an execution node according to Run a node. Note that since The Merge, an execution client is required to be running along with a beacon node. Hence, the query on Beacon Node APIs requires users to run both. While there are some Beacon Node APIs that you can query with only the beacon node, such as the node version, in general an execution client is required to get the updated information about the beacon chain, such as state root, headers and many others, which are dynamically progressing with time.
HTTP Request/Response Examples
This section contains some simple examples of using the HTTP API via curl.
All endpoints are documented in the Beacon Node API
specification.
View the head of the beacon chain
Returns the block header at the head of the canonical chain.
curl -X GET "http://localhost:5052/eth/v1/beacon/headers/head" -H "accept: application/json" | jq
{
  "execution_optimistic": false,
  "finalized": false,
  "data": {
    "root": "0x9059bbed6b8891e0ba2f656dbff93fc40f8c7b2b7af8fea9df83cfce5ee5e3d8",
    "canonical": true,
    "header": {
      "message": {
        "slot": "6271829",
        "proposer_index": "114398",
        "parent_root": "0x1d2b4fa8247f754a7a86d36e1d0283a5e425491c431533716764880a7611d225",
        "state_root": "0x2b48adea290712f56b517658dde2da5d36ee01c41aebe7af62b7873b366de245",
        "body_root": "0x6fa74c995ce6f397fa293666cde054d6a9741f7ec280c640bee51220b4641e2d"
      },
      "signature": "0x8258e64fea426033676a0045c50543978bf173114ba94822b12188e23cbc8d8e89e0b5c628a881bf3075d325bc11341105a4e3f9332ac031d89a93b422525b79e99325928a5262f17dfa6cc3ddf84ca2466fcad86a3c168af0d045f79ef52036"
    }
  }
}
The jq tool is used to format the JSON data properly. If it returns jq: command not found, then you can install jq with sudo apt install -y jq. After that, run the command again, and it should return the head state of the beacon chain.
View the status of a validator
Shows the status of validator at index 1 at the head state.
curl -X GET "http://localhost:5052/eth/v1/beacon/states/head/validators/1" -H "accept: application/json" | jq
{
  "execution_optimistic": false,
  "finalized": false,
  "data": {
    "index": "1",
    "balance": "32004587169",
    "status": "active_ongoing",
    "validator": {
      "pubkey": "0xa1d1ad0714035353258038e964ae9675dc0252ee22cea896825c01458e1807bfad2f9969338798548d9858a571f7425c",
      "withdrawal_credentials": "0x01000000000000000000000015f4b914a0ccd14333d850ff311d6dafbfbaa32b",
      "effective_balance": "32000000000",
      "slashed": false,
      "activation_eligibility_epoch": "0",
      "activation_epoch": "0",
      "exit_epoch": "18446744073709551615",
      "withdrawable_epoch": "18446744073709551615"
    }
  }
}
You can replace 1 in the above command with the validator index that you would like to query. Other API query can be done similarly by changing the link according to the Beacon API.
Events API
The events API provides information such as the payload attributes that are of interest to block builders and relays. To query the payload attributes, it is necessary to run Lighthouse beacon node with the flag --always-prepare-payload. With the flag --always-prepare-payload, it is mandatory to also have the flag --suggested-fee-recipient set on the beacon node. You could pass a dummy fee recipient and have it override with the intended fee recipient of the proposer during the actual block proposal. It is also recommended to add the flag --prepare-payload-lookahead 8000 which configures the payload attributes to be sent at 4s into each slot (or 8s from the start of the next slot). An example of the command is:
curl -X 'GET' \
'http://localhost:5052/eth/v1/events?topics=payload_attributes' \
-H 'accept: text/event-stream'
An example of response is:
data:{"version":"capella","data":{"proposal_slot":"11047","proposer_index":"336057","parent_block_root":"0x26f8999d270dd4677c2a1c815361707157a531f6c599f78fa942c98b545e1799","parent_block_number":"9259","parent_block_hash":"0x7fb788cd7afa814e578afa00a3edd250cdd4c8e35c22badd327d981b5bda33d2","payload_attributes":{"timestamp":"1696034964","prev_randao":"0xeee34d7a3f6b99ade6c6a881046c9c0e96baab2ed9469102d46eb8d6e4fde14c","suggested_fee_recipient":"0x0000000000000000000000000000000000000001","withdrawals":[{"index":"40705","validator_index":"360712","address":"0x73b2e0e54510239e22cc936f0b4a6de1acf0abde","amount":"1202941"},{"index":"40706","validator_index":"360713","address":"0x73b2e0e54510239e22cc936f0b4a6de1acf0abde","amount":"1201138"},{"index":"40707","validator_index":"360714","address":"0x73b2e0e54510239e22cc936f0b4a6de1acf0abde","amount":"1215255"},{"index":"40708","validator_index":"360715","address":"0x73b2e0e54510239e22cc936f0b4a6de1acf0abde","amount":"1161977"},{"index":"40709","validator_index":"360716","address":"0x73b2e0e54510239e22cc936f0b4a6de1acf0abde","amount":"1257278"},{"index":"40710","validator_index":"360717","address":"0x73b2e0e54510239e22cc936f0b4a6de1acf0abde","amount":"1247740"},{"index":"40711","validator_index":"360718","address":"0x73b2e0e54510239e22cc936f0b4a6de1acf0abde","amount":"1204337"},{"index":"40712","validator_index":"360719","address":"0x73b2e0e54510239e22cc936f0b4a6de1acf0abde","amount":"1183575"},{"index":"40713","validator_index":"360720","address":"0x73b2e0e54510239e22cc936f0b4a6de1acf0abde","amount":"1157785"},{"index":"40714","validator_index":"360721","address":"0x73b2e0e54510239e22cc936f0b4a6de1acf0abde","amount":"1143371"},{"index":"40715","validator_index":"360722","address":"0x73b2e0e54510239e22cc936f0b4a6de1acf0abde","amount":"1234787"},{"index":"40716","validator_index":"360723","address":"0x73b2e0e54510239e22cc936f0b4a6de1acf0abde","amount":"1286673"},{"index":"40717","validator_index":"360724","address":"0x73b2e0e54510239e22cc936f0b4a6de1acf0abde","amount":"1419241"},{"index":"40718","validator_index":"360725","address":"0x73b2e0e54510239e22cc936f0b4a6de1acf0abde","amount":"1231015"},{"index":"40719","validator_index":"360726","address":"0x73b2e0e54510239e22cc936f0b4a6de1acf0abde","amount":"1304321"},{"index":"40720","validator_index":"360727","address":"0x73b2e0e54510239e22cc936f0b4a6de1acf0abde","amount":"1236543"}]}}}
Serving the HTTP API over TLS
Warning: This feature is currently experimental.
The HTTP server can be served over TLS by using the --http-enable-tls,
http-tls-cert and http-tls-key flags.
This allows the API to be accessed via HTTPS, encrypting traffic to
and from the server.
This is particularly useful when connecting validator clients to beacon nodes on different machines or remote servers. However, even when serving the HTTP API server over TLS, it should not be exposed publicly without one of the security measures suggested in the Security section.
Below is a simple example serving the HTTP API over TLS using a self-signed certificate on Linux:
Enabling TLS on a beacon node
Generate a self-signed certificate using openssl:
openssl req -x509 -nodes -newkey rsa:4096 -keyout key.pem -out cert.pem -days 365 -subj "/CN=localhost"
Note that currently Lighthouse only accepts keys that are not password protected.
This means we need to run with the -nodes flag (short for ‘no DES’).
Once generated, we can run Lighthouse and an execution node according to Run a node. In addition, add the flags --http-enable-tls --http-tls-cert cert.pem --http-tls-key key.pem to Lighthouse, the command should look like:
lighthouse bn \
  --network mainnet \
  --execution-endpoint http://localhost:8551 \
  --execution-jwt /secrets/jwt.hex \
  --checkpoint-sync-url https://mainnet.checkpoint.sigp.io \
  --http \
  --http-enable-tls \
  --http-tls-cert cert.pem \
  --http-tls-key key.pem
Note that the user running Lighthouse must have permission to read the certificate and key.
The API is now being served at https://localhost:5052.
To test connectivity, you can run the following:
curl -X GET "https://localhost:5052/eth/v1/node/version" -H "accept: application/json" --cacert cert.pem | jq
Connecting a validator client
In order to connect a validator client to a beacon node over TLS, the validator client needs to be aware of the certificate. There are two ways to do this:
Option 1: Add the certificate to the operating system trust store
The process for this will vary depending on your operating system. Below are the instructions for Ubuntu and Arch Linux:
# Ubuntu
sudo cp cert.pem /usr/local/share/ca-certificates/beacon.crt
sudo update-ca-certificates
# Arch
sudo cp cert.pem /etc/ca-certificates/trust-source/anchors/beacon.crt
sudo trust extract-compat
Now the validator client can be connected to the beacon node by running:
lighthouse vc --beacon-nodes https://localhost:5052
Option 2: Specify the certificate via CLI
You can also specify any custom certificates via the validator client CLI like so:
lighthouse vc --beacon-nodes https://localhost:5052 --beacon-nodes-tls-certs cert.pem
Troubleshooting
HTTP API is unavailable or refusing connections
Ensure the --http flag has been supplied at the CLI.
You can quickly check that the HTTP endpoint is up using curl:
curl -X GET "http://localhost:5052/eth/v1/node/version" -H "accept:application/json"
The beacon node should respond with its version:
{"data":{"version":"Lighthouse/v4.1.0-693886b/x86_64-linux"}
If this doesn’t work, the server might not be started or there might be a network connection error.
I cannot query my node from a web browser (e.g., Swagger)
By default, the API does not provide an Access-Control-Allow-Origin header,
which causes browsers to reject responses with a CORS error.
The --http-allow-origin flag can be used to add a wild-card CORS header:
lighthouse bn --http --http-allow-origin "*"
Warning: Adding the wild-card allow-origin flag can pose a security risk. Only use it in production if you understand the risks of a loose CORS policy.
Lighthouse Non-Standard APIs
Lighthouse fully supports the standardization efforts at
github.com/ethereum/beacon-APIs.
However, sometimes development requires additional endpoints that shouldn’t
necessarily be defined as a broad-reaching standard. Such endpoints are placed
behind the /lighthouse path.
The endpoints behind the /lighthouse path are:
- Not intended to be stable.
- Not guaranteed to be safe.
- For testing and debugging purposes only.
Although we don’t recommend that users rely on these endpoints, we document them briefly so they can be utilized by developers and researchers.
/lighthouse/health
Note: This endpoint is presently only available on Linux.
Returns information regarding the health of the host machine.
curl -X GET "http://localhost:5052/lighthouse/health" -H "accept: application/json" | jq
{
  "data": {
    "sys_virt_mem_total": 16671133696,
    "sys_virt_mem_available": 8273715200,
    "sys_virt_mem_used": 7304818688,
    "sys_virt_mem_free": 2998190080,
    "sys_virt_mem_percent": 50.37101,
    "sys_virt_mem_cached": 5013975040,
    "sys_virt_mem_buffers": 1354149888,
    "sys_loadavg_1": 2.29,
    "sys_loadavg_5": 3.48,
    "sys_loadavg_15": 3.72,
    "cpu_cores": 4,
    "cpu_threads": 8,
    "system_seconds_total": 5728,
    "user_seconds_total": 33680,
    "iowait_seconds_total": 873,
    "idle_seconds_total": 177530,
    "cpu_time_total": 217447,
    "disk_node_bytes_total": 358443397120,
    "disk_node_bytes_free": 70025089024,
    "disk_node_reads_total": 1141863,
    "disk_node_writes_total": 1377993,
    "network_node_bytes_total_received": 2405639308,
    "network_node_bytes_total_transmit": 328304685,
    "misc_node_boot_ts_seconds": 1620629638,
    "misc_os": "linux",
    "pid": 4698,
    "pid_num_threads": 25,
    "pid_mem_resident_set_size": 783757312,
    "pid_mem_virtual_memory_size": 2564665344,
    "pid_process_seconds_total": 22
  }
}
/lighthouse/ui/health
Returns information regarding the health of the host machine.
curl -X GET "http://localhost:5052/lighthouse/ui/health" -H "accept: application/json" | jq
{
  "data": {
    "total_memory": 16443219968,
    "free_memory": 1283739648,
    "used_memory": 5586264064,
    "sys_loadavg_1": 0.59,
    "sys_loadavg_5": 1.13,
    "sys_loadavg_15": 2.41,
    "cpu_cores": 4,
    "cpu_threads": 8,
    "global_cpu_frequency": 3.4,
    "disk_bytes_total": 502390845440,
    "disk_bytes_free": 9981386752,
    "system_uptime": 660706,
    "app_uptime": 105,
    "system_name": "Arch Linux",
    "kernel_version": "5.19.13-arch1-1",
    "os_version": "Linux rolling Arch Linux",
    "host_name": "Computer1"
    "network_name": "wlp0s20f3",
    "network_bytes_total_received": 14105556611,
    "network_bytes_total_transmit": 3649489389,
    "nat_open": true,
    "connected_peers": 80,
    "sync_state": "Synced",
  }
}
/lighthouse/ui/validator_count
Returns an overview of validators.
curl -X GET "http://localhost:5052/lighthouse/ui/validator_count" -H "accept: application/json" | jq
{
  "data": {
    "active_ongoing":479508,
    "active_exiting":0,
    "active_slashed":0,
    "pending_initialized":28,
    "pending_queued":0,
    "withdrawal_possible":933,
    "withdrawal_done":0,
    "exited_unslashed":0,
    "exited_slashed":3
  }
}
/lighthouse/ui/validator_metrics
Re-exposes certain metrics from the validator monitor to the HTTP API. This API requires that the beacon node to have the flag --validator-monitor-auto. This API will only return metrics for the validators currently being monitored and present in the POST data, or the validators running in the validator client.
curl -X POST "http://localhost:5052/lighthouse/ui/validator_metrics" -d '{"indices": [12345]}' -H "Content-Type: application/json" | jq
{
  "data": {
    "validators": {
      "12345": {
        "attestation_hits": 10,
        "attestation_misses": 0,
        "attestation_hit_percentage": 100,
        "attestation_head_hits": 10,
        "attestation_head_misses": 0,
        "attestation_head_hit_percentage": 100,
        "attestation_target_hits": 5,
        "attestation_target_misses": 5,
        "attestation_target_hit_percentage": 50,
        "latest_attestation_inclusion_distance": 1
      }
    }
  }
}
Running this API without the flag --validator-monitor-auto in the beacon node will return null:
{
  "data": {
    "validators": {}
  }
}
/lighthouse/syncing
Returns the sync status of the beacon node.
curl -X GET "http://localhost:5052/lighthouse/syncing" -H "accept: application/json" | jq
There are two possible outcomes, depending on whether the beacon node is syncing or synced.
-
Syncing:
{ "data": { "SyncingFinalized": { "start_slot": "5478848", "target_slot": "5478944" } } } -
Synced:
{
  "data": "Synced"
}
/lighthouse/peers
curl -X GET "http://localhost:5052/lighthouse/peers" -H "accept: application/json" | jq
[
  {
    "peer_id": "16Uiu2HAm2ZoWQ2zkzsMFvf5o7nXa7R5F7H1WzZn2w7biU3afhgov",
    "peer_info": {
      "score": {
        "Real": {
          "lighthouse_score": 0,
          "gossipsub_score": -18371.409037358582,
          "ignore_negative_gossipsub_score": false,
          "score": -21.816048231863316
        }
      },
      "client": {
        "kind": "Lighthouse",
        "version": "v4.1.0-693886b",
        "os_version": "x86_64-linux",
        "protocol_version": "eth2/1.0.0",
        "agent_string": "Lighthouse/v4.1.0-693886b/x86_64-linux"
      },
      "connection_status": {
        "status": "disconnected",
        "connections_in": 0,
        "connections_out": 0,
        "last_seen": 9028,
        "banned_ips": []
      },
      "listening_addresses": [
        "/ip4/212.102.59.173/tcp/23452",
        "/ip4/23.124.84.197/tcp/23452",
        "/ip4/127.0.0.1/tcp/23452",
        "/ip4/192.168.0.2/tcp/23452",
        "/ip4/192.168.122.1/tcp/23452"
      ],
      "seen_addresses": [
        "23.124.84.197:23452"
      ],
      "sync_status": {
        "Synced": {
          "info": {
            "head_slot": "5468141",
            "head_root": "0x7acc017a199c0cf0693a19e0ed3a445a02165c03ea6f46cb5ffb8f60bf0ebf35",
            "finalized_epoch": "170877",
            "finalized_root": "0xbbc3541637976bd03b526de73e60a064e452a4b873b65f43fa91fefbba140410"
          }
        }
      },
      "meta_data": {
        "V2": {
          "seq_number": 501,
          "attnets": "0x0000020000000000",
          "syncnets": "0x00"
        }
      },
      "subnets": [],
      "is_trusted": false,
      "connection_direction": "Outgoing",
      "enr": "enr:-L64QI37ReMIki2Uqln3pcgQyAH8Y3ceSYrtJp1FlDEGSM37F7ngCpS9k-SKQ1bOHp0zFCkNxpvFlf_3o5OUkBRw0qyCAfqHYXR0bmV0c4gAAAIAAAAAAIRldGgykGKJQe8DABAg__________-CaWSCdjSCaXCEF3xUxYlzZWNwMjU2azGhAmoW921eIvf8pJhOvOwuxLSxKnpLY2inE_bUILdlZvhdiHN5bmNuZXRzAIN0Y3CCW5yDdWRwgluc"
    }
  }
]
/lighthouse/peers/connected
Returns information about connected peers.
curl -X GET "http://localhost:5052/lighthouse/peers/connected" -H "accept: application/json" | jq
[
 {
    "peer_id": "16Uiu2HAmCAvpoYE6ABGdQJaW4iufVqNCTJU5AqzyZPB2D9qba7ZU",
    "peer_info": {
      "score": {
        "Real": {
          "lighthouse_score": 0,
          "gossipsub_score": 0,
          "ignore_negative_gossipsub_score": false,
          "score": 0
        }
      },
      "client": {
        "kind": "Lighthouse",
        "version": "v3.5.1-319cc61",
        "os_version": "x86_64-linux",
        "protocol_version": "eth2/1.0.0",
        "agent_string": "Lighthouse/v3.5.1-319cc61/x86_64-linux"
      },
      "connection_status": {
        "status": "connected",
        "connections_in": 0,
        "connections_out": 1,
        "last_seen": 0
      },
      "listening_addresses": [
        "/ip4/144.91.92.17/tcp/9000",
        "/ip4/127.0.0.1/tcp/9000",
        "/ip4/172.19.0.3/tcp/9000"
      ],
      "seen_addresses": [
        "144.91.92.17:9000"
      ],
      "sync_status": {
        "Synced": {
          "info": {
            "head_slot": "5468930",
            "head_root": "0x25409073c65d2f6f5cee20ac2eff5ab980b576ca7053111456063f8ff8f67474",
            "finalized_epoch": "170902",
            "finalized_root": "0xab59473289e2f708341d8e5aafd544dd88e09d56015c90550ea8d16c50b4436f"
          }
        }
      },
      "meta_data": {
        "V2": {
          "seq_number": 67,
          "attnets": "0x0000000080000000",
          "syncnets": "0x00"
        }
      },
      "subnets": [
        {
          "Attestation": "39"
        }
      ],
      "is_trusted": false,
      "connection_direction": "Outgoing",
      "enr": "enr:-Ly4QHd3RHJdkuR1iE6MtVtibC5S-aiWGPbwi4cG3wFGbqxRAkAgLDseTzPFQQIehQ7LmO7KIAZ5R1fotjMQ_LjA8n1Dh2F0dG5ldHOIAAAAAAAQAACEZXRoMpBiiUHvAwAQIP__________gmlkgnY0gmlwhJBbXBGJc2VjcDI1NmsxoQL4z8A7B-NS29zOgvkTX1YafKandwOtrqQ1XRnUJj3se4hzeW5jbmV0cwCDdGNwgiMog3VkcIIjKA"
    }
  }
]
/lighthouse/proto_array
curl -X GET "http://localhost:5052/lighthouse/proto_array" -H "accept: application/json" | jq
Example omitted for brevity.
/lighthouse/validator_inclusion/{epoch}/{validator_id}
/lighthouse/validator_inclusion/{epoch}/global
/lighthouse/liveness
POST request that checks if any of the given validators have attested in the given epoch. Returns a list
of objects, each including the validator index, epoch, and is_live status of a requested validator.
This endpoint is used in doppelganger detection, and can only provide accurate information for the current, previous, or next epoch.
Note that for this API, if you insert an arbitrary epoch other than the previous, current or next epoch of the network, it will return
"code:400"andBAD_REQUEST.
curl -X POST "http://localhost:5052/lighthouse/liveness" -d '{"indices":["0","1"],"epoch":"1"}' -H "content-type: application/json" | jq
{
    "data": [
        {
            "index": "0",
            "epoch": "1",
            "is_live": true
        }
    ]
}
/lighthouse/database/info
Information about the database’s split point and anchor info.
curl "http://localhost:5052/lighthouse/database/info" | jq
{
  "schema_version": 22,
  "config": {
    "block_cache_size": 5,
    "state_cache_size": 128,
    "compression_level": 1,
    "historic_state_cache_size": 1,
    "hdiff_buffer_cache_size": 16,
    "compact_on_init": false,
    "compact_on_prune": true,
    "prune_payloads": true,
    "hierarchy_config": {
      "exponents": [
        5,
        7,
        11
      ]
    },
    "prune_blobs": true,
    "epochs_per_blob_prune": 1,
    "blob_prune_margin_epochs": 0
  },
  "split": {
    "slot": "10530592",
    "state_root": "0xd27e6ce699637cf9b5c7ca632118b7ce12c2f5070bb25a27ac353ff2799d4466",
    "block_root": "0x71509a1cb374773d680cd77148c73ab3563526dacb0ab837bb0c87e686962eae"
  },
  "anchor": {
    "anchor_slot": "7451168",
    "oldest_block_slot": "3962593",
    "oldest_block_parent": "0x4a39f21367b3b9cc272744d1e38817bda5daf38d190dc23dc091f09fb54acd97",
    "state_upper_limit": "7454720",
    "state_lower_limit": "0"
  },
  "blob_info": {
    "oldest_blob_slot": "7413769",
    "blobs_db": true
  }
}
For more information about the split point, see the Database Configuration docs.
For archive nodes, the anchor will be:
"anchor": {
    "anchor_slot": "0",
    "oldest_block_slot": "0",
    "oldest_block_parent": "0x0000000000000000000000000000000000000000000000000000000000000000",
    "state_upper_limit": "0",
    "state_lower_limit": "0"
  },
indicating that all states with slots >= 0 are available, i.e., full state history. For more information
on the specific meanings of these fields see the docs on Checkpoint
Sync.
/lighthouse/custody/info
Information about data columns custody info.
curl "http://localhost:5052/lighthouse/custody/info" | jq
{
  "earliest_custodied_data_column_slot": "8823040",
  "custody_group_count": "4",
  "custody_columns": [
    "117",
    "72",
    "31",
    "79"
  ]
}
/lighthouse/custody/backfill
Starts a custody backfill sync from the next epoch with the node’s latest custody requirements. The sync won’t begin immediately, it waits until the next epoch is finalized before triggering.
This endpoint should only be used to fix nodes that may have partial custody columns due to a prior backfill bug (present in v8.0.0-rc.2). Use with caution as it re-downloads all historic custody data columns and may consume significant bandwidth.
curl -X POST "http://localhost:5052/lighthouse/custody/backfill"
/lighthouse/merge_readiness
Returns the current difficulty and terminal total difficulty of the network. Before The Merge on 15th September 2022, you will see that the current difficulty is less than the terminal total difficulty, An example is shown below:
curl -X GET "http://localhost:5052/lighthouse/merge_readiness" | jq
{
    "data":{
       "type":"ready",
       "config":{
          "terminal_total_difficulty":"6400"
       },
       "current_difficulty":"4800"
    }
 }
As all testnets and Mainnet have been merged, both values will be the same after The Merge. An example of response on the Goerli testnet:
{
  "data": {
    "type": "ready",
    "config": {
      "terminal_total_difficulty": "10790000"
    },
    "current_difficulty": "10790000"
  }
}
/lighthouse/logs
This is a Server Side Event subscription endpoint. This allows a user to read
the Lighthouse logs directly from the HTTP API endpoint. This currently
exposes INFO and higher level logs. It is only enabled when the --gui flag is set in the CLI.
Example:
curl -N "http://localhost:5052/lighthouse/logs"
Should provide an output that emits log events as they occur:
{
"data": {
	  "time": "Mar 13 15:28:41",
	  "level": "INFO",
	  "msg": "Syncing",
	  "service": "slot_notifier",
	  "est_time": "1 hr 27 mins",
	  "speed": "5.33 slots/sec",
	  "distance": "28141 slots (3 days 21 hrs)",
	  "peers": "8"
	}
}
/lighthouse/nat
Checks if the ports are open.
curl -X GET "http://localhost:5052/lighthouse/nat" | jq
An example of response:
{
  "data": {
    "discv5_ipv4": true,
    "discv5_ipv6": false,
    "libp2p_ipv4": true,
    "libp2p_ipv6": false
  }
}
Validator Inclusion APIs
The /lighthouse/validator_inclusion API endpoints provide information on
results of the proof-of-stake voting process used for finality/justification
under Casper FFG.
These endpoints are not stable or included in the Ethereum consensus standard API. As such, they are subject to change or removal without a change in major release version.
In order to apply these APIs, you need to have historical states information in the database of your node. This means adding the flag --archive in the beacon node. Once the state reconstruction process is completed, you can apply these APIs to any epoch.
Endpoints
| HTTP Path | Description |
|---|---|
/lighthouse/validator_inclusion/{epoch}/global | A global vote count for a given epoch. |
/lighthouse/validator_inclusion/{epoch}/{validator_id} | A per-validator breakdown of votes in a given epoch. |
Global
Returns a global count of votes for some given epoch. The results are included
both for the current and previous (epoch - 1) epochs since both are required
by the beacon node whilst performing per-epoch-processing.
Generally, you should consider the “current” values to be incomplete and the “previous” values to be final. This is because validators can continue to include attestations from the current epoch in the next epoch, however this is not the case for attestations from the previous epoch.
                  `epoch` query parameter
				              |
				              |     --------- values are calculated here
                              |     |
							  v     v
Epoch:  |---previous---|---current---|---next---|

                          |-------------|
						         ^
                                 |
		       window for including "current" attestations
					        in a block
The votes are expressed in terms of staked effective Gwei (i.e., not the number of
individual validators). For example, if a validator has 32 ETH staked they will
increase the current_epoch_attesting_gwei figure by 32,000,000,000 if they
have an attestation included in a block during the current epoch. If this
validator has more than 32 ETH, that extra ETH will not count towards their
vote (that is why it is effective Gwei).
The following fields are returned:
current_epoch_active_gwei: the total staked gwei that was active (i.e., able to vote) during the current epoch.current_epoch_target_attesting_gwei: the total staked gwei that attested to the majority-elected Casper FFG target epoch during the current epoch.previous_epoch_target_attesting_gwei: seecurrent_epoch_target_attesting_gwei.previous_epoch_head_attesting_gwei: the total staked gwei that attested to a head beacon block that is in the canonical chain.
From this data you can calculate:
Justification/Finalization Rate
previous_epoch_target_attesting_gwei / current_epoch_active_gwei
When this value is greater than or equal to 2/3 it is possible that the
beacon chain may justify and/or finalize the epoch.
HTTP Example
curl -X GET "http://localhost:5052/lighthouse/validator_inclusion/0/global" -H "accept: application/json" | jq
{
  "data": {
    "current_epoch_active_gwei": 642688000000000,
    "current_epoch_target_attesting_gwei": 366208000000000,
    "previous_epoch_target_attesting_gwei": 1000000000,
    "previous_epoch_head_attesting_gwei": 1000000000
  }
}
Individual
Returns a per-validator summary of how that validator performed during the current epoch.
The Global Votes endpoint is the summation of all of these individual values, please see it for definitions of terms like “current_epoch”, “previous_epoch” and “target_attester”.
HTTP Example
curl -X GET "http://localhost:5052/lighthouse/validator_inclusion/0/42" -H "accept: application/json" | jq
{
  "data": {
    "is_slashed": false,
    "is_withdrawable_in_current_epoch": false,
    "is_active_unslashed_in_current_epoch": true,
    "is_active_unslashed_in_previous_epoch": true,
    "current_epoch_effective_balance_gwei": 32000000000,
    "is_current_epoch_target_attester": false,
    "is_previous_epoch_target_attester": false,
    "is_previous_epoch_head_attester": false
  }
}
Validator Client API
Lighthouse implements a JSON HTTP API for the validator client which enables programmatic management of validators and keys.
The API includes all of the endpoints from the standard keymanager API that is implemented by other clients and remote signers. It also includes some Lighthouse-specific endpoints which are described in Endpoints.
Note: All requests to the HTTP server must supply an
Authorizationheader.
Starting the server
A Lighthouse validator client can be configured to expose a HTTP server by supplying the --http flag. The default listen address is http://127.0.0.1:5062.
The following CLI flags control the HTTP server:
--http: enable the HTTP server (required even if the following flags are provided).--http-address: specify the listen address of the server. It is almost always unsafe to use a non-default HTTP listen address. Use this with caution. See the Security section below for more information.--http-port: specify the listen port of the server.--http-allow-origin: specify the value of theAccess-Control-Allow-Originheader. The default is to not supply a header.
Security
The validator client HTTP server is not encrypted (i.e., it is not HTTPS). For
this reason, it will listen by default on http://127.0.0.1.
It is unsafe to expose the validator client to the public Internet without additional transport layer security (e.g., HTTPS via nginx, SSH tunnels, etc.).
For custom setups, such as certain Docker configurations, a custom HTTP listen address can be used by passing the --http-address and --unencrypted-http-transport flags. The --unencrypted-http-transport flag is a safety flag which is required to ensure the user is aware of the potential risks when using a non-default listen address.
CLI Example
Start the validator client with the HTTP server listening on http://localhost:5062:
lighthouse vc --http
Validator Client API: Endpoints
Endpoints
| HTTP Path | Description |
|---|---|
GET /lighthouse/version | Get the Lighthouse software version. |
GET /lighthouse/health | Get information about the host machine. |
GET /lighthouse/ui/health | Get information about the host machine. Focused for UI applications. |
GET /lighthouse/spec | Get the Ethereum proof-of-stake consensus specification used by the validator. |
GET /lighthouse/auth | Get the location of the authorization token. |
GET /lighthouse/validators | List all validators. |
GET /lighthouse/validators | List all validators. |
GET /lighthouse/validators/:voting_pubkey | Get a specific validator. |
PATCH /lighthouse/validators/:voting_pubkey | Update a specific validator. |
POST /lighthouse/validators | Create a new validator and mnemonic. |
POST /lighthouse/validators/keystore | Import a keystore. |
POST /lighthouse/validators/mnemonic | Create a new validator from an existing mnemonic. |
POST /lighthouse/validators/web3signer | Add web3signer validators. |
GET /lighthouse/logs | Get logs |
GET /lighthouse/beacon/health | Get health information for each connected beacon node. |
POST /lighthouse/beacon/update | Update the --beacon-nodes list. |
The query to Lighthouse API endpoints requires authorization, see Authorization Header.
In addition to the above endpoints Lighthouse also supports all of the standard keymanager APIs.
GET /lighthouse/version
Returns the software version and git commit hash for the Lighthouse binary.
HTTP Specification
| Property | Specification |
|---|---|
| Path | /lighthouse/version |
| Method | GET |
| Required Headers | Authorization |
| Typical Responses | 200 |
Command:
DATADIR=/var/lib/lighthouse
curl -X GET "http://localhost:5062/lighthouse/version" -H "Authorization: Bearer $(cat ${DATADIR}/validators/api-token.txt)" | jq
Example Response Body:
{
    "data": {
        "version": "Lighthouse/v4.1.0-693886b/x86_64-linux"
    }
}
Note: The command provided in this documentation links to the API token file. In this documentation, it is assumed that the API token file is located in
/var/lib/lighthouse/validators/api-token.txt. If your database is saved in another directory, modify theDATADIRaccordingly. If you’ve specified a custom token path using--http-token-path, use that path instead. If you are having permission issue with accessing the API token file, you can modify the header to become-H "Authorization: Bearer $(sudo cat ${DATADIR}/validators/api-token.txt)".
As an alternative, you can also provide the API token directly, for example,
-H "Authorization: Bearer hGut6B8uEujufDXSmZsT0thnxvdvKFBvh. In this case, you obtain the token from the fileapi-token.txtand the command becomes:
curl -X GET "http://localhost:5062/lighthouse/version" -H "Authorization: Bearer hGut6B8uEujufDXSmZsT0thnxvdvKFBvh" | jq
GET /lighthouse/health
Returns information regarding the health of the host machine.
HTTP Specification
| Property | Specification |
|---|---|
| Path | /lighthouse/health |
| Method | GET |
| Required Headers | Authorization |
| Typical Responses | 200 |
Note: this endpoint is presently only available on Linux.
Command:
DATADIR=/var/lib/lighthouse
curl -X GET "http://localhost:5062/lighthouse/health" -H "Authorization: Bearer $(cat ${DATADIR}/validators/api-token.txt)" | jq
Example Response Body:
{
  "data": {
    "sys_virt_mem_total": 8184274944,
    "sys_virt_mem_available": 1532280832,
    "sys_virt_mem_used": 6248341504,
    "sys_virt_mem_free": 648790016,
    "sys_virt_mem_percent": 81.27775,
    "sys_virt_mem_cached": 1244770304,
    "sys_virt_mem_buffers": 42373120,
    "sys_loadavg_1": 2.33,
    "sys_loadavg_5": 2.11,
    "sys_loadavg_15": 2.47,
    "cpu_cores": 4,
    "cpu_threads": 8,
    "system_seconds_total": 103095,
    "user_seconds_total": 750734,
    "iowait_seconds_total": 60671,
    "idle_seconds_total": 3922305,
    "cpu_time_total": 4794222,
    "disk_node_bytes_total": 982820896768,
    "disk_node_bytes_free": 521943703552,
    "disk_node_reads_total": 376287830,
    "disk_node_writes_total": 48232652,
    "network_node_bytes_total_received": 143003442144,
    "network_node_bytes_total_transmit": 185348289905,
    "misc_node_boot_ts_seconds": 1681740973,
    "misc_os": "linux",
    "pid": 144072,
    "pid_num_threads": 27,
    "pid_mem_resident_set_size": 15835136,
    "pid_mem_virtual_memory_size": 2179018752,
    "pid_process_seconds_total": 54
  }
}
GET /lighthouse/ui/health
Returns information regarding the health of the host machine.
HTTP Specification
| Property | Specification |
|---|---|
| Path | /lighthouse/ui/health |
| Method | GET |
| Required Headers | Authorization |
| Typical Responses | 200 |
Command:
DATADIR=/var/lib/lighthouse
curl -X GET "http://localhost:5062/lighthouse/ui/health" -H "Authorization: Bearer $(cat ${DATADIR}/validators/api-token.txt)" | jq
Example Response Body
{
  "data": {
    "total_memory": 16443219968,
    "free_memory": 1283739648,
    "used_memory": 5586264064,
    "sys_loadavg_1": 0.59,
    "sys_loadavg_5": 1.13,
    "sys_loadavg_15": 2.41,
    "cpu_cores": 4,
    "cpu_threads": 8,
    "global_cpu_frequency": 3.4,
    "disk_bytes_total": 502390845440,
    "disk_bytes_free": 9981386752,
    "system_uptime": 660706,
    "app_uptime": 105,
    "system_name": "Arch Linux",
    "kernel_version": "5.19.13-arch1-1",
    "os_version": "Linux rolling Arch Linux",
    "host_name": "Computer1"
  }
}
GET /lighthouse/ui/graffiti
Returns the graffiti that will be used for the next block proposal of each validator.
HTTP Specification
| Property | Specification |
|---|---|
| Path | /lighthouse/ui/graffiti |
| Method | GET |
| Required Headers | Authorization |
| Typical Responses | 200 |
Command:
DATADIR=/var/lib/lighthouse
curl -X GET "http://localhost:5062/lighthouse/ui/graffiti" -H "Authorization: Bearer $(cat ${DATADIR}/validators/api-token.txt)" | jq
Example Response Body
{
  "data": {
    "0x81283b7a20e1ca460ebd9bbd77005d557370cabb1f9a44f530c4c4c66230f675f8df8b4c2818851aa7d77a80ca5a4a5e": "mr f was here",
    "0xa3a32b0f8b4ddb83f1a0a853d81dd725dfe577d4f4c3db8ece52ce2b026eca84815c1a7e8e92a4de3d755733bf7e4a9b": "mr v was here",
    "0x872c61b4a7f8510ec809e5b023f5fdda2105d024c470ddbbeca4bc74e8280af0d178d749853e8f6a841083ac1b4db98f": null
  }
}
GET /lighthouse/spec
Returns the Ethereum proof-of-stake consensus specification loaded for this validator.
HTTP Specification
| Property | Specification |
|---|---|
| Path | /lighthouse/spec |
| Method | GET |
| Required Headers | Authorization |
| Typical Responses | 200 |
Command:
DATADIR=/var/lib/lighthouse
curl -X GET "http://localhost:5062/lighthouse/spec" -H "Authorization: Bearer $(cat ${DATADIR}/validators/api-token.txt)" | jq
Example Response Body
{
  "data": {
    "CONFIG_NAME": "hoodi",
    "PRESET_BASE": "mainnet",
    "TERMINAL_TOTAL_DIFFICULTY": "0",
    "TERMINAL_BLOCK_HASH": "0x0000000000000000000000000000000000000000000000000000000000000000",
    "TERMINAL_BLOCK_HASH_ACTIVATION_EPOCH": "18446744073709551615",
    "MIN_GENESIS_ACTIVE_VALIDATOR_COUNT": "16384",
    "MIN_GENESIS_TIME": "1742212800",
    "GENESIS_FORK_VERSION": "0x10000910",
    "GENESIS_DELAY": "600",
    "ALTAIR_FORK_VERSION": "0x20000910",
    "ALTAIR_FORK_EPOCH": "0",
    "BELLATRIX_FORK_VERSION": "0x30000910",
    "BELLATRIX_FORK_EPOCH": "0",
    "CAPELLA_FORK_VERSION": "0x40000910",
    "CAPELLA_FORK_EPOCH": "0",
    "DENEB_FORK_VERSION": "0x50000910",
    "DENEB_FORK_EPOCH": "0",
    "ELECTRA_FORK_VERSION": "0x60000910",
    "ELECTRA_FORK_EPOCH": "2048",
    "FULU_FORK_VERSION": "0x70000910",
    "FULU_FORK_EPOCH": "18446744073709551615",
    "SECONDS_PER_SLOT": "12",
    "SLOT_DURATION_MS": "12000",
    "SECONDS_PER_ETH1_BLOCK": "12",
    "MIN_VALIDATOR_WITHDRAWABILITY_DELAY": "256",
    "SHARD_COMMITTEE_PERIOD": "256",
    "ETH1_FOLLOW_DISTANCE": "2048",
    "SUBNETS_PER_NODE": "2",
    "INACTIVITY_SCORE_BIAS": "4",
    "INACTIVITY_SCORE_RECOVERY_RATE": "16",
    "EJECTION_BALANCE": "16000000000",
    "MIN_PER_EPOCH_CHURN_LIMIT": "4",
    "MAX_PER_EPOCH_ACTIVATION_CHURN_LIMIT": "8",
    "CHURN_LIMIT_QUOTIENT": "65536",
    "PROPOSER_SCORE_BOOST": "40",
    "DEPOSIT_CHAIN_ID": "560048",
    "DEPOSIT_NETWORK_ID": "560048",
    "DEPOSIT_CONTRACT_ADDRESS": "0x00000000219ab540356cbb839cbe05303d7705fa",
    "GAS_LIMIT_ADJUSTMENT_FACTOR": "1024",
    "MAX_PAYLOAD_SIZE": "10485760",
    "MAX_REQUEST_BLOCKS": "1024",
    "MIN_EPOCHS_FOR_BLOCK_REQUESTS": "33024",
    "TTFB_TIMEOUT": "5",
    "RESP_TIMEOUT": "10",
    "ATTESTATION_PROPAGATION_SLOT_RANGE": "32",
    "MAXIMUM_GOSSIP_CLOCK_DISPARITY_MILLIS": "500",
    "MESSAGE_DOMAIN_INVALID_SNAPPY": "0x00000000",
    "MESSAGE_DOMAIN_VALID_SNAPPY": "0x01000000",
    "ATTESTATION_SUBNET_PREFIX_BITS": "6",
    "MAX_REQUEST_BLOCKS_DENEB": "128",
    "MAX_REQUEST_BLOB_SIDECARS": "768",
    "MAX_REQUEST_DATA_COLUMN_SIDECARS": "16384",
    "MIN_EPOCHS_FOR_BLOB_SIDECARS_REQUESTS": "4096",
    "BLOB_SIDECAR_SUBNET_COUNT": "6",
    "MAX_BLOBS_PER_BLOCK": "6",
    "MIN_PER_EPOCH_CHURN_LIMIT_ELECTRA": "128000000000",
    "MAX_PER_EPOCH_ACTIVATION_EXIT_CHURN_LIMIT": "256000000000",
    "MAX_BLOBS_PER_BLOCK_ELECTRA": "9",
    "BLOB_SIDECAR_SUBNET_COUNT_ELECTRA": "9",
    "MAX_REQUEST_BLOB_SIDECARS_ELECTRA": "1152",
    "NUMBER_OF_COLUMNS": "128",
    "NUMBER_OF_CUSTODY_GROUPS": "128",
    "DATA_COLUMN_SIDECAR_SUBNET_COUNT": "128",
    "SAMPLES_PER_SLOT": "8",
    "CUSTODY_REQUIREMENT": "4",
    "MAX_COMMITTEES_PER_SLOT": "64",
    "TARGET_COMMITTEE_SIZE": "128",
    "MAX_VALIDATORS_PER_COMMITTEE": "2048",
    "SHUFFLE_ROUND_COUNT": "90",
    "HYSTERESIS_QUOTIENT": "4",
    "HYSTERESIS_DOWNWARD_MULTIPLIER": "1",
    "HYSTERESIS_UPWARD_MULTIPLIER": "5",
    "MIN_DEPOSIT_AMOUNT": "1000000000",
    "MAX_EFFECTIVE_BALANCE": "32000000000",
    "EFFECTIVE_BALANCE_INCREMENT": "1000000000",
    "MIN_ATTESTATION_INCLUSION_DELAY": "1",
    "SLOTS_PER_EPOCH": "32",
    "MIN_SEED_LOOKAHEAD": "1",
    "MAX_SEED_LOOKAHEAD": "4",
    "EPOCHS_PER_ETH1_VOTING_PERIOD": "64",
    "SLOTS_PER_HISTORICAL_ROOT": "8192",
    "MIN_EPOCHS_TO_INACTIVITY_PENALTY": "4",
    "EPOCHS_PER_HISTORICAL_VECTOR": "65536",
    "EPOCHS_PER_SLASHINGS_VECTOR": "8192",
    "HISTORICAL_ROOTS_LIMIT": "16777216",
    "VALIDATOR_REGISTRY_LIMIT": "1099511627776",
    "BASE_REWARD_FACTOR": "64",
    "WHISTLEBLOWER_REWARD_QUOTIENT": "512",
    "PROPOSER_REWARD_QUOTIENT": "8",
    "INACTIVITY_PENALTY_QUOTIENT": "67108864",
    "MIN_SLASHING_PENALTY_QUOTIENT": "128",
    "PROPORTIONAL_SLASHING_MULTIPLIER": "1",
    "MAX_PROPOSER_SLASHINGS": "16",
    "MAX_ATTESTER_SLASHINGS": "2",
    "MAX_ATTESTATIONS": "128",
    "MAX_DEPOSITS": "16",
    "MAX_VOLUNTARY_EXITS": "16",
    "INACTIVITY_PENALTY_QUOTIENT_ALTAIR": "50331648",
    "MIN_SLASHING_PENALTY_QUOTIENT_ALTAIR": "64",
    "PROPORTIONAL_SLASHING_MULTIPLIER_ALTAIR": "2",
    "SYNC_COMMITTEE_SIZE": "512",
    "EPOCHS_PER_SYNC_COMMITTEE_PERIOD": "256",
    "MIN_SYNC_COMMITTEE_PARTICIPANTS": "1",
    "INACTIVITY_PENALTY_QUOTIENT_BELLATRIX": "16777216",
    "MIN_SLASHING_PENALTY_QUOTIENT_BELLATRIX": "32",
    "PROPORTIONAL_SLASHING_MULTIPLIER_BELLATRIX": "3",
    "MAX_BYTES_PER_TRANSACTION": "1073741824",
    "MAX_TRANSACTIONS_PER_PAYLOAD": "1048576",
    "BYTES_PER_LOGS_BLOOM": "256",
    "MAX_EXTRA_DATA_BYTES": "32",
    "MAX_BLS_TO_EXECUTION_CHANGES": "16",
    "MAX_WITHDRAWALS_PER_PAYLOAD": "16",
    "MAX_VALIDATORS_PER_WITHDRAWALS_SWEEP": "16384",
    "MAX_BLOB_COMMITMENTS_PER_BLOCK": "4096",
    "FIELD_ELEMENTS_PER_BLOB": "4096",
    "MIN_ACTIVATION_BALANCE": "32000000000",
    "MAX_EFFECTIVE_BALANCE_ELECTRA": "2048000000000",
    "MIN_SLASHING_PENALTY_QUOTIENT_ELECTRA": "4096",
    "WHISTLEBLOWER_REWARD_QUOTIENT_ELECTRA": "4096",
    "PENDING_DEPOSITS_LIMIT": "134217728",
    "PENDING_PARTIAL_WITHDRAWALS_LIMIT": "134217728",
    "PENDING_CONSOLIDATIONS_LIMIT": "262144",
    "MAX_ATTESTER_SLASHINGS_ELECTRA": "1",
    "MAX_ATTESTATIONS_ELECTRA": "8",
    "MAX_DEPOSIT_REQUESTS_PER_PAYLOAD": "8192",
    "MAX_WITHDRAWAL_REQUESTS_PER_PAYLOAD": "16",
    "MAX_CONSOLIDATION_REQUESTS_PER_PAYLOAD": "2",
    "MAX_PENDING_PARTIALS_PER_WITHDRAWALS_SWEEP": "8",
    "MAX_PENDING_DEPOSITS_PER_EPOCH": "16",
    "FIELD_ELEMENTS_PER_CELL": "64",
    "FIELD_ELEMENTS_PER_EXT_BLOB": "8192",
    "KZG_COMMITMENTS_INCLUSION_PROOF_DEPTH": "4",
    "DOMAIN_BEACON_PROPOSER": "0x00000000",
    "DOMAIN_CONTRIBUTION_AND_PROOF": "0x09000000",
    "DOMAIN_DEPOSIT": "0x03000000",
    "DOMAIN_SELECTION_PROOF": "0x05000000",
    "VERSIONED_HASH_VERSION_KZG": "1",
    "TARGET_AGGREGATORS_PER_SYNC_SUBCOMMITTEE": "16",
    "DOMAIN_VOLUNTARY_EXIT": "0x04000000",
    "BLS_WITHDRAWAL_PREFIX": "0x00",
    "DOMAIN_APPLICATION_MASK": "0x00000001",
    "DOMAIN_SYNC_COMMITTEE_SELECTION_PROOF": "0x08000000",
    "DOMAIN_SYNC_COMMITTEE": "0x07000000",
    "COMPOUNDING_WITHDRAWAL_PREFIX": "0x02",
    "TARGET_AGGREGATORS_PER_COMMITTEE": "16",
    "SYNC_COMMITTEE_SUBNET_COUNT": "4",
    "DOMAIN_BEACON_ATTESTER": "0x01000000",
    "UNSET_DEPOSIT_REQUESTS_START_INDEX": "18446744073709551615",
    "FULL_EXIT_REQUEST_AMOUNT": "0",
    "DOMAIN_AGGREGATE_AND_PROOF": "0x06000000",
    "ETH1_ADDRESS_WITHDRAWAL_PREFIX": "0x01",
    "DOMAIN_RANDAO": "0x02000000"
  }
}
GET /lighthouse/auth
Fetch the filesystem path of the authorization token. Unlike the other endpoints this may be called without providing an authorization token.
This API is intended to be called from the same machine as the validator client, so that the token file may be read by a local user with access rights.
HTTP Specification
| Property | Specification |
|---|---|
| Path | /lighthouse/auth |
| Method | GET |
| Required Headers | - |
| Typical Responses | 200 |
Command:
curl http://localhost:5062/lighthouse/auth | jq
Example Response Body
{
    "token_path": "/home/karlm/.lighthouse/hoodi/validators/api-token.txt"
}
GET /lighthouse/validators
Lists all validators managed by this validator client.
HTTP Specification
| Property | Specification |
|---|---|
| Path | /lighthouse/validators |
| Method | GET |
| Required Headers | Authorization |
| Typical Responses | 200 |
Command:
DATADIR=/var/lib/lighthouse
curl -X GET "http://localhost:5062/lighthouse/validators/" -H "Authorization: Bearer $(cat ${DATADIR}/validators/api-token.txt)" | jq
Example Response Body
{
    "data": [
        {
            "enabled": true,
            "description": "validator one",
            "voting_pubkey": "0xb0148e6348264131bf47bcd1829590e870c836dc893050fd0dadc7a28949f9d0a72f2805d027521b45441101f0cc1cde"
        },
        {
            "enabled": true,
            "description": "validator two",
            "voting_pubkey": "0xb0441246ed813af54c0a11efd53019f63dd454a1fa2a9939ce3c228419fbe113fb02b443ceeb38736ef97877eb88d43a"
        },
        {
            "enabled": true,
            "description": "validator three",
            "voting_pubkey": "0xad77e388d745f24e13890353031dd8137432ee4225752642aad0a2ab003c86620357d91973b6675932ff51f817088f38"
        }
    ]
}
GET /lighthouse/validators/:voting_pubkey
Get a validator by their voting_pubkey.
HTTP Specification
| Property | Specification |
|---|---|
| Path | /lighthouse/validators/:voting_pubkey |
| Method | GET |
| Required Headers | Authorization |
| Typical Responses | 200, 400 |
Command:
DATADIR=/var/lib/lighthouse
curl -X GET "http://localhost:5062/lighthouse/validators/0xb0148e6348264131bf47bcd1829590e870c836dc893050fd0dadc7a28949f9d0a72f2805d027521b45441101f0cc1cde" -H "Authorization: Bearer $(cat ${DATADIR}/validators/api-token.txt)" | jq
Example Response Body
{
    "data": {
        "enabled": true,
        "voting_pubkey": "0xb0148e6348264131bf47bcd1829590e870c836dc893050fd0dadc7a28949f9d0a72f2805d027521b45441101f0cc1cde"
    }
}
PATCH /lighthouse/validators/:voting_pubkey
Update some values for the validator with voting_pubkey. Possible fields: enabled, gas_limit, builder_proposals, builder_boost_factor, prefer_builder_proposals
and graffiti. The following example updates a validator from enabled: true to enabled: false.
HTTP Specification
| Property | Specification |
|---|---|
| Path | /lighthouse/validators/:voting_pubkey |
| Method | PATCH |
| Required Headers | Authorization |
| Typical Responses | 200, 400 |
Example Request Body
{
    "enabled": false
}
Command:
DATADIR=/var/lib/lighthouse
curl -X PATCH "http://localhost:5062/lighthouse/validators/0xb0148e6348264131bf47bcd1829590e870c836dc893050fd0dadc7a28949f9d0a72f2805d027521b45441101f0cc1cde" \
-H "Authorization: Bearer $(cat ${DATADIR}/validators/api-token.txt)" \
-H "Content-Type: application/json" \
-d "{\"enabled\":false}" | jq
Example Response Body
null
A null response indicates that the request is successful. At the same time, lighthouse vc will log:
INFO Disabled validator                      voting_pubkey: 0xb0148e6348264131bf47bcd1829590e870c836dc893050fd0dadc7a28949f9d0a72f2805d027521b45441101f0cc1cde
INFO Modified key_cache saved successfully
POST /lighthouse/validators/
Create any number of new validators, all of which will share a common mnemonic generated by the server.
A BIP-39 mnemonic will be randomly generated and returned with the response.
This mnemonic can be used to recover all keys returned in the response.
Validators are generated from the mnemonic according to
EIP-2334, starting at index 0.
HTTP Specification
| Property | Specification |
|---|---|
| Path | /lighthouse/validators |
| Method | POST |
| Required Headers | Authorization |
| Typical Responses | 200 |
Example Request Body
[
    {
        "enable": true,
        "description": "validator_one",
        "deposit_gwei": "32000000000",
        "graffiti": "Mr F was here",
        "suggested_fee_recipient": "0xa2e334e71511686bcfe38bb3ee1ad8f6babcc03d"
    },
    {
        "enable": false,
        "description": "validator two",
        "deposit_gwei": "34000000000"
    }
]
Command:
DATADIR=/var/lib/lighthouse
curl -X POST http://localhost:5062/lighthouse/validators \
-H "Authorization: Bearer $(cat ${DATADIR}/validators/api-token.txt)" \
-H "Content-Type: application/json" \
-d '[
    {
        "enable": true,
        "description": "validator_one",
        "deposit_gwei": "32000000000",
        "graffiti": "Mr F was here",
        "suggested_fee_recipient": "0xa2e334e71511686bcfe38bb3ee1ad8f6babcc03d"
    },
    {
        "enable": false,
        "description": "validator two",
        "deposit_gwei": "34000000000"
    }
]' | jq
Example Response Body
{
    "data": {
        "mnemonic": "marine orchard scout label trim only narrow taste art belt betray soda deal diagram glare hero scare shadow ramp blur junior behave resource tourist",
        "validators": [
            {
                "enabled": true,
                "description": "validator_one",
                "voting_pubkey": "0x8ffbc881fb60841a4546b4b385ec5e9b5090fd1c4395e568d98b74b94b41a912c6101113da39d43c101369eeb9b48e50",
                "eth1_deposit_tx_data": "0x22895118000000000000000000000000000000000000000000000000000000000000008000000000000000000000000000000000000000000000000000000000000000e000000000000000000000000000000000000000000000000000000000000001206c68675776d418bfd63468789e7c68a6788c4dd45a3a911fe3d642668220bbf200000000000000000000000000000000000000000000000000000000000000308ffbc881fb60841a4546b4b385ec5e9b5090fd1c4395e568d98b74b94b41a912c6101113da39d43c101369eeb9b48e5000000000000000000000000000000000000000000000000000000000000000000000000000000000000000000000002000cf8b3abbf0ecd91f3b0affcc3a11e9c5f8066efb8982d354ee9a812219b17000000000000000000000000000000000000000000000000000000000000000608fbe2cc0e17a98d4a58bd7a65f0475a58850d3c048da7b718f8809d8943fee1dbd5677c04b5fa08a9c44d271d009edcd15caa56387dc217159b300aad66c2cf8040696d383d0bff37b2892a7fe9ba78b2220158f3dc1b9cd6357bdcaee3eb9f2",
                "deposit_gwei": "32000000000"
            },
            {
                "enabled": false,
                "description": "validator two",
                "voting_pubkey": "0xa9fadd620dc68e9fe0d6e1a69f6c54a0271ad65ab5a509e645e45c6e60ff8f4fc538f301781193a08b55821444801502",
                "eth1_deposit_tx_data": "0x22895118000000000000000000000000000000000000000000000000000000000000008000000000000000000000000000000000000000000000000000000000000000e00000000000000000000000000000000000000000000000000000000000000120b1911954c1b8d23233e0e2bf8c4878c8f56d25a4f790ec09a94520ec88af30490000000000000000000000000000000000000000000000000000000000000030a9fadd620dc68e9fe0d6e1a69f6c54a0271ad65ab5a509e645e45c6e60ff8f4fc538f301781193a08b5582144480150200000000000000000000000000000000000000000000000000000000000000000000000000000000000000000000002000a96df8b95c3ba749265e48a101f2ed974fffd7487487ed55f8dded99b617ad000000000000000000000000000000000000000000000000000000000000006090421299179824950e2f5a592ab1fdefe5349faea1e8126146a006b64777b74cce3cfc5b39d35b370e8f844e99c2dc1b19a1ebd38c7605f28e9c4540aea48f0bc48e853ae5f477fa81a9fc599d1732968c772730e1e47aaf5c5117bd045b788e",
                "deposit_gwei": "34000000000"
            }
        ]
    }
}
lighthouse vc will log:
INFO Enabled validator                      voting_pubkey: 0x8ffbc881fb60841a4546b4b385ec5e9b5090fd1c4395e568d98b74b94b41a912c6101113da39d43c101369eeb9b48e50, signing_method: local_keystore
INFO Modified key_cache saved successfully
INFO Disabled validator                     voting_pubkey: 0xa9fadd620dc68e9fe0d6e1a69f6c54a0271ad65ab5a509e645e45c6e60ff8f4fc538f301781193a08b55821444801502
POST /lighthouse/validators/keystore
Import a keystore into the validator client.
HTTP Specification
| Property | Specification |
|---|---|
| Path | /lighthouse/validators/keystore |
| Method | POST |
| Required Headers | Authorization |
| Typical Responses | 200 |
Example Request Body
{
  "enable": true,
  "password": "mypassword",
  "keystore": {
    "crypto": {
      "kdf": {
        "function": "scrypt",
        "params": {
          "dklen": 32,
          "n": 262144,
          "r": 8,
          "p": 1,
          "salt": "445989ec2f332bb6099605b4f1562c0df017488d8d7fb3709f99ebe31da94b49"
        },
        "message": ""
      },
      "checksum": {
        "function": "sha256",
        "params": {

        },
        "message": "abadc1285fd38b24a98ac586bda5b17a8f93fc1ff0778803dc32049578981236"
      },
      "cipher": {
        "function": "aes-128-ctr",
        "params": {
          "iv": "65abb7e1d02eec9910d04299cc73efbe"
        },
        "message": "6b7931a4447be727a3bb5dc106d9f3c1ba50671648e522f213651d13450b6417"
      }
    },
    "uuid": "5cf2a1fb-dcd6-4095-9ebf-7e4ee0204cab",
    "path": "m/12381/3600/0/0/0",
    "pubkey": "b0d2f05014de27c6d7981e4a920799db1c512ee7922932be6bf55729039147cf35a090bd4ab378fe2d133c36cbbc9969",
    "version": 4,
    "description": ""
  }
}
We can use JSON to String Converter so that the above data can be properly presented as a command. The command is as below:
Command:
DATADIR=/var/lib/lighthouse
curl -X POST http://localhost:5062/lighthouse/validators/keystore \
-H "Authorization: Bearer $(cat ${DATADIR}/validators/api-token.txt)" \
-H "Content-Type: application/json" \
-d "{\"enable\":true,\"password\":\"mypassword\",\"keystore\":{\"crypto\":{\"kdf\":{\"function\":\"scrypt\",\"params\":{\"dklen\":32,\"n\":262144,\"r\":8,\"p\":1,\"salt\":\"445989ec2f332bb6099605b4f1562c0df017488d8d7fb3709f99ebe31da94b49\"},\"message\":\"\"},\"checksum\":{\"function\":\"sha256\",\"params\":{},\"message\":\"abadc1285fd38b24a98ac586bda5b17a8f93fc1ff0778803dc32049578981236\"},\"cipher\":{\"function\":\"aes-128-ctr\",\"params\":{\"iv\":\"65abb7e1d02eec9910d04299cc73efbe\"},\"message\":\"6b7931a4447be727a3bb5dc106d9f3c1ba50671648e522f213651d13450b6417\"}},\"uuid\":\"5cf2a1fb-dcd6-4095-9ebf-7e4ee0204cab\",\"path\":\"m/12381/3600/0/0/0\",\"pubkey\":\"b0d2f05014de27c6d7981e4a920799db1c512ee7922932be6bf55729039147cf35a090bd4ab378fe2d133c36cbbc9969\",\"version\":4,\"description\":\"\"}}" | jq
As this is an example for demonstration, the above command will return InvalidPassword. However, with a keystore file and correct password, running the above command will import the keystore to the validator client. An example of a success message is shown below:
Example Response Body
{
  "data": {
    "enabled": true,
    "description": "",
    "voting_pubkey": "0xb0d2f05014de27c6d7981e4a920799db1c512ee7922932be6bf55729039147cf35a090bd4ab378fe2d133c36cbbc9969"
  }
}
lighthouse vc will log:
INFO Enabled validator                      voting_pubkey: 0xb0d2f05014de27c6d7981e4a920799db1c512ee7922932be6bf55729039147cf35a090bd4ab378fe2d133c36cbb, signing_method: local_keystore
INFO Modified key_cache saved successfully
POST /lighthouse/validators/mnemonic
Create any number of new validators, all of which will share a common mnemonic.
The supplied BIP-39 mnemonic will be used to generate the validator keys
according to EIP-2334, starting at
the supplied key_derivation_path_offset. For example, if
key_derivation_path_offset = 42, then the first validator voting key will be
generated with the path m/12381/3600/i/42.
HTTP Specification
| Property | Specification |
|---|---|
| Path | /lighthouse/validators/mnemonic |
| Method | POST |
| Required Headers | Authorization |
| Typical Responses | 200 |
Example Request Body
{
    "mnemonic": "theme onion deal plastic claim silver fancy youth lock ordinary hotel elegant balance ridge web skill burger survey demand distance legal fish salad cloth",
    "key_derivation_path_offset": 0,
    "validators": [
        {
            "enable": true,
            "description": "validator_one",
            "deposit_gwei": "32000000000"
        }
    ]
}
Command:
DATADIR=/var/lib/lighthouse
curl -X POST http://localhost:5062/lighthouse/validators/mnemonic \
-H "Authorization: Bearer $(cat ${DATADIR}/validators/api-token.txt)" \
-H "Content-Type: application/json" \
-d '{"mnemonic":" theme onion deal plastic claim silver fancy youth lock ordinary hotel elegant balance ridge web skill burger survey demand distance legal fish salad cloth","key_derivation_path_offset":0,"validators":[{"enable":true,"description":"validator_one","deposit_gwei":"32000000000"}]}' | jq
Example Response Body
{
    "data": [
        {
            "enabled": true,
            "description": "validator_one",
            "voting_pubkey": "0xa062f95fee747144d5e511940624bc6546509eeaeae9383257a9c43e7ddc58c17c2bab4ae62053122184c381b90db380",
            "eth1_deposit_tx_data": "0x22895118000000000000000000000000000000000000000000000000000000000000008000000000000000000000000000000000000000000000000000000000000000e00000000000000000000000000000000000000000000000000000000000000120a57324d95ae9c7abfb5cc9bd4db253ed0605dc8a19f84810bcf3f3874d0e703a0000000000000000000000000000000000000000000000000000000000000030a062f95fee747144d5e511940624bc6546509eeaeae9383257a9c43e7ddc58c17c2bab4ae62053122184c381b90db3800000000000000000000000000000000000000000000000000000000000000000000000000000000000000000000000200046e4199f18102b5d4e8842d0eeafaa1268ee2c21340c63f9c2cd5b03ff19320000000000000000000000000000000000000000000000000000000000000060b2a897b4ba4f3910e9090abc4c22f81f13e8923ea61c0043506950b6ae174aa643540554037b465670d28fa7b7d716a301e9b172297122acc56be1131621c072f7c0a73ea7b8c5a90ecd5da06d79d90afaea17cdeeef8ed323912c70ad62c04b",
            "deposit_gwei": "32000000000"
        }
    ]
}
lighthouse vc will log:
INFO Enabled validator                       voting_pubkey: 0xa062f95fee747144d5e511940624bc6546509eeaeae9383257a9c43e7ddc58c17c2bab4ae62053122184c381b90db380, signing_method: local_keystore
INFO Modified key_cache saved successfully
POST /lighthouse/validators/web3signer
Create any number of new validators, all of which will refer to a Web3Signer server for signing.
HTTP Specification
| Property | Specification |
|---|---|
| Path | /lighthouse/validators/web3signer |
| Method | POST |
| Required Headers | Authorization |
| Typical Responses | 200, 400 |
Example Request Body
[
    {
        "enable": true,
        "description": "validator_one",
        "graffiti": "Mr F was here",
        "suggested_fee_recipient": "0xa2e334e71511686bcfe38bb3ee1ad8f6babcc03d",
        "voting_public_key": "0xa062f95fee747144d5e511940624bc6546509eeaeae9383257a9c43e7ddc58c17c2bab4ae62053122184c381b90db380",
        "builder_proposals": true,
        "url": "http://path-to-web3signer.com",
        "root_certificate_path": "/path/to/certificate.pem",
        "client_identity_path": "/path/to/identity.p12",
        "client_identity_password": "pass",
        "request_timeout_ms": 12000
    }
]
Some of the fields above may be omitted or nullified to obtain default values (e.g., graffiti, request_timeout_ms).
Command:
DATADIR=/var/lib/lighthouse
curl -X POST http://localhost:5062/lighthouse/validators/web3signer \
-H "Authorization: Bearer $(cat ${DATADIR}/validators/api-token.txt)" \
-H "Content-Type: application/json" \
-d "[{\"enable\":true,\"description\":\"validator_one\",\"graffiti\":\"Mr F was here\",\"suggested_fee_recipient\":\"0xa2e334e71511686bcfe38bb3ee1ad8f6babcc03d\",\"voting_public_key\":\"0xa062f95fee747144d5e511940624bc6546509eeaeae9383257a9c43e7ddc58c17c2bab4ae62053122184c381b90db380\",\"builder_proposals\":true,\"url\":\"http://path-to-web3signer.com\",\"root_certificate_path\":\"/path/to/certificate.pem\",\"client_identity_path\":\"/path/to/identity.p12\",\"client_identity_password\":\"pass\",\"request_timeout_ms\":12000}]"
Example Response Body
null
A null response indicates that the request is successful. At the same time, lighthouse vc will log:
INFO Enabled validator voting_pubkey: 0xa062f95fee747144d5e511940624bc6546509eeaeae9383257a9c43e7ddc58c17c2bab4ae62053122184c381b90db380, signing_method: remote_signer
GET /lighthouse/logs
Provides a subscription to receive logs as Server Side Events. Currently the logs emitted are INFO level or higher.
HTTP Specification
| Property | Specification |
|---|---|
| Path | /lighthouse/logs |
| Method | GET |
| Required Headers | None |
| Typical Responses | 200 |
Example Response Body
{
  "data": {
	  "time": "Mar 13 15:26:53",
	  "level": "INFO",
	  "msg": "Connected to beacon node(s)",
	  "service": "notifier",
	  "synced": 1,
	  "available": 1,
	  "total": 1
  }
}
GET /lighthouse/beacon/health
Provides information about the sync status and execution layer health of each connected beacon node. For more information about how to interpret the beacon node health, see Fallback Health.
HTTP Specification
| Property | Specification |
|---|---|
| Path | /lighthouse/beacon/health |
| Method | GET |
| Required Headers | Authorization |
| Typical Responses | 200, 400 |
Command:
DATADIR=/var/lib/lighthouse
curl -X GET http://localhost:5062/lighthouse/beacon/health \
 -H "Authorization: Bearer $(cat ${DATADIR}/validators/api-token.txt)" | jq
Example Response Body
{
    "data": {
        "beacon_nodes": [
            {
                "index": 0,
                "endpoint": "http://localhost:5052",
                "health": {
                    "user_index": 0,
                    "head": 10500000,
                    "optimistic_status": "No",
                    "execution_status": "Healthy",
                    "health_tier": {
                        "tier": 1,
                        "sync_distance": 0,
                        "distance_tier": "Synced"
                    }
                }
            },
            {
                "index": 1,
                "endpoint": "http://fallbacks-r.us",
                "health": "Offline"
            }
        ]
    }
}
POST /lighthouse/beacon/update
Updates the list of beacon nodes originally specified by the --beacon-nodes CLI flag.
Use this endpoint when you don’t want to restart the VC to add, remove or reorder beacon nodes.
HTTP Specification
| Property | Specification |
|---|---|
| Path | /lighthouse/beacon/update |
| Method | POST |
| Required Headers | Authorization |
| Typical Responses | 200, 400 |
Example Request Body
{
    "beacon_nodes": [
        "http://beacon-node1:5052",
        "http://beacon-node2:5052",
        "http://beacon-node3:5052"
    ]
}
Command:
DATADIR=/var/lib/lighthouse
curl -X POST http://localhost:5062/lighthouse/beacon/update \
 -H "Authorization: Bearer $(cat ${DATADIR}/validators/api-token.txt)" \
 -H "Content-Type: application/json" \
 -d "{\"beacon_nodes\":[\"http://beacon-node1:5052\",\"http://beacon-node2:5052\",\"http://beacon-node3:5052\"]}"
Example Response Body
{
    "data": {
        "new_beacon_nodes_list": [
            "http://beacon-node1:5052",
            "http://beacon-node2:5052",
            "http://beacon-node3:5052"
        ]
    }
}
If successful, the response will be a copy of the new list included in the request.
If unsuccessful, an error will be shown and the beacon nodes list will not be updated.
You can verify the results of the endpoint by using the /lighthouse/beacon/health endpoint.
Validator Client API: Authorization Header
Overview
The validator client HTTP server requires that all requests have the following HTTP header:
- Name:
Authorization - Value:
Bearer <api-token>
Where <api-token> is a string that can be obtained from the validator client
host. Here is an example of the Authorization header:
Authorization: Bearer hGut6B8uEujufDXSmZsT0thnxvdvKFBvh
Obtaining the API token
The API token is stored as a file in the validators directory. For most users
this is ~/.lighthouse/{network}/validators/api-token.txt, unless overridden using the
--http-token-path CLI parameter. Here’s an
example using the cat command to print the token for mainnet to the terminal, but any
text editor will suffice:
cat ~/.lighthouse/mainnet/validators/api-token.txt
hGut6B8uEujufDXSmZsT0thnxvdvKFBvh
When starting the validator client it will output a log message containing the path to the file containing the api token.
Sep 28 19:17:52.615 INFO HTTP API started api_token_file: "$HOME/hoodi/validators/api-token.txt", listen_address: 127.0.0.1:5062
The path to the API token may also be fetched from the HTTP API itself (this endpoint is the only one accessible without the token):
curl http://localhost:5062/lighthouse/auth
Response:
{
    "token_path": "/home/karlm/.lighthouse/hoodi/validators/api-token.txt"
}
Example
Here is an example curl command using the API token in the Authorization header:
curl localhost:5062/lighthouse/version -H "Authorization: Bearer hGut6B8uEujufDXSmZsT0thnxvdvKFBvh"
The server should respond with its version:
{"data":{"version":"Lighthouse/v0.2.11-fc0654fbe+/x86_64-linux"}}
Prometheus Metrics
Lighthouse provides an extensive suite of metrics and monitoring in the Prometheus export format via a HTTP server built into Lighthouse.
These metrics are generally consumed by a Prometheus server and displayed via a Grafana dashboard. These components are available in a docker-compose format at sigp/lighthouse-metrics.
Beacon Node Metrics
By default, these metrics are disabled but can be enabled with the --metrics
flag. Use the --metrics-address, --metrics-port and
--metrics-allow-origin flags to customize the metrics server.
Example
Start a beacon node with the metrics server enabled:
lighthouse bn --metrics
Check to ensure that the metrics are available on the default port:
curl localhost:5054/metrics
Validator Client Metrics
By default, these metrics are disabled but can be enabled with the --metrics
flag. Use the --metrics-address, --metrics-port and
--metrics-allow-origin flags to customize the metrics server.
Example
Start a validator client with the metrics server enabled:
lighthouse vc --metrics
Check to ensure that the metrics are available on the default port:
curl localhost:5064/metrics
Remote Monitoring
Lighthouse has the ability to send a subset of metrics to a remote server for collection. Presently the main server offering remote monitoring is beaconcha.in. Instructions for setting this up can be found in beaconcha.in’s docs:
The Lighthouse flag for setting the monitoring URL is --monitoring-endpoint.
When sending metrics to a remote server you should be conscious of security:
- Only use a monitoring service that you trust: you are sending detailed information about your validators and beacon node to this service which could be used to track you.
- Always use an HTTPS URL to prevent the traffic being intercepted in transit.
The specification for the monitoring endpoint can be found here:
Note: the similarly named Validator Monitor feature is entirely independent of remote metric monitoring.
Update Period
You can adjust the frequency at which Lighthouse sends metrics to the remote server using the
--monitoring-endpoint-period flag. It takes an integer value in seconds, defaulting to 60
seconds.
lighthouse bn --monitoring-endpoint-period 60 --monitoring-endpoint "https://url"
Increasing the monitoring period between can be useful if you are running into rate limits when posting large amounts of data for multiple nodes.
Lighthouse UI (Siren)
Documentation for Siren users and developers.
Siren is a user interface built for Lighthouse that connects to a Lighthouse Beacon Node and a Lighthouse Validator Client to monitor performance and display key validator metrics.
The UI is currently in active development. It resides in the Siren repository.
Topics
See the following Siren specific topics for more context-specific information:
- Installation Guide - Explanation of how to setup and configure Siren.
- Authentication Guide - Explanation of how Siren authentication works and protects validator actions.
- Usage - Details various Siren components.
- FAQs - Frequently Asked Questions.
Contributing
If you find an issue or bug or would otherwise like to help out with the development of the Siren project, please submit issues and PRs to the Siren repository.
📦 Installation
Siren supports any operating system that supports containers and/or NodeJS 18, this includes Linux, MacOS, and Windows. The recommended way of running Siren is by launching the docker container.
Version Requirement
To ensure proper functionality, the Siren app requires Lighthouse v4.3.0 or higher. You can find these versions on the releases page of the Lighthouse repository.
Configuration
Siren requires a connection to both a Lighthouse Validator Client and a Lighthouse Beacon Node.
Both the Beacon node and the Validator client need to have their HTTP APIs enabled.
These ports should be accessible from Siren. This means adding the flag --http on both beacon node and validator client.
To enable the HTTP API for the beacon node, utilize the --gui CLI flag. This action ensures that the HTTP API can be accessed by other software on the same machine. It also enables the validator monitoring.
The Beacon Node must be run with the
--guiflag set.
Running Siren with Docker Compose (Recommended)
We recommend running Siren’s container next to your beacon node (on the same server), as it’s essentially a webapp that you can access with any browser.
-
Clone the Siren repository:
git clone https://github.com/sigp/siren cd siren -
Copy the example
.env.examplefile to.env:cp .env.example .env -
Edit the
.envfile filling in the required fields. A beacon node and validator url needs to be specified as well as the validator clientsAPI_TOKEN, which can be obtained from theValidator Client Authorization Header. Note that the HTTP API ports must be accessible from within docker and cannot just be listening on localhost. This means using the--http-address 0.0.0.0flag on the beacon node and, and both--http-address 0.0.0.0and--unencrypted-http-transportflags on the validator client. -
Run the containers with docker compose
docker compose up -d -
You should now be able to access siren at the url (provided SSL is enabled):
https://localhost
Note: If running on a remote host and the port is exposed, you can access Siren remotely via
https://<IP-OF-REMOTE-HOST>
Running Siren in Docker
-
Create a directory to run Siren:
cd ~ mkdir Siren cd Siren -
Create a configuration file in the
Sirendirectory:nano .envand insert the following fields to the.envfile. The field values are given here as an example, modify the fields as necessary. For example, theAPI_TOKENcan be obtained fromValidator Client Authorization Header.A full example with all possible configuration options can be found here.
BEACON_URL=http://localhost:5052 VALIDATOR_URL=http://localhost:5062 API_TOKEN=R6YhbDO6gKjNMydtZHcaCovFbQ0izq5Hk SESSION_PASSWORD=your_password -
You can now start Siren with:
docker run -ti --name siren --env-file $PWD/.env -p 443:443 sigp/siren
Note: If you have only exposed your HTTP API ports on the Beacon Node and Validator client to localhost, i.e via –http-address 127.0.0.1, you must add
--add-host=host.docker.internal:host-gatewayto the docker command to allow docker to access the hosts localhost. Alternatively, you should expose the HTTP API to the IP address of the host or0.0.0.0
-
Siren should be accessible at the url:
https://localhost
Note: If running on a remote host and the port is exposed, you can access Siren remotely via
https://<IP-OF-REMOTE-HOST>
Possible Docker Errors
Note that when use SSL, you will get an SSL warning. Advanced users can mount their own certificates or disable SSL altogether, see the SSL Certificates section below. This error is safe to ignore.
If it fails to start, an error message will be shown. For example, the error
http://localhost:5062 unreachable, check settings and connection
means that the validator client is not running, or the --http flag is not provided, or otherwise inaccessible from within the container. Another common error is:
validator api issue, server response: 403
which means that the API token is incorrect. Check that you have provided the correct token in the field API_TOKEN in .env.
When Siren has successfully started, you should see the log LOG [NestApplication] Nest application successfully started +118ms, indicating that Siren has started (in the docker logs).
Note: We recommend setting a strong password when running Siren to protect it from unauthorized access.
Building From Source
Docker
The docker image can be built with the following command:
docker build -f Dockerfile -t siren .
Building locally
To build from source, ensure that your system has Node v18.18 and yarn installed.
Build and run the backend
Navigate to the backend directory cd backend. Install all required Node packages by running yarn. Once the installation is complete, compile the backend with yarn build. Deploy the backend in a production environment, yarn start:production. This ensures optimal performance.
Build and run the frontend
After initializing the backend, return to the root directory. Install all frontend dependencies by executing yarn. Build the frontend using yarn build. Start the frontend production server with yarn start.
This will allow you to access siren at http://localhost:3300 by default.
Advanced configuration
About self-signed SSL certificates
By default, internally, Siren is running on port 80 (plain, behind nginx), port 3300 (plain, direct) and port 443 (with SSL, behind nginx)). Siren will generate and use a self-signed certificate on startup. This will generate a security warning when you try to access the interface. We recommend to only disable SSL if you would access Siren over a local LAN or otherwise highly trusted or encrypted network (i.e. VPN).
Generating persistent SSL certificates and installing them to your system
mkcert is a tool that makes it super easy to generate a self-signed certificate that is trusted by your browser.
To use it for siren, install it following the instructions. Then, run mkdir certs; mkcert -cert-file certs/cert.pem -key-file certs/key.pem 127.0.0.1 localhost (add or replace any IP or hostname that you would use to access it at the end of this command).
To use these generated certificates, add this to to your docker run command: -v $PWD/certs:/certs
The nginx SSL config inside Siren’s container expects 3 files: /certs/cert.pem /certs/key.pem /certs/key.pass. If /certs/cert.pem does not exist, it will generate a self-signed certificate as mentioned above. If /certs/cert.pem does exist, it will attempt to use your provided or persisted certificates.
Configuration through environment variables
For those who prefer to use environment variables to configure Siren instead of using an .env file, this is fully supported. In some cases this may even be preferred.
Docker installed through snap
If you installed Docker through a snap (i.e. on Ubuntu), Docker will have trouble accessing the .env file. In this case it is highly recommended to pass the config to the container with environment variables.
Note that the defaults in .env.example will be used as fallback, if no other value is provided.
Authentication
Siren Session
For enhanced security, Siren will require users to authenticate with their session password to access the dashboard. This is crucial because Siren now includes features that can permanently alter the status of the user’s validators. The session password must be set during the installation process before running the Docker or local build, either in an .env file or via Docker flags.
Protected Actions
Prior to executing any sensitive validator action, Siren will request authentication of the session password. If you wish to update your password please refer to the Siren installation process.
Usage
Siren offers many features ranging from diagnostics, logs, validator management including graffiti and exiting. Below we will describe all major features and how to take advantage of Siren to the fullest.
Dashboard
Siren’s dashboard view provides a summary of all performance and key validator metrics. Sync statuses, uptimes, accumulated rewards, hardware and network metrics are all consolidated on the dashboard for evaluation.
Account Earnings
The account earnings component accumulates reward data from all registered validators providing a summation of total rewards earned while staking. Given current conversion rates, this component also converts your balance into your selected fiat currency.
Below in the earning section, you can also view your total earnings or click the adjacent buttons to view your estimated earnings given a specific time frame based on current device and network conditions.
Keep in mind, if validators have updated (0x01) withdrawal credentials, this balance will only reflect the balance before the accumulated rewards are paid out and will subsequently be reset to a zero balance and start accumulating rewards until the next reward payout.
Validator Table
The validator table component is a list of all registered validators, which includes data such as name, index, total balance, earned rewards and current status. Each validator row also contains a link to a detailed data modal and additional data provided by Beaconcha.in.
Validator Balance Chart
The validator balance component is a graphical representation of each validator balance over the latest 10 epochs. Take note that only active validators are rendered in the chart visualization.
By clicking on the chart component you can filter selected validators in the render. This will allow for greater resolution in the rendered visualization.
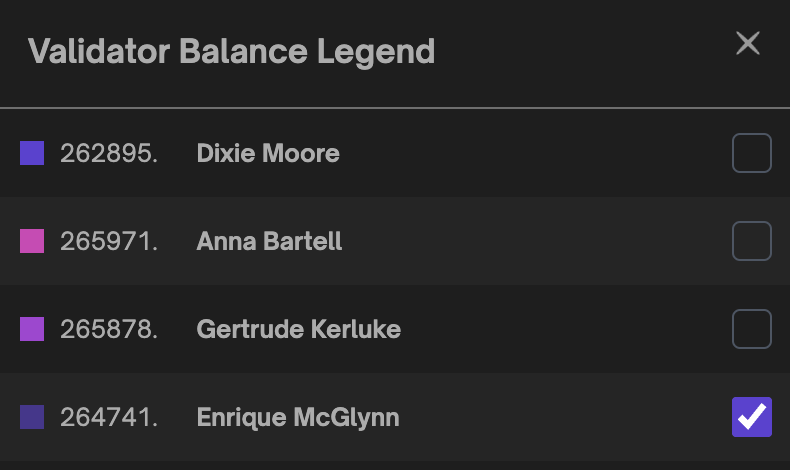
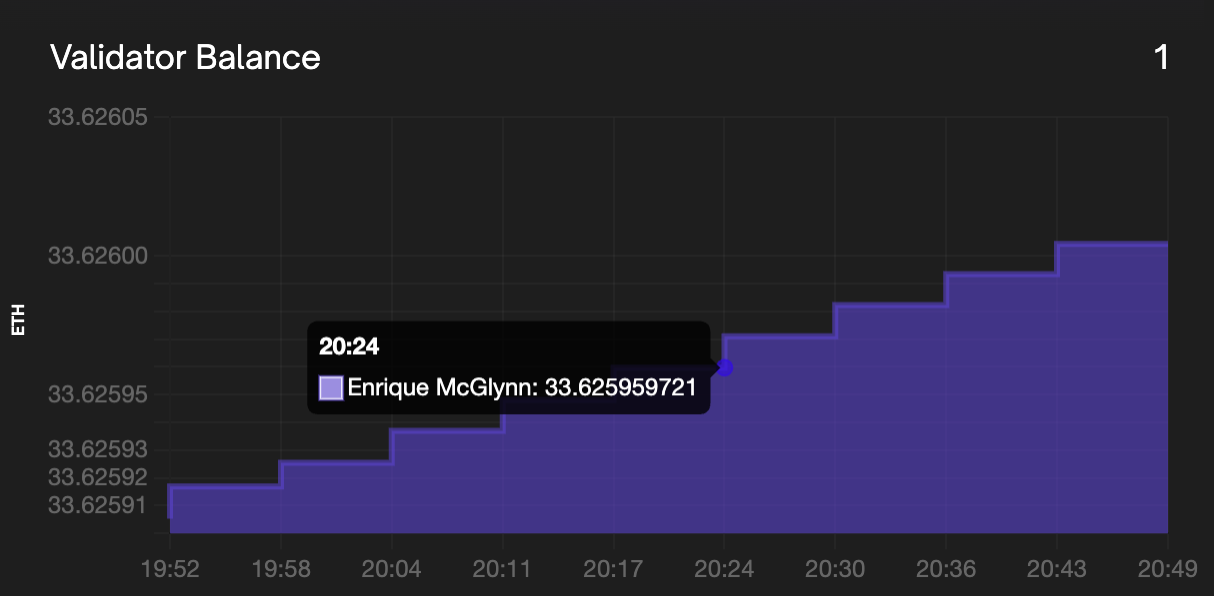
Hardware Usage and Device Diagnostics
The hardware usage component gathers information about the device the Beacon Node is currently running. It displays the Disk usage, CPU metrics and memory usage of the Beacon Node device. The device diagnostics component provides the sync status of the execution client and beacon node.
Log Statistics
The log statistics present an hourly combined rate of critical, warning, and error logs from the validator client and beacon node. This analysis enables informed decision-making, troubleshooting, and proactive maintenance for optimal system performance. You can view the full log outputs in the logs page by clicking view all at the top of the component.
Validator Management
Siren’s validator management view provides a detailed overview of all validators with options to deposit to and/or add new validators. Each validator table row displays the validator name, index, balance, rewards, status and all available actions per validator.
Validator Modal
Clicking the validator icon activates a detailed validator modal component. This component also allows users to trigger validator actions and as well to view and update validator graffiti. Each modal contains the validator total income with hourly, daily and weekly earnings estimates.
Validator BLS Withdrawal Credentials
When Siren detects that your validator is using outdated BLS withdrawal credentials, it will temporarily block any further actions by the validator. You can identify if your validator does not meet this requirement by an exclamation mark on the validator icon or a message in the validator modal that provides instructions for updating the credentials.
If you wish to convert your withdrawal address, Siren will prompt you to provide a valid BLS Change JSON. This JSON can include a single validator or multiple validators for your convenience. Upon validation, the process will initiate, during which your validator will enter a processing state. Once the process is complete, you will regain access to all other validator actions.
Validator Edit
Siren makes it possible to edit your validator’s display name by clicking the edit icon in the validator table. Note: This does not change the validator name, but gives it an alias you can use to identify each validator easily.
These settings are stored in your browser’s localStorage
Validator Exit
Siren provides the ability to exit/withdraw your validators via the validator management page. In the validator modal, click the validator action withdraw validator. Siren will then prompt you with additional information before requiring you to validate your session password. Remember, this action is irreversible and will lock your validator into an exiting state. Please take extra caution.
Deposit and Import new Validators
Siren’s deposit flow aims to create a smooth and easy process for depositing and importing a new Lighthouse validator. The process is separated into 6 main steps:
Validator Setup
- First, select the number of validators you wish to create, ensuring you connect a wallet with sufficient funds to cover each validator deposit. For each validator candidate, you can set a custom name and optionally enable the
0x02withdrawal credential flag, which indicates to the deposit contract that the validator will compound and have an increasedMAX_EFFECTIVE_BALANCE.
Phrase Verification
- Enter a valid mnemonic phrase to generate corresponding deposit JSON and keystore objects. This is a sensitive step; copying and pasting your mnemonic phrase is not recommended. This information is never stored or transmitted through any communication channel.
Mnemonic Indexing
- The mnemonic index is as important as the mnemonic phrase; reusing existing or previously exited indices directs deposits to existing validators and may require additional steps to recover those funds. Each index combined with the mnemonic phrase generates a deterministic public key, which Siren validates by checking against the Beacon Node. Since newly submitted deposits may not immediately appear on the Beacon Node, Siren provides Beaconcha.in links for secondary confirmation.
Withdrawal Credentials
- Next, set the withdrawal and suggested fee recipient addresses. In the basic view, you can conveniently set both values to the same address, or switch to the advanced view to specify them separately. You may apply these settings uniformly to all validators or individually per candidate. Each value can be verified by connecting the relevant wallet and signing a valid message. Skipping verification is not recommended, as the withdrawal address will receive the staked validator funds and cannot be changed later.
Keystore Authentication
- To securely import your validator post-deposit, set a strong keystore password. You may apply the same password across all candidates or individually assign passwords for each.
Sign and Deposit
- Finally, complete each deposit by connecting a wallet with sufficient funds to Siren and signing the transaction. Upon successful inclusion of the deposit in the next block, Siren automatically imports the validator using the provided keystore credentials. Once imported, your validator will appear in Siren when the Beacon Node processes the transaction and enters the deposit queue. Processing time may vary depending on the queue length, potentially taking several days. Siren maintains a record of the deposit transaction for your review during this period.
Consolidate Validator
EIP-7251 increases the MAX_EFFECTIVE_BALANCE limit up to 2048 ETH, allowing validators with 0x02 withdrawal credentials to consolidate funds from multiple exited validators. Siren facilitates requests to a consolidation contract, enabling validators to upgrade their withdrawal credentials and merge several validators into one compounding target validator.
Eligibility requirements for consolidation
-
Validators must have at least
0x01withdrawal credentials. Validators with0x00credentials must first perform a BLS Execution Change. -
Target validators with
0x01withdrawal credentials must initiate a self-consolidation request to upgrade credentials to0x02, enabling them to accept funds and benefit from the increased balance cap. -
Source validators must first have been active long enough to become eligible for exit and must not have any pending withdrawal requests.
Post-consolidation
-
All source validators will exit automatically, and their funds will be transferred to the target validator.
-
Validators consolidated under the new credentials (
0x02) will no longer participate in automatic partial withdrawal sweeps. Instead, withdrawal requests must be explicitly submitted to the withdrawal contract as defined inEIP-7002.
Partial Validator Withdrawal
EIP-7002 enables partial withdrawals from validators with 0x02 withdrawal credentials and balances exceeding the MIN_ACTIVATION_BALANCE. Additionally, validators with upgraded 0x02 credentials will no longer participate in the automatic withdrawal sweeps, making this tool very valuable for Lighthouse validators.
In order to request a partial withdrawal you must have access to the wallet set in the validator’s withdrawal credentials and enough ETH to cover the withdrawal request and gas fees. Connect this wallet to the Siren dashboard to start withdrawing funds. All pending withdrawals will be visible in the same view for your convenience.
Partial Validator Top-ups
If your validator’s EFFECTIVE_BALANCE drops, or you’ve upgraded to 0x02 compounding withdrawal credentials, you can add additional funds. Simply connect any wallet to Siren and enter the desired amount to deposit to your validator. Once prompted sign the deposit transaction and your funds will enter the deposit queue and processed by the Beacon Node.
Validator and Beacon Logs
The logs page provides users with the functionality to access and review recorded logs for both validators and beacons. Users can conveniently observe log severity, messages, timestamps, and any additional data associated with each log entry. The interface allows for seamless switching between validator and beacon log outputs, and incorporates useful features such as built-in text search and the ability to pause log feeds.
Additionally, users can obtain log statistics, which are also available on the main dashboard, thereby facilitating a comprehensive overview of the system’s log data. Please note that Siren is limited to storing and displaying only the previous 1000 log messages. This also means the text search is limited to the logs that are currently stored within Siren’s limit.
Settings
Siren’s settings view provides access to the application theme, version, display name, and important external links. If you experience any problems or have feature request, please follow the github and or discord links to get in touch.
Frequently Asked Questions
1. Are there any requirements to run Siren?
Yes, the most current Siren version requires Lighthouse v4.3.0 or higher to function properly. These releases can be found on the releases page of the Lighthouse repository.
2. Where can I find my API token?
The required API token may be found in the default data directory of the validator client. For more information please refer to the lighthouse ui configuration api token section.
3. How do I fix the Node Network Errors?
If you receive a red notification with a BEACON or VALIDATOR NODE NETWORK ERROR you can refer to the lighthouse ui installation.
4. How do I connect Siren to Lighthouse from a different computer on the same network?
Siren is a webapp, you can access it like any other website. We don’t recommend exposing it to the internet; if you require remote access a VPN or (authenticated) reverse proxy is highly recommended. That being said, it is entirely possible to have it published over the internet, how to do that goes well beyond the scope of this document but we want to emphasize once more the need for at least SSL encryption if you choose to do so.
5. How can I use Siren to monitor my validators remotely when I am not at home?
Most contemporary home routers provide options for VPN access in various ways. A VPN permits a remote computer to establish a connection with internal computers within a home network. With a VPN configuration in place, connecting to the VPN enables you to treat your computer as if it is part of your local home network. The connection process involves following the setup steps for connecting via another machine on the same network on the Siren configuration page and installation.
6. Does Siren support reverse proxy or DNS named addresses?
Yes, if you need to access your beacon or validator from an address such as https://merp-server:9909/eth2-vc you should configure Siren as follows:
VALIDATOR_URL=https://merp-server:9909/eth2-vc
7. Why doesn’t my validator balance graph show any data?
If your graph is not showing data, it usually means your validator node is still caching data. The application must wait at least 3 epochs before it can render any graphical visualizations. This could take up to 20min.
8. How can I connect to Siren using Reown (previously WalletConnect)?
Depending on your configuration, building with Docker or Local, you will need to include the NEXT_PUBLIC_WALLET_CONNECT_ID variable in your .env file. To obtain your Wallet Connect project ID, please follow the instructions on their website. After providing a valid project ID, the Wallet Connect option should appear in the wallet connector dropdown.
9. I can’t log in to Siren even with correct credentials?
When you deploy Siren via Docker, NODE_ENV defaults to production, which enforces HTTPS‑only access. If you access the dashboard over HTTP, the authentication cookie can’t be set and login will fail. To allow HTTP access, unset NODE_ENV or set it to development.
Advanced Usage
Want to get into the nitty-gritty of Lighthouse configuration? Looking for something not covered elsewhere?
This section provides detailed information about configuring Lighthouse for specific use cases, and tips about how things work under the hood.
- Checkpoint Sync: quickly sync the beacon chain to perform validator duties.
- Custom Data Directories: modify the data directory to your preferred location.
- Proposer Only Beacon Nodes: beacon node only for proposer duty for increased anonymity.
- Remote Signing with Web3Signer: don’t want to store your keystore in local node? Use web3signer.
- Database Configuration: understanding space-time trade-offs in the database.
- Database Migrations: have a look at all previous Lighthouse database scheme versions.
- Key Recovery: explore how to recover wallet and validator with Lighthouse.
- Advanced Networking: open your ports to have a diverse and healthy set of peers.
- Running a Slasher: contribute to the health of the network by running a slasher.
- Redundancy: want to have more than one beacon node as backup? This is for you.
- Release Candidates: latest release of Lighthouse to get feedback from users.
- Maximal Extractable Value: use external builders for a potential higher rewards during block proposals
- Late Block Re-orgs: read information about Lighthouse late block re-orgs.
- Blobs: information about blobs
Checkpoint Sync
Lighthouse supports syncing from a recent finalized checkpoint. This is substantially faster than syncing from genesis, while still providing all the same features. Checkpoint sync is also safer as it protects the node from long-range attacks. Since v4.6.0, checkpoint sync is required by default and genesis sync will no longer work without the use of --allow-insecure-genesis-sync.
To quickly get started with checkpoint sync, read the sections below on:
The remaining sections are for more advanced use-cases (archival nodes).
Automatic Checkpoint Sync
To begin checkpoint sync you will need HTTP API access to another synced beacon node. Enable
checkpoint sync by providing the other beacon node’s URL to --checkpoint-sync-url, alongside any
other flags:
lighthouse bn --checkpoint-sync-url "http://remote-bn:5052" ...
Lighthouse will print a message to indicate that checkpoint sync is being used:
INFO Starting checkpoint sync remote_url: http://remote-bn:8000/, service: beacon
After a short time (usually less than a minute), it will log the details of the checkpoint loaded from the remote beacon node:
INFO Loaded checkpoint block and state state_root: 0xe8252c68784a8d5cc7e5429b0e95747032dd1dcee0d1dc9bdaf6380bf90bc8a6, block_root: 0x5508a20147299b1a7fe9dbea1a8b3bf979f74c52e7242039bd77cbff62c0695a, slot: 2034720, service: beacon
Security Note: You should cross-reference the
block_rootandslotof the loaded checkpoint against a trusted source like a friend’s node, a block explorer or some public endpoints.
Once the checkpoint is loaded Lighthouse will sync forwards to the head of the chain.
If a validator client is connected to the node then it will be able to start completing its duties as soon as forwards sync completes.
Use a community checkpoint sync endpoint
The Ethereum community provides various public endpoints for you to choose from for your initial checkpoint state. Select one for your network and use it as the url for the --checkpoint-sync-url flag. e.g.
lighthouse bn --checkpoint-sync-url https://example.com/ ...
Adjusting the timeout
If the beacon node fails to start due to a timeout from the checkpoint sync server, you can try
running it again with a longer timeout by adding the flag --checkpoint-sync-url-timeout.
lighthouse bn --checkpoint-sync-url-timeout 300 --checkpoint-sync-url https://example.com/ ...
The flag takes a value in seconds. For more information see lighthouse bn --help.
Backfilling Blocks
Once forwards sync completes, Lighthouse will commence a “backfill sync” to download the blocks from the checkpoint back to genesis.
The beacon node will log messages similar to the following each minute while it completes backfill sync:
INFO Downloading historical blocks est_time: 5 hrs 0 mins, speed: 111.96 slots/sec, distance: 2020451 slots (40 weeks 0 days), service: slot_notifier
Once backfill is complete, a INFO Historical block download complete log will be emitted.
Note: Since v4.1.0, Lighthouse implements rate-limited backfilling to mitigate validator performance issues after a recent checkpoint sync. This means that the speed at which historical blocks are downloaded is limited, typically to less than 20 slots/sec. This will not affect validator performance. However, if you would still prefer to sync the chain as fast as possible, you can add the flag
--disable-backfill-rate-limitingto the beacon node.
Note: Since v4.2.0, Lighthouse limits the backfill sync to only sync backwards to the weak subjectivity point (approximately 5 months). This will help to save disk space. However, if you would like to sync back to the genesis, you can add the flag
--genesis-backfillto the beacon node.
FAQ
-
What if I have an existing database? How can I use checkpoint sync?
The existing beacon database needs to be deleted before Lighthouse will attempt checkpoint sync. You can do this by providing the
--purge-db-forceflag, or by manually deleting<DATADIR>/beacon. -
Why is checkpoint sync faster?
Checkpoint sync prioritises syncing to the head of the chain quickly so that the node can perform its duties. Additionally, it only has to perform lightweight verification of historic blocks: it checks the hash chain integrity & proposer signature rather than computing the full state transition.
-
Is checkpoint sync less secure?
No, in fact it is more secure! Checkpoint sync guards against long-range attacks that genesis sync does not. This is due to a property of Proof of Stake consensus known as Weak Subjectivity.
How to run an archived node
This section is only relevant if you are interested in running an archival node for analysis purposes.
After completing backfill sync the node’s database will differ from a genesis-synced node in the lack of historic states. You do not need these states to run a staking node, but they are required for historical API calls (as used by block explorers and researchers).
To run an archived node, you can opt-in to reconstructing all of the historic states by providing the
--archive flag to the beacon node at any point (before, during or after sync).
The database keeps track of three markers to determine the availability of historic blocks and states:
oldest_block_slot: All blocks with slots greater than or equal to this value are available in the database. Additionally, the genesis block is always available.state_lower_limit: All states with slots less than or equal to this value are available in the database. The minimum value is 0, indicating that the genesis state is always available.state_upper_limit: All states with slots greater than or equal tomin(split.slot, state_upper_limit)are available in the database. In the case where thestate_upper_limitis higher than thesplit.slot, this means states are not being written to the freezer database.
Reconstruction runs from the state lower limit to the upper limit, narrowing the window of unavailable states as it goes. It will log messages like the following to show its progress:
INFO State reconstruction in progress remaining: 747519, slot: 466944, service: freezer_db
Important information to be aware of:
- Reconstructed states will consume several gigabytes or hundreds of gigabytes of disk space, depending on the database configuration used.
- Reconstruction will only begin once backfill sync has completed and
oldest_block_slotis equal to 0. - While reconstruction is running the node will temporarily pause migrating new data to the freezer database. This will lead to the database increasing in size temporarily (by a few GB per day) until state reconstruction completes.
- It is safe to interrupt state reconstruction by gracefully terminating the node – it will pick up from where it left off when it restarts.
- You can start reconstruction from the HTTP API, and view its progress. See the
/lighthouse/databaseAPIs.
For more information on historic state storage see the Database Configuration page.
Manual Checkpoint Sync
This section is only relevant if you want to manually provide the checkpoint state and block instead of fetching them from a URL.
To manually specify a checkpoint use the following two flags:
--checkpoint-state: accepts an SSZ-encodedBeaconStatefile--checkpoint-block: accepts an SSZ-encodedSignedBeaconBlockfile--checkpoint-blobs: accepts an SSZ-encodedBlobsfile
The command is as following:
curl -H "Accept: application/octet-stream" "http://localhost:5052/eth/v2/debug/beacon/states/$SLOT" > state.ssz
curl -H "Accept: application/octet-stream" "http://localhost:5052/eth/v2/beacon/blocks/$SLOT" > block.ssz
curl -H "Accept: application/octet-stream" "http://localhost:5052/eth/v1/beacon/blobs/$SLOT" > blobs.ssz
where $SLOT is the slot number. A slot which is an epoch boundary slot (i.e., first slot of an epoch) should always be used for manual checkpoint sync.
If the block contains blobs, all state, block and blobs must be provided and must point to the same slot (only applies for slots before Fulu). The state may be from the same slot as the block (unadvanced), or advanced to an epoch boundary, in which case it will be assumed to be finalized at that epoch.
Custom Data Directories
Users can override the default Lighthouse data directories (e.g., ~/.lighthouse/mainnet) using the --datadir flag. The custom data directory mirrors the structure of any network specific default directory (e.g. ~/.lighthouse/mainnet).
Note: Users should specify different custom directories for different networks.
Below is an example flow for importing validator keys, running a beacon node and validator client using a custom data directory /var/lib/my-custom-dir for the Mainnet network.
lighthouse --network mainnet --datadir /var/lib/my-custom-dir account validator import --directory <PATH-TO-LAUNCHPAD-KEYS-DIRECTORY>
lighthouse --network mainnet --datadir /var/lib/my-custom-dir bn --staking
lighthouse --network mainnet --datadir /var/lib/my-custom-dir vc
The first step creates a validators directory under /var/lib/my-custom-dir which contains the imported keys and validator_definitions.yml.
After that, we simply run the beacon chain and validator client with the custom dir path.
Relative Paths
Prior to the introduction of #2682 and #2846 (releases v2.0.1 and earlier), Lighthouse would
not correctly parse relative paths from the lighthouse bn --datadir flag.
If the user provided a relative path (e.g., --datadir here or --datadir ./here), the beacon
directory would be split across two paths:
~/here(in the home directory), containing:chain_dbfreezer_db
./here(in the present working directory), containing:logsnetwork
All versions released after the fix (#2846) will default to storing all files in the present
working directory (i.e. ./here). New users need not be concerned with the old behaviour.
For existing users which already have a split data directory, a backwards compatibility feature will
be applied. On start-up, if a split directory scenario is detected (i.e. ~/here exists),
Lighthouse will continue to operate with split directories. In such a scenario, the following
harmless log will show:
WARN Legacy datadir location location: "/home/user/datadir/beacon", msg: this occurs when using relative paths for a datadir location
In this case, the user could solve this warn by following these steps:
- Stopping the BN process
- Consolidating the legacy directory with the new one:
mv /home/user/datadir/beacon/* $(pwd)/datadir/beacon- Where
$(pwd)is the present working directory for the Lighthouse binary
- Removing the legacy directory:
rm -r /home/user/datadir/beacon
- Restarting the BN process
Although there are no known issues with using backwards compatibility functionality, having split directories is likely to cause confusion for users. Therefore, we recommend that affected users migrate to a consolidated directory structure.
Advanced Proposer-Only Beacon Nodes
Lighthouse allows for more exotic setups that can minimize attack vectors by adding redundant beacon nodes and dividing the roles of attesting and block production between them.
The purpose of this is to minimize attack vectors where malicious users obtain the network identities (IP addresses) of beacon nodes corresponding to individual validators and subsequently perform Denial Of Service attacks on the beacon nodes when they are due to produce a block on the network. By splitting the duties of attestation and block production across different beacon nodes, an attacker may not know which node is the block production node, especially if the user rotates IP addresses of the block production beacon node in between block proposals (this is in-frequent with networks with large validator counts).
The Beacon Node
A Lighthouse beacon node can be configured with the --proposer-only flag
(i.e. lighthouse bn --proposer-only).
Setting a beacon node with this flag will limit its use as a beacon node for
normal activities such as performing attestations, but it will make the node
harder to identify as a potential node to attack and will also consume less
resources.
Specifically, this flag prevents the node from subscribing to any attestation-subnets or sync-committees which is a primary way for attackers to de-anonymize validators.
Note: Beacon nodes that have set the
--proposer-onlyflag should not be connected to validator clients unless via the--proposer-nodesflag. If connected as a normal beacon node, the validator may fail to handle its duties correctly and result in a loss of income.
The Validator Client
The validator client can be given a list of HTTP API endpoints representing
beacon nodes that will be solely used for block propagation on the network, via
the CLI flag --proposer-nodes. These nodes can be any working beacon nodes
and do not specifically have to be proposer-only beacon nodes that have been
executed with the --proposer-only (although we do recommend this flag for
these nodes for added security).
Note: The validator client still requires at least one other beacon node to perform its duties and must be specified in the usual
--beacon-nodesflag.
Note: The validator client will attempt to get a block to propose from the beacon nodes specified in
--beacon-nodesbefore trying--proposer-nodes. This is because the nodes subscribed to subnets have a higher chance of producing a more profitable block. Any block builders should therefore be attached to the--beacon-nodesand not necessarily the--proposer-nodes.
Setup Overview
The intended set-up to take advantage of this mechanism is to run one (or more) normal beacon nodes in conjunction with one (or more) proposer-only beacon nodes. See the Redundancy section for more information about setting up redundant beacon nodes. The proposer-only beacon nodes should be setup to use a different IP address than the primary (non proposer-only) nodes. For added security, the IP addresses of the proposer-only nodes should be rotated occasionally such that a new IP-address is used per block proposal.
A single validator client can then connect to all of the above nodes via the
--beacon-nodes and --proposer-nodes flags. The resulting setup will allow
the validator client to perform its regular duties on the standard beacon nodes
and when the time comes to propose a block, it will send this block via the
specified proposer-only nodes.
Remote Signing with Web3Signer
Web3Signer is a tool by Consensys which allows remote signing. Remote signing is when a Validator Client (VC) out-sources the signing of messages to a remote server (e.g., via HTTPS). This means that the VC does not hold the validator private keys.
Warnings
Using a remote signer comes with risks, please read the following two warnings before proceeding:
Remote signing is complex and risky
Remote signing is generally only desirable for enterprise users or users with unique security requirements. Most users will find the separation between the Beacon Node (BN) and VC to be sufficient without introducing a remote signer.
Using a remote signer introduces a new set of security and slashing risks and should only be undertaken by advanced users who fully understand the risks.
Web3Signer is not maintained by Lighthouse
The Web3Signer tool is maintained by Consensys, the same team that maintains Teku. The Lighthouse team (Sigma Prime) does not maintain Web3Signer or make any guarantees about its safety or effectiveness.
Usage
A remote signing validator is added to Lighthouse in much the same way as one that uses a local
keystore, via the validator_definitions.yml file or via the POST /lighthouse/validators/web3signer API endpoint.
Here is an example of a validator_definitions.yml file containing one validator which uses a
remote signer:
---
- enabled: true
  voting_public_key: "0xa5566f9ec3c6e1fdf362634ebec9ef7aceb0e460e5079714808388e5d48f4ae1e12897fed1bea951c17fa389d511e477"
  type: web3signer
  url: "https://my-remote-signer.com:1234"
  root_certificate_path: /home/paul/my-certificates/my-remote-signer.pem
  client_identity_path: /home/paul/my-keys/my-identity-certificate.p12
  client_identity_password: "password"
When using this file, the Lighthouse VC will perform duties for the 0xa5566.. validator and refer
to the https://my-remote-signer.com:1234 server to obtain any signatures. It will load a
“self-signed” SSL certificate from /home/paul/my-certificates/my-remote-signer.pem (on the
filesystem of the VC) to encrypt the communications between the VC and Web3Signer. It will use
SSL client authentication with the “self-signed” certificate in /home/paul/my-keys/my-identity-certificate.p12.
The
request_timeout_mskey can also be specified. Use this key to override the default timeout with a new timeout in milliseconds. This is the timeout before requests to Web3Signer are considered to be failures. Setting a value that is too long may create contention and late duties in the VC. Setting it too short will result in failed signatures and therefore missed duties.
Slashing protection database
Web3signer can be configured with its own slashing protection database. This makes the local slashing protection database by Lighthouse redundant. To disable Lighthouse slashing protection database for web3signer keys, use the flag --disable-slashing-protection-web3signer on the validator client.
Note: DO NOT use this flag unless you are certain that slashing protection is enabled on web3signer.
The --init-slashing-protection flag is also required to initialize the slashing protection database locally.
Database Configuration
Lighthouse uses an efficient “split” database schema, whereby finalized states are stored separately from recent, unfinalized states. We refer to the portion of the database storing finalized states as the freezer or cold DB, and the portion storing recent states as the hot DB.
In both the hot and cold DBs, full BeaconState data structures are only stored periodically, and
intermediate states are reconstructed by quickly replaying blocks on top of the nearest state. For
example, to fetch a state at slot 7 the database might fetch a full state from slot 0, and replay
blocks from slots 1-7 while omitting redundant signature checks and Merkle root calculations. In
the freezer DB, Lighthouse also uses hierarchical state diffs to jump larger distances (described in
more detail below).
The full states upon which blocks are replayed are referred to as snapshots in the case of the freezer DB, and epoch boundary states in the case of the hot DB.
The frequency at which the hot database stores full BeaconStates is fixed to one-state-per-epoch
in order to keep loads of recent states performant. For the freezer DB, the frequency is
configurable via the --hierarchy-exponents CLI flag, which is the topic of the next section.
Hierarchical State Diffs
Since v6.0.0, Lighthouse’s freezer database uses hierarchical state diffs or hdiffs for short. These diffs allow Lighthouse to reconstruct any historic state relatively quickly from a very compact database. The essence of the hdiffs is that full states (snapshots) are stored only around once per year. To reconstruct a particular state, Lighthouse fetches the last snapshot prior to that state, and then applies several layers of diffs. For example, to access a state from November 2022, we might fetch the yearly snapshot for the start of 2022, then apply a monthly diff to jump to November, and then more granular diffs to reach the particular week, day and epoch desired. Usually for the last stretch between the start of the epoch and the state requested, some blocks will be replayed.
The following diagram shows part of the layout of diffs in the default configuration. There is a
full snapshot stored every 2^21 slots. In the next layer there are diffs every 2^18 slots which
approximately correspond to “monthly” diffs. Following this are more granular diffs every 2^16
slots, every 2^13 slots, and so on down to the per-epoch diffs every 2^5 slots.
The number of layers and frequency of diffs is configurable via the --hierarchy-exponents flag,
which has a default value of 5,9,11,13,16,18,21. The hierarchy exponents must be provided in order
from smallest to largest. The smallest exponent determines the frequency of the “closest” layer
of diffs, with the default value of 5 corresponding to a diff every 2^5 slots (every epoch).
The largest number determines the frequency of full snapshots, with the default value of 21
corresponding to a snapshot every 2^21 slots (every 291 days).
The number of possible --hierarchy-exponents configurations is extremely large and our exploration
of possible configurations is still in its relative infancy. If you experiment with non-default
values of --hierarchy-exponents we would be interested to hear how it goes. A few rules of thumb
that we have observed are:
- More frequent snapshots = more space. This is quite intuitive - if you store full states more
often then these will take up more space than diffs. However what you lose in space efficiency you
may gain in speed. It would be possible to achieve a configuration similar to Lighthouse’s
previous
--slots-per-restore-point 32using--hierarchy-exponents 5, although this would use a lot of space. It’s even possible to push beyond that with--hierarchy-exponents 0which would store a full state every single slot (NOT RECOMMENDED). - Less diff layers are not necessarily faster. One might expect that the fewer diff layers there
are, the less work Lighthouse would have to do to reconstruct any particular state. In practice
this seems to be offset by the increased size of diffs in each layer making the diffs take longer
to apply. We observed no significant performance benefit from
--hierarchy-exponents 5,7,11, and a substantial increase in space consumed.
The following table lists the data for different configurations. Note that the disk space requirement is for the chain_db and freezer_db, excluding the blobs_db.
| Hierarchy Exponents | Storage Requirement | Sequential Slot Query | Uncached Query | Time to Sync |
|---|---|---|---|---|
| 5,9,11,13,16,18,21 (default) | 418 GiB | 250-700 ms | up to 10 s | 1 week |
| 5,7,11 (frequent snapshots) | 589 GiB | 250-700 ms | up to 6 s | 1 week |
| 0,5,7,11 (per-slot diffs) | 2500 GiB | 250-700 ms | up to 4 s | 7 weeks |
Jim has done some experiments to study the response time of querying random slots (uncached query) for --hierarchy-exponents 0,5,7,11 (per-slot diffs) and --hierarchy-exponents 5,9,11,13,17,21 (per-epoch diffs), as show in the figures below. From the figures, two points can be concluded:
- response time (y-axis) increases with slot number (x-axis) due to state growth.
- response time for per-slot configuration in general is 2x faster than that of per-epoch.
In short, setting different configurations is a trade-off between disk space requirement, sync time and response time. The data presented here is useful to help users choosing the configuration that suit their needs.
We acknowledge the data provided by Jim and his consent for us to share it here.
If in doubt, we recommend running with the default configuration! It takes a long time to reconstruct states in any given configuration, so it might be some time before the optimal configuration is determined.
CLI Configuration
To configure your Lighthouse node’s database, run your beacon node with the --hierarchy-exponents flag:
lighthouse beacon_node --hierarchy-exponents "5,7,11"
Historic state cache
Lighthouse includes a cache to avoid repeatedly replaying blocks when loading historic states. Lighthouse will cache a limited number of reconstructed states and will re-use them when serving requests for subsequent states at higher slots. This greatly reduces the cost of requesting several states in order, and we recommend that applications like block explorers take advantage of this cache.
The historical state cache size can be specified with the flag --historic-state-cache-size (default value is 1):
lighthouse beacon_node --historic-state-cache-size 4
Note: Use a large cache limit can lead to high memory usage.
Glossary
- Freezer DB: part of the database storing finalized states. States are stored in a sparser format, and usually less frequently than in the hot DB.
- Cold DB: see Freezer DB.
- HDiff: hierarchical state diff.
- Hierarchy Exponents: configuration for hierarchical state diffs, which determines the density of stored diffs and snapshots in the freezer DB.
- Hot DB: part of the database storing recent states, all blocks, and other runtime data. Full states are stored every epoch.
- Snapshot: a full
BeaconStatestored periodically in the freezer DB. Approximately yearly by default (every ~291 days). - Split Slot: the slot at which states are divided between the hot and the cold DBs. All states from slots less than the split slot are in the freezer, while all states with slots greater than or equal to the split slot are in the hot DB.
Database Migrations
Lighthouse uses a versioned database schema to allow its database design to evolve over time.
Since beacon chain genesis in December 2020 there have been several database upgrades that have been applied automatically and in a backwards compatible way.
However, backwards compatibility does not imply the ability to downgrade to a prior version of Lighthouse after upgrading. To facilitate smooth downgrades, Lighthouse v2.3.0 and above includes a command for applying database downgrades. If a downgrade is available from a schema version, it is listed in the table below under the “Downgrade available?” header.
Everything on this page applies to the Lighthouse beacon node, not to the validator client or the slasher.
List of schema versions
| Lighthouse version | Release date | Schema version | Downgrade available? |
|---|---|---|---|
| v8.2.0 | Jun 2026 | v29 | yes before Gloas |
| v8.1.0 | Feb 2026 | v28 | no |
| v8.0.0 | Nov 2025 | v28 | no |
Note: All point releases (e.g. v4.4.1) are schema-compatible with the prior minor release (e.g. v4.4.0).
Note: Even if no schema downgrade is available, it is still possible to move between versions that use the same schema. E.g. you can downgrade from v5.2.0 to v5.0.0 because both use schema v19.
Note: Support for old schemas is gradually removed from newer versions of Lighthouse. We usually do this after a major version has been out for a while and everyone has upgraded. Deprecated schema versions for previous releases are archived under Full list of schema versions. If you get stuck and are unable to upgrade a testnet node to the latest version, sometimes it is possible to upgrade via an intermediate version (e.g. upgrade from v3.5.0 to v4.6.0 via v4.0.1). This is never necessary on mainnet.
How to apply a database downgrade
To apply a downgrade you need to use the lighthouse db migrate command with the correct parameters.
- Make sure you have a copy of the latest version of Lighthouse. This will be the version that knows about the latest schema change, and has the ability to revert it.
- Work out the schema version you would like to downgrade to by checking the table above, or the Full list of schema versions below. E.g. if you want to downgrade from v4.2.0, which upgraded the version from v16 to v17, then you’ll want to downgrade to v16 in order to run v4.0.1.
- Ensure that downgrading is feasible. Not all schema upgrades can be reverted, and some of them are time-sensitive. The release notes will state whether a downgrade is available and whether any caveats apply to it.
- Work out the parameters for Running
lighthouse dbcorrectly, including your Lighthouse user, your datadir and your network flag. - After stopping the beacon node, run the migrate command with the
--toparameter set to the schema version you would like to downgrade to.
sudo -u "$LH_USER" lighthouse db migrate --to "$VERSION" --datadir "$LH_DATADIR" --network "$NET"
For example if you want to downgrade to Lighthouse v4.0.1 from v4.2.0 and you followed Somer Esat’s guide, you would run:
sudo -u lighthousebeacon lighthouse db migrate --to 16 --datadir /var/lib/lighthouse --network mainnet
Where lighthouse is Lighthouse v4.2.0+. After the downgrade succeeds you can then replace your
global lighthouse binary with the older version and start your node again.
How to apply a database upgrade
Database upgrades happen automatically upon installing a new version of Lighthouse. We will highlight in the release notes when a database upgrade is included, and make note of the schema versions involved (e.g. v2.3.0 includes an upgrade from v8 to v9).
They can also be applied using the --to parameter to lighthouse db migrate. See the section
on downgrades above.
How to check the schema version
To check the schema version of a running Lighthouse instance you can use the HTTP API:
curl "http://localhost:5052/lighthouse/database/info" | jq
{
  "schema_version": 16,
  "config": {
    "slots_per_restore_point": 8192,
    "slots_per_restore_point_set_explicitly": false,
    "block_cache_size": 5,
    "historic_state_cache_size": 1,
    "compact_on_init": false,
    "compact_on_prune": true,
    "prune_payloads": true
  },
  "split": {
    "slot": "5485952",
    "state_root": "0xcfe5d41e6ab5a9dab0de00d89d97ae55ecaeed3b08e4acda836e69b2bef698b4"
  },
  "anchor": {
    "anchor_slot": "5414688",
    "oldest_block_slot": "0",
    "oldest_block_parent": "0x0000000000000000000000000000000000000000000000000000000000000000",
    "state_upper_limit": "5414912",
    "state_lower_limit": "8192"
  }
}
The schema_version key indicates that this database is using schema version 16.
Alternatively, you can check the schema version with the lighthouse db command.
sudo -u lighthousebeacon lighthouse db version --datadir /var/lib/lighthouse --network mainnet
See the section on Running lighthouse db correctly for details.
How to run lighthouse db correctly
Several conditions need to be met in order to run lighthouse db:
- The beacon node must be stopped (not running). If you are using systemd a command like
sudo systemctl stop lighthousebeaconwill accomplish this. - The command must run as the user that owns the beacon node database. If you are using systemd then
your beacon node might run as a user called
lighthousebeacon. - The
--datadirflag must be set to the location of the Lighthouse data directory. - The
--networkflag must be set to the correct network, e.g.mainnet,hoodiorsepolia.
The general form for a lighthouse db command is:
sudo -u "$LH_USER" lighthouse db version --datadir "$LH_DATADIR" --network "$NET"
If you followed Somer Esat’s guide for mainnet:
sudo systemctl stop lighthousebeacon
sudo -u lighthousebeacon lighthouse db version --datadir /var/lib/lighthouse --network mainnet
If you followed the CoinCashew guide for mainnet:
sudo systemctl stop beacon-chain
lighthouse db version --network mainnet
How to prune historic states
Pruning historic states helps in managing the disk space used by the Lighthouse beacon node by removing old beacon states from the freezer database. This can be especially useful when the database has accumulated a significant amount of historic data. This command is intended for nodes synced before 4.4.1, as newly synced nodes no longer store historic states by default.
Here are the steps to prune historic states:
-
Before running the prune command, make sure that the Lighthouse beacon node is not running. If you are using systemd, you might stop the Lighthouse beacon node with a command like:
sudo systemctl stop lighthousebeacon -
Use the
prune-statescommand to prune the historic states. You can do a test run without the--confirmflag to check that the database can be pruned:sudo -u "$LH_USER" lighthouse db prune-states --datadir "$LH_DATADIR" --network "$NET"If pruning is available, Lighthouse will log:
INFO Ready to prune states WARN Pruning states is irreversible WARN Re-run this command with --confirm to commit to state deletion INFO Nothing has been pruned on this run -
If you are ready to prune the states irreversibly, add the
--confirmflag to commit the changes:sudo -u "$LH_USER" lighthouse db prune-states --confirm --datadir "$LH_DATADIR" --network "$NET"The
--confirmflag ensures that you are aware the action is irreversible, and historic states will be permanently removed. Lighthouse will log:INFO Historic states pruned successfully -
After successfully pruning the historic states, you can restart the Lighthouse beacon node:
sudo systemctl start lighthousebeacon
Full list of schema versions
| Lighthouse version | Release date | Schema version | Downgrade available? |
|---|---|---|---|
| v8.2.0 | Jun 2026 | v29 | yes before Gloas |
| v8.1.0 | Feb 2026 | v28 | yes before Fulu using <= v8.1.3 |
| v8.0.0 | Nov 2025 | v28 | yes before Fulu using <= v8.1.3 |
| v8.0.0-rc.0 | Sep 2025 | v28 | yes before Fulu using <= v8.1.3 |
| v7.1.0 | Jul 2025 | v26 | yes using <= v8.1.3 |
| v7.0.0 | Apr 2025 | v22 | no |
| v6.0.0 | Nov 2024 | v22 | no |
| v5.3.0 | Aug 2024 | v21 | yes before Electra using <= v7.0.0 |
| v5.2.0 | Jun 2024 | v19 | yes before Deneb using <= v5.2.1 |
| v5.1.0 | Mar 2024 | v19 | yes before Deneb using <= v5.2.1 |
| v5.0.0 | Feb 2024 | v19 | yes before Deneb using <= v5.2.1 |
| v4.6.0 | Dec 2023 | v19 | yes before Deneb using <= v5.2.1 |
| v4.6.0-rc.0 | Dec 2023 | v18 | yes before Deneb using <= v5.2.1 |
| v4.5.0 | Sep 2023 | v17 | yes using <= v5.2.1 |
| v4.4.0 | Aug 2023 | v17 | yes using <= v5.2.1 |
| v4.3.0 | Jul 2023 | v17 | yes using <= v5.2.1 |
| v4.2.0 | May 2023 | v17 | yes using <= v5.2.1 |
| v4.1.0 | Apr 2023 | v16 | yes before Capella using <= v4.5.0 |
| v4.0.1 | Mar 2023 | v16 | yes before Capella using <= v4.5.0 |
| v3.5.0 | Feb 2023 | v15 | yes before Capella using <= v4.5.0 |
| v3.4.0 | Jan 2023 | v13 | yes using <= 4.5.0 |
| v3.3.0 | Nov 2022 | v13 | yes using <= 4.5.0 |
| v3.2.0 | Oct 2022 | v12 | yes using <= 4.5.0 |
| v3.1.0 | Sep 2022 | v12 | yes using <= 4.5.0 |
| v3.0.0 | Aug 2022 | v11 | yes using <= 4.5.0 |
| v2.5.0 | Aug 2022 | v11 | yes using <= 4.5.0 |
| v2.4.0 | Jul 2022 | v9 | yes using <= v3.3.0 |
| v2.3.0 | May 2022 | v9 | yes using <= v3.3.0 |
| v2.2.0 | Apr 2022 | v8 | no |
| v2.1.0 | Jan 2022 | v8 | no |
| v2.0.0 | Oct 2021 | v5 | no |
Key Recovery
Generally, validator keystore files are generated alongside a mnemonic. If the keystore and/or the keystore password are lost, this mnemonic can regenerate a new, equivalent keystore with a new password.
There are two ways to recover keys using the lighthouse CLI:
lighthouse account validator recover: recover one or more EIP-2335 keystores from a mnemonic. These keys can be used directly in a validator client.lighthouse account wallet recover: recover an EIP-2386 wallet from a mnemonic.
⚠️ Warning
Recovering validator keys from a mnemonic should only be used as a last resort. Key recovery entails significant risks:
- Exposing your mnemonic to a computer at any time puts it at risk of being compromised. Your mnemonic is not encrypted and is a target for theft.
- It’s completely possible to regenerate a validator keypairs that is already active on some other validator client. Running the same keypairs on two different validator clients is very likely to result in slashing.
Recover EIP-2335 validator keystores
A single mnemonic can generate a practically unlimited number of validator keystores using an index. Generally, the first time you generate a keystore you’ll use index 0, the next time you’ll use index 1, and so on. Using the same index on the same mnemonic always results in the same validator keypair being generated (see EIP-2334 for more detail).
Using the lighthouse account validator recover command you can generate the
keystores that correspond to one or more indices in the mnemonic:
lighthouse account validator recover: recover only index0.lighthouse account validator recover --count 2: recover indices0, 1.lighthouse account validator recover --first-index 1: recover only index1.lighthouse account validator recover --first-index 1 --count 2: recover indices1, 2.
For each of the indices recovered in the above commands, a directory will be
created in the --validator-dir location (default ~/.lighthouse/{network}/validators)
which contains all the information necessary to run a validator using the
lighthouse vc command. The password to this new keystore will be placed in
the --secrets-dir (default ~/.lighthouse/{network}/secrets).
where {network} is the name of the consensus layer network passed in the --network parameter (default is mainnet).
Recover a EIP-2386 wallet
Instead of creating EIP-2335 keystores directly, an EIP-2386 wallet can be
generated from the mnemonic. This wallet can then be used to generate validator
keystores, if desired. For example, the following command will create an
encrypted wallet named wally-recovered from a mnemonic:
lighthouse account wallet recover --name wally-recovered
⚠️ Warning: the wallet will be created with a nextaccount value of 0.
This means that if you have already generated n validators, then the next n
validators generated by this wallet will be duplicates. As mentioned
previously, running duplicate validators is likely to result in slashing.
Advanced Networking
Lighthouse’s networking stack has a number of configurable parameters that can be adjusted to handle a variety of network situations. This section outlines some of these configuration parameters and their consequences at the networking level and their general intended use.
Target Peers
The beacon node has a --target-peers CLI parameter. This allows you to
instruct the beacon node how many peers it should try to find and maintain.
Lighthouse allows an additional 10% of this value for nodes to connect to us.
Every 30 seconds, the excess peers are pruned. Lighthouse removes the
worst-performing peers and maintains the best performing peers.
It may be counter-intuitive, but having a very large peer count will likely have a degraded performance for a beacon node in normal operation and during sync.
Having a large peer count means that your node must act as an honest RPC server to all your connected peers. If there are many that are syncing, they will often be requesting a large number of blocks from your node. This means your node must perform a lot of work reading and responding to these peers. If your node is overloaded with peers and cannot respond in time, other Lighthouse peers will consider you non-performant and disfavour you from their peer stores. Your node will also have to handle and manage the gossip and extra bandwidth that comes from having these extra peers. Having a non-responsive node (due to overloading of connected peers), degrades the network as a whole.
It is often the belief that a higher peer counts will improve sync times. Beyond a handful of peers, this is not true. On all current tested networks, the bottleneck for syncing is not the network bandwidth of downloading blocks, rather it is the CPU load of processing the blocks themselves. Most of the time, the network is idle, waiting for blocks to be processed. Having a very large peer count will not speed up sync.
For these reasons, we recommend users do not modify the --target-peers count
drastically and use the (recommended) default.
NAT Traversal (Port Forwarding)
Lighthouse, by default, uses port 9000 for both TCP and UDP. Since v4.5.0, Lighthouse will also attempt to make QUIC connections via UDP port 9001 by default. Lighthouse will still function if it is behind a NAT without any port mappings. Although Lighthouse still functions, we recommend that some mechanism is used to ensure that your Lighthouse node is publicly accessible. This will typically improve your peer count, allow the scoring system to find the best/most favourable peers for your node and overall improve the Ethereum consensus network.
Lighthouse currently supports UPnP. If UPnP is enabled on your router, Lighthouse will automatically establish the port mappings for you (the beacon node will inform you of established routes in this case). If UPnP is not enabled, we recommend you to manually set up port mappings to Lighthouse’s TCP and UDP ports (9000 TCP/UDP, and 9001 UDP by default).
Note: Lighthouse needs to advertise its publicly accessible ports in order to inform its peers that it is contactable and how to connect to it. Lighthouse has an automated way of doing this for the UDP port. This means Lighthouse can detect its external UDP port. There is no such mechanism for the TCP port. As such, we assume that the external UDP and external TCP port is the same (i.e external 5050 UDP/TCP mapping to internal 9000 is fine). If you are setting up differing external UDP and TCP ports, you should explicitly specify them using the
--enr-tcp-portand--enr-udp-portas explained in the following section.
How to Open Ports
The steps to do port forwarding depends on the router, but the general steps are given below:
-
Determine the default gateway IP:
- On Linux: open a terminal and run
ip route | grep default, the result should look something similar todefault via 192.168.50.1 dev wlp2s0 proto dhcp metric 600. The192.168.50.1is your router management default gateway IP. - On macOS: open a terminal and run
netstat -nr|grep defaultand it should return the default gateway IP.
The default gateway IP usually looks like 192.168.X.X. Once you obtain the IP, enter it to a web browser and it will lead you to the router management page.
- On Linux: open a terminal and run
-
Login to the router management page. The login credentials are usually available in the manual or the router, or it can be found on a sticker underneath the router. You can also try the login credentials for some common router brands listed here.
-
Navigate to the port forward settings in your router. The exact step depends on the router, but typically it will fall under the “Advanced” section, under the name “port forwarding” or “virtual server”.
-
Configure a port forwarding rule as below:
- Protocol: select
TCP/UDPorBOTH - External port:
9000 - Internal port:
9000 - IP address: Usually there is a dropdown list for you to select the device. Choose the device that is running Lighthouse.
Since V4.5.0 port 9001/UDP is also used for QUIC support.
- Protocol: select
UDP - External port:
9001 - Internal port:
9001 - IP address: Choose the device that is running Lighthouse.
- Protocol: select
-
To check that you have successfully opened the ports, go to
yougetsignaland enter9000in theport number. If it shows “open”, then you have successfully set up port forwarding. If it shows “closed”, double check your settings, and also check that you have allowed firewall rules on port 9000. Note: this will only confirm if port 9000/TCP is open. You will need to ensure you have correctly setup port forwarding for the UDP ports (9000and9001by default).
ENR Configuration
Lighthouse has a number of CLI parameters for constructing and modifying the
local Ethereum Node Record (ENR). Examples are --enr-address,
--enr-udp-port, --enr-tcp-port and --disable-enr-auto-update. These
settings allow you to construct your initial ENR. Their primary intention is for
setting up boot-like nodes and having a contactable ENR on boot. On normal
operation of a Lighthouse node, none of these flags need to be set. Setting
these flags incorrectly can lead to your node being incorrectly added to the
global DHT which will degrade the discovery process for all Ethereum consensus peers.
The ENR of a Lighthouse node is initially set to be non-contactable. The in-built discovery mechanism can determine if your node is publicly accessible, and if it is, it will update your ENR to the correct public IP and port address (meaning you do not need to set it manually). Lighthouse persists its ENR, so on reboot it will re-load the settings it had discovered previously.
Modifying the ENR settings can degrade the discovery of your node, making it harder for peers to find you or potentially making it harder for other peers to find each other. We recommend not touching these settings unless for a more advanced use case.
IPv6 support
As noted in the previous sections, two fundamental parts to ensure good connectivity are: The parameters that configure the sockets over which Lighthouse listens for connections, and the parameters used to tell other peers how to connect to your node. This distinction is relevant and applies to most nodes that do not run directly on a public network.
Since Lighthouse v7.0.0, Lighthouse listens to both IPv4 and IPv6 by default if it detects a globally routable IPv6 address. This means that dual-stack is enabled by default.
Configuring Lighthouse to listen over IPv4/IPv6/Dual stack
To listen over only IPv4 and not IPv6, use the flag --listen-address 0.0.0.0.
To listen over only IPv6 use the same parameters as done when listening over IPv4 only:
--listen-address :: --port 9909will listen over IPv6 using port9909for TCP and UDP.--listen-address :: --port 9909 --discovery-port 9999will listen over IPv6 using port9909for TCP and port9999for UDP.- By default, QUIC listens for UDP connections using a port number that is one greater than the specified port.
If the specified port is 9909, QUIC will use port 9910 for IPv6 UDP connections.
This can be configured with
--quic-port.
To listen over both IPv4 and IPv6 and using a different port for IPv6::
- Set two listening addresses using the
--listen-addressflag twice ensuring the two addresses are one IPv4, and the other IPv6. When doing so, the--portand--discovery-portflags will apply exclusively to IPv4. Note that this behaviour differs from the IPv6 only case described above. - If necessary, set the
--port6flag to configure the port used for TCP and UDP over IPv6. This flag has no effect when listening over IPv6 only. - If necessary, set the
--discovery-port6flag to configure the IPv6 UDP port. This will default to the value given to--port6if not set. This flag has no effect when listening over IPv6 only. - If necessary, set the
--quic-port6flag to configure the port used by QUIC for UDP over IPv6. This will default to the value given to--port6+ 1. This flag has no effect when listening over IPv6 only.
Configuration Examples
When using
--listen-address :: --listen-address 0.0.0.0 --port 9909, listening will be set up as follows:IPv4:
It listens on port
9909for both TCP and UDP. QUIC will use the next sequential port9910for UDP.IPv6:
It listens on the default value of –port6 (
9000) for both UDP and TCP. QUIC will use port9001for UDP, which is the default--port6value (9000) + 1.
When using
--listen-address :: --listen-address 0.0.0.0 --port 9909 --discovery-port6 9999, listening will be set up as follows:IPv4:
It listens on port
9909for both TCP and UDP. QUIC will use the next sequential port9910for UDP.IPv6:
It listens on the default value of
--port6(9000) for TCP, and port9999for UDP. QUIC will use port9001for UDP, which is the default--port6value (9000) + 1.
Configuring Lighthouse to advertise IPv6 reachable addresses
Lighthouse supports IPv6 to connect to other nodes both over IPv6 exclusively, and dual stack using one socket for IPv4 and another socket for IPv6. In both scenarios, the previous sections still apply. In summary:
Beacon nodes must advertise their publicly reachable socket address
In order to do so, lighthouse provides the following CLI options/parameters.
--enr-udp-portUse this to advertise the port that is publicly reachable over UDP with a publicly reachable IPv4 address. This might differ from the IPv4 port used to listen.--enr-udp6-portUse this to advertise the port that is publicly reachable over UDP with a publicly reachable IPv6 address. This might differ from the IPv6 port used to listen.--enr-tcp-portUse this to advertise the port that is publicly reachable over TCP with a publicly reachable IPv4 address. This might differ from the IPv4 port used to listen.--enr-tcp6-portUse this to advertise the port that is publicly reachable over TCP with a publicly reachable IPv6 address. This might differ from the IPv6 port used to listen.--enr-addressesUse this to advertise publicly reachable addresses. Takes at most two values, one for IPv4 and one for IPv6. Note that a beacon node that advertises some address, must be reachable both over UDP and TCP.
In the general case, a user will not require to set these explicitly. Update these options only if you can guarantee your node is reachable with these values.
Known caveats
IPv6 link local addresses are likely to have poor connectivity if used in topologies with more than one interface. Use global addresses for the general case.
Running a Slasher
Lighthouse includes a slasher for identifying slashable offences committed by other validators and including proof of those offences in blocks.
Running a slasher is a good way to contribute to the health of the network, and doing so can earn extra income for your validators. However it is currently only recommended for expert users because of the immaturity of the slasher UX and the extra resources required.
Minimum System Requirements
- Quad-core CPU
- 16 GB RAM
- 256 GB solid state storage (in addition to the space requirement for the beacon node DB)
How to Run
The slasher runs inside the same process as the beacon node, when enabled via the --slasher flag:
lighthouse bn --slasher
The slasher hooks into Lighthouse’s block and attestation processing, and pushes messages into an in-memory queue for regular processing. It will increase the CPU usage of the beacon node because it verifies the signatures of otherwise invalid messages. When a slasher batch update runs, the messages are filtered for relevancy, and all relevant messages are checked for slashings and written to the slasher database.
Configuration
The slasher has several configuration options that control its functioning.
Database Directory
- Flag:
--slasher-dir PATH - Argument: path to directory
By default the slasher stores data in the slasher_db directory inside the beacon node’s datadir,
e.g. ~/.lighthouse/{network}/beacon/slasher_db. You can use this flag to change that storage
directory.
Database Backend
- Flag:
--slasher-backend NAME - Argument: one of
mdbx,lmdbordisabled - Default:
lmdbfor new installs,mdbxif an MDBX database already exists
It is possible to use one of several database backends with the slasher:
- LMDB (default)
- MDBX
The advantage of MDBX is that it performs compaction, resulting in less disk usage over time. The disadvantage is that upstream MDBX is unstable, so Lighthouse is pinned to a specific version. If bugs are found in our pinned version of MDBX it may be deprecated in future.
LMDB does not have compaction but is more stable upstream than MDBX. If running with the LMDB backend on Windows it is recommended to allow extra space due to this issue: sigp/lighthouse#2342.
More backends may be added in future.
Backend Override
The default backend was changed from MDBX to LMDB in Lighthouse v4.3.0.
If an MDBX database is already found on disk, then Lighthouse will try to use it. This will result in a log at start-up:
INFO Slasher backend overridden reason: database exists, configured_backend: lmdb, overridden_backend: mdbx
If the running Lighthouse binary doesn’t have the MDBX backend enabled but an existing database is found, then a warning will be logged and Lighthouse will use the LMDB backend and create a new database:
WARN Slasher backend override failed advice: delete old MDBX database or enable MDBX backend, path: /home/user/.lighthouse/mainnet/beacon/slasher_db/mdbx.dat
In this case you should either obtain a Lighthouse binary with the MDBX backend enabled, or delete
the files for the old backend. The pre-built Lighthouse binaries and Docker images have MDBX enabled,
or if you’re building from source you can enable the slasher-mdbx feature.
To delete the files, use the path from the WARN log, and then delete the mbdx.dat and
mdbx.lck files.
Switching Backends
If you change database backends and want to reclaim the space used by the old backend you can
delete the following files from your slasher_db directory:
- removing MDBX: delete
mdbx.datandmdbx.lck - removing LMDB: delete
data.mdbandlock.mdb
History Length
- Flag:
--slasher-history-length EPOCHS - Argument: number of epochs
- Default: 4096 epochs
The slasher stores data for the history-length most recent epochs. By default the history length
is set high in order to catch all validator misbehaviour since the last weak subjectivity
checkpoint. If you would like to reduce the resource requirements (particularly disk space), set the
history length to a lower value, although a lower history length may prevent your slasher from
finding some slashings.
Note: See the --slasher-max-db-size section below to ensure that your disk space savings are
applied. The history length must be a multiple of the chunk size (default 16), and cannot be
changed after initialization.
Max Database Size
- Flag:
--slasher-max-db-size GIGABYTES - Argument: maximum size of the database in gigabytes
- Default: 512 GB
Both database backends LMDB and MDBX place a hard limit on the size of the database
file. You can use the --slasher-max-db-size flag to set this limit. It can be adjusted after
initialization if the limit is reached.
By default the limit is set to accommodate the default history length and around 1 million validators but you can set it lower if running with a reduced history length. The space required scales approximately linearly in validator count and history length, i.e. if you halve either you can halve the space required.
If you want an estimate of the database size you can use this formula:
4.56 GB * (N / 256) * (V / 250000)
where N is the history length and V is the validator count.
You should set the maximum size higher than the estimate to allow room for growth in the validator count.
Update Period
- Flag:
--slasher-update-period SECONDS - Argument: number of seconds
- Default: 12 seconds
Set the length of the time interval between each slasher batch update. You can check if your slasher is keeping up with its update period by looking for a log message like this:
DEBG Completed slasher update num_blocks: 1, num_attestations: 279, time_taken: 1821ms, epoch: 20889, service: slasher
If the time_taken is substantially longer than the update period then it indicates your machine is
struggling under the load, and you should consider increasing the update period or lowering the
resource requirements by tweaking the history length.
The update period should almost always be set to a multiple of the slot duration (12 seconds), or in rare cases a divisor (e.g. 4 seconds).
Slot Offset
- Flag:
--slasher-slot-offset SECONDS - Argument: number of seconds (decimal allowed)
- Default: 10.5 seconds
Set the offset from the start of the slot at which slasher processing should run. The default value of 10.5 seconds is chosen so that de-duplication can be maximally effective. The slasher will de-duplicate attestations from the same batch by storing only the attestations necessary to cover all seen validators. In other words, it will store aggregated attestations rather than unaggregated attestations if given the opportunity.
Aggregated attestations are published 8 seconds into the slot, so the default allows 2.5 seconds for them to arrive, and 1.5 seconds for them to be processed before a potential block proposal at the start of the next slot. If the batch processing time on your machine is significantly longer than 1.5 seconds then you may want to lengthen the update period to 24 seconds, or decrease the slot offset to a value in the range 8.5-10.5s (lower values may result in more data being stored).
The slasher will run every update-period seconds after the first slot_start + slot-offset, which
means the slot-offset will be ineffective if the update-period is not a multiple (or divisor) of
the slot duration.
Chunk Size and Validator Chunk Size
- Flags:
--slasher-chunk-size EPOCHS,--slasher-validator-chunk-size NUM_VALIDATORS - Arguments: number of epochs, number of validators
- Defaults: 16, 256
Adjusting these parameter should only be done in conjunction with reading in detail about how the slasher works, and/or reading the source code.
Attestation Root Cache Size
- Flag:
--slasher-att-cache-size COUNT - Argument: number of attestations
- Default: 100,000
The number of attestation data roots to cache in memory. The cache is an LRU cache used to map indexed attestation IDs to the tree hash roots of their attestation data. The cache prevents reading whole indexed attestations from disk to determine whether they are slashable.
Each value is very small (38 bytes) so the entire cache should fit in around 4 MB of RAM. Decreasing the cache size is not recommended, and the size is set so as to be large enough for future growth.
Short-Range Example
If you would like to run a lightweight slasher that just checks blocks and attestations within the last day or so, you can use this combination of arguments:
lighthouse bn --slasher --slasher-history-length 256 --slasher-max-db-size 16 --debug-level debug
Stability Warning
The slasher code is still quite new, so we may update the schema of the slasher database in a backwards-incompatible way which will require re-initialization.
Redundancy
There are three places in Lighthouse where redundancy is notable:
- ✅ GOOD: Using a redundant beacon node in
lighthouse vc --beacon-nodes - ❌ NOT SUPPORTED: Using a redundant execution node in
lighthouse bn --execution-endpoint - ☠️ BAD: Running redundant
lighthouse vcinstances with overlapping keypairs.
We mention (3) since it is unsafe and should not be confused with the other two uses of redundancy. Running the same validator keypair in more than one validator client (Lighthouse, or otherwise) will eventually lead to slashing. See Slashing Protection for more information.
From this paragraph, this document will only refer to the first two items (1, 2). We never recommend that users implement redundancy for validator keypairs.
Redundant Beacon Nodes
The Lighthouse validator client can be configured to use multiple redundant beacon nodes.
The lighthouse vc --beacon-nodes flag allows one or more comma-separated values:
lighthouse vc --beacon-nodes http://localhost:5052lighthouse vc --beacon-nodes http://localhost:5052,http://192.168.1.1:5052
In the first example, the validator client will attempt to contact
http://localhost:5052 to perform duties. If that node is not contactable, not
synced or unable to serve the request then the validator client may fail to
perform some duty (e.g. produce a block or attest).
However, in the second example, any failure on http://localhost:5052 will be
followed by a second attempt using http://192.168.1.1:5052. This
achieves redundancy, allowing the validator client to continue to perform its
duties as long as at least one of the beacon nodes is available.
There are a few interesting properties about the list of --beacon-nodes:
- Ordering matters: the validator client prefers a beacon node that is earlier in the list.
- Synced is preferred: the validator client prefers a synced beacon node over one that is still syncing.
Note: When supplying multiple beacon nodes the
http://localhost:5052address must be explicitly provided (if it is desired). It will only be used as default if no--beacon-nodesflag is provided at all.
Configuring a redundant Beacon Node
In our previous example, we listed http://192.168.1.1:5052 as a redundant
node. Apart from having sufficient resources, the backup node should have the
following flags:
--http: starts the HTTP API server.--http-address local_IP: wherelocal_IPis the private IP address of the computer running the beacon node. This is only required if your backup beacon node is on a different host.
Note: You could also use
--http-address 0.0.0.0, but this allows any external IP address to access the HTTP server. As such, a firewall should be configured to deny unauthorized access to port5052.
--execution-endpoint: see Merge Migration.--execution-jwt: see Merge Migration.
For example one could use the following command to provide a backup beacon node:
lighthouse bn \
  --http \
  --http-address local_IP \
  --execution-endpoint http://localhost:8551 \
  --execution-jwt /secrets/jwt.hex
Prior to v3.2.0 fallback beacon nodes also required the --subscribe-all-subnets and
--import-all-attestations flags. These flags are no longer required as the validator client will
now broadcast subscriptions to all connected beacon nodes by default. This broadcast behaviour
can be disabled using the --broadcast none flag for lighthouse vc.
Fallback Health
Since v6.0.0, the validator client will be more aggressive in switching to a fallback node. To do this, it uses the concept of “Health”. Every slot, the validator client checks each connected beacon node to determine which node is the “Healthiest”. In general, the validator client will prefer nodes which are synced, have synced execution layers and which are not currently optimistically syncing.
Sync distance is separated out into 4 tiers: “Synced”, “Small”, “Medium”, “Large”. Nodes are then
sorted into tiers based onto sync distance and execution layer status. You can use the
--beacon-nodes-sync-tolerances to change how many slots wide each tier is. In the case where
multiple nodes fall into the same tier, user order is used to tie-break.
To see health information for each connected node, you can use the
/lighthouse/beacon/health API endpoint.
Broadcast modes
Since v4.6.0, the Lighthouse VC can be configured to broadcast messages to all configured beacon nodes rather than just the first available.
The flag to control this behaviour is --broadcast, which takes multiple comma-separated values
from this list:
subscriptions: Send subnet subscriptions & other control messages which keep the beacon nodes primed and ready to process messages. It is recommended to leave this enabled.attestations: Send attestations & aggregates to all beacon nodes. This can improve propagation of attestations throughout the network, at the cost of increased load on the beacon nodes and increased bandwidth between the VC and the BNs.blocks: Send proposed blocks to all beacon nodes. This can improve propagation of blocks throughout the network, at the cost of slightly increased load on the beacon nodes and increased bandwidth between the VC and the BNs. If you are looking to improve performance in a multi-BN setup this is the first option we would recommend enabling.sync-committee: Send sync committee signatures & aggregates to all beacon nodes. This can improve propagation of sync committee messages with similar tradeoffs to broadcasting attestations, although occurring less often due to the infrequency of sync committee duties.none: Disable all broadcasting. This option only has an effect when provided alone, otherwise it is ignored. Not recommended except for expert tweakers.
The default is --broadcast subscriptions. To also broadcast blocks for example, use
--broadcast subscriptions,blocks.
Redundant execution nodes
Lighthouse previously supported redundant execution nodes for fetching data from the deposit contract. On merged networks this is no longer supported. Each Lighthouse beacon node must be configured in a 1:1 relationship with an execution node. For more information on the rationale behind this decision please see the Merge Migration documentation.
To achieve redundancy we recommend configuring Redundant beacon nodes where each has its own execution engine.
Release Candidates
From time-to-time, Lighthouse release candidates will be published on the sigp/lighthouse repository. Release candidates are previously known as Pre-Releases. These releases have passed the usual automated testing, however the developers would like to see it running “in the wild” in a variety of configurations before declaring it an official, stable release. Release candidates are also used by developers to get feedback from users regarding the ergonomics of new features or changes.
Github will clearly show such releases as a “Pre-release” and they will not show up on sigp/lighthouse/releases/latest. However, release candidates will show up on the sigp/lighthouse/releases page, so please pay attention to avoid the release candidates when you’re looking for stable Lighthouse.
From time to time, Lighthouse may use the terms “release candidate” and “pre release” interchangeably. A pre release is identical to a release candidate.
Examples
v1.4.0-rc.0 has rc in the version string and is therefore a release candidate. This release is
not stable and is not intended for critical tasks on mainnet (e.g., staking).
However, v1.4.0 is considered stable since it is not marked as a release candidate and does not
contain rc in the version string. This release is intended for use on mainnet.
When to use a release candidate
Users may wish to try a release candidate for the following reasons:
- To preview new features before they are officially released.
- To help detect bugs and regressions before they reach production.
- To provide feedback on annoyances before they make it into a release and become harder to change or revert.
There can also be a scenario that a bug has been found and requires an urgent fix. An example of incidence is v4.0.2-rc.0 which contains a hot-fix to address high CPU usage experienced after the Capella upgrade on 12th April 2023. In this scenario, we will announce the release candidate on Github and also on Discord to recommend users to update to the release candidate version.
When not to use a release candidate
Other than the above scenarios, it is generally not recommended to use release candidates for any critical tasks on mainnet (e.g., staking). To test new release candidate features, try one of the testnets (e.g., Hoodi).
Maximal Extractable Value (MEV)
Lighthouse is able to interact with servers that implement the builder API, allowing it to produce blocks without having knowledge of the transactions included in the block. This enables Lighthouse to outsource the job of transaction gathering/ordering within a block to parties specialized in this particular task. For economic reasons, these parties will refuse to reveal the list of transactions to the validator before the validator has committed to (i.e. signed) the block. A primer on MEV can be found here.
Using the builder API is not known to introduce additional slashing risks, however a live-ness risk (i.e. the ability for the chain to produce valid blocks) is introduced because your node will be signing blocks without executing the transactions within the block. Therefore, it won’t know whether the transactions are valid, and it may sign a block that the network will reject. This would lead to a missed proposal and the opportunity cost of lost block rewards.
How to connect to a builder
The beacon node and validator client each require a new flag for lighthouse to be fully compatible with builder API servers.
lighthouse bn --builder https://mainnet-builder.test
The --builder flag will cause the beacon node to simultaneously query the provided URL and the local execution engine during block production for a block payload with stubbed-out transactions. If either fails, the successful result will be used; If both succeed, the more profitable result will be used.
The beacon node will only query for this type of block (a “blinded” block) when a validator specifically requests it. Otherwise, it will continue to serve full blocks as normal. In order to configure the validator client to query for blinded blocks, you should use the following flag:
lighthouse vc --builder-proposals
With the --builder-proposals flag, the validator client will ask for blinded blocks for all validators it manages.
lighthouse vc --prefer-builder-proposals
With the --prefer-builder-proposals flag, the validator client will always prefer blinded blocks, regardless of the payload value, for all validators it manages.
lighthouse vc --builder-boost-factor <INTEGER>
With the --builder-boost-factor flag, a percentage multiplier is applied to the builder’s payload value when choosing between a
builder payload header and payload from the paired execution node. For example, --builder-boost-factor 50 will only use the builder payload if it is 2x more profitable than the local payload.
In order to configure whether a validator queries for blinded blocks check out this section.
Multiple builders
Lighthouse currently only supports a connection to a single builder. If you’d like to connect to multiple builders or
relays, run one of the following services and configure lighthouse to use it with the --builder flag.
Validator Client Configuration
In the validator client you can configure gas limit and fee recipient on a per-validator basis. If no gas limit is
configured, Lighthouse will use a default gas limit of 60,000,000, which is the current default value used in execution
engines. You can also enable or disable use of external builders on a per-validator basis rather than using
--builder-proposals, --builder-boost-factor or --prefer-builder-proposals, which apply builder related preferences for all validators.
In order to manage these configurations per-validator, you can either make updates to the validator_definitions.yml file
or you can use the HTTP requests described below.
Both the gas limit and fee recipient will be passed along as suggestions to connected builders. If there is a discrepancy in either, it will not keep you from proposing a block with the builder. This is because the bounds on gas limit are calculated based on prior execution blocks, so an honest external builder will make sure that even if your requested gas limit value is out of the specified range, a valid gas limit in the direction of your request will be used in constructing the block. Depending on the connected relay, payment to the proposer might be in the form of a transaction within the block to the fee recipient, so a discrepancy in fee recipient might not indicate that there is something afoot.
Note: The gas limit configured here is effectively a vote on block size, so the configuration should not be taken lightly. 60,000,000 is currently seen as a value balancing block size with how expensive it is for the network to validate blocks. So if you don’t feel comfortable making an informed “vote”, using the default value is encouraged. We will update the default value if the community reaches a rough consensus on a new value.
Set Gas Limit via HTTP
To update gas limit per-validator you can use the standard key manager API.
Alternatively, you can use the lighthouse API. See below for an example.
Enable/Disable builder proposals via HTTP
Use the lighthouse API to enable/disable use of the builder API on a per-validator basis. You can also update the configured gas limit with these requests.
PATCH /lighthouse/validators/:voting_pubkey
HTTP Specification
| Property | Specification |
|---|---|
| Path | /lighthouse/validators/:voting_pubkey |
| Method | PATCH |
| Required Headers | Authorization |
| Typical Responses | 200, 400 |
Example Path
localhost:5062/lighthouse/validators/0xb0148e6348264131bf47bcd1829590e870c836dc893050fd0dadc7a28949f9d0a72f2805d027521b45441101f0cc1cde
Example Request Body
Each field is optional.
{
    "builder_proposals": true,
    "gas_limit": 45000001
}
Command:
DATADIR=/var/lib/lighthouse
curl -X PATCH "http://localhost:5062/lighthouse/validators/0xb0148e6348264131bf47bcd1829590e870c836dc893050fd0dadc7a28949f9d0a72f2805d027521b45441101f0cc1cde" \
-H "Authorization: Bearer $(cat ${DATADIR}/validators/api-token.txt)" \
-H "Content-Type: application/json" \
-d '{
    "builder_proposals": true,
    "gas_limit": 45000001
}' | jq
If you are having permission issue with accessing the API token file, you can modify the header to become -H "Authorization: Bearer $(sudo cat ${DATADIR}/validators/api-token.txt)"
Example Response Body
null
A null response indicates that the request is successful. At the same time, lighthouse vc will show a log which looks like:
INFO Published validator registrations to the builder network, count: 3, service: preparation
Fee Recipient
Refer to suggested fee recipient documentation.
Validator definitions example
You can also directly configure these fields in the validator_definitions.yml file.
---
- enabled: true
  voting_public_key: "0x87a580d31d7bc69069b55f5a01995a610dd391a26dc9e36e81057a17211983a79266800ab8531f21f1083d7d84085007"
  type: local_keystore
  voting_keystore_path: /home/paul/.lighthouse/validators/0x87a580d31d7bc69069b55f5a01995a610dd391a26dc9e36e81057a17211983a79266800ab8531f21f1083d7d84085007/voting-keystore.json
  voting_keystore_password_path: /home/paul/.lighthouse/secrets/0x87a580d31d7bc69069b55f5a01995a610dd391a26dc9e36e81057a17211983a79266800ab8531f21f1083d7d84085007
  suggested_fee_recipient: "0x6cc8dcbca744a6e4ffedb98e1d0df903b10abd21"
  gas_limit: 45000001
  builder_proposals: true
  builder_boost_factor: 50
- enabled: false
  voting_public_key: "0xa5566f9ec3c6e1fdf362634ebec9ef7aceb0e460e5079714808388e5d48f4ae1e12897fed1bea951c17fa389d511e477"
  type: local_keystore voting_keystore_path: /home/paul/.lighthouse/validators/0xa5566f9ec3c6e1fdf362634ebec9ef7aceb0e460e5079714808388e5d48f4ae1e12897fed1bea951c17fa389d511e477/voting-keystore.json
  voting_keystore_password: myStrongpa55word123&$
  suggested_fee_recipient: "0xa2e334e71511686bcfe38bb3ee1ad8f6babcc03d"
  gas_limit: 33333333
  builder_proposals: true
  prefer_builder_proposals: true
Circuit breaker conditions
By outsourcing payload construction and signing blocks without verifying transactions, we are creating a new risk to live-ness. If most of the network is using a small set of relays and one is bugged, a string of missed proposals could happen quickly. This is not only generally bad for the network, but if you have a proposal coming up, you might not realize that your next proposal is likely to be missed until it’s too late. So we’ve implemented some “chain health” checks to try and avoid scenarios like this.
By default, Lighthouse is strict with these conditions, but we encourage users to learn about and adjust them.
--builder-fallback-skips- If we’ve seen this number of skip slots on the canonical chain in a row prior to proposing, we will NOT query any connected builders, and will use the local execution engine for payload construction.--builder-fallback-skips-per-epoch- If we’ve seen this number of skip slots on the canonical chain in the pastSLOTS_PER_EPOCH, we will NOT query any connected builders, and will use the local execution engine for payload construction.--builder-fallback-epochs-since-finalization- If we’re proposing and the chain has not finalized within this number of epochs, we will NOT query any connected builders, and will use the local execution engine for payload construction. Setting this value to anything less than 2 will cause the node to NEVER query connected builders. Setting it to 2 will cause this condition to be hit if there are skips slots at the start of an epoch, right before this node is set to propose.--builder-fallback-disable-checks- This flag disables all checks related to chain health. This means the builder API will always be used for payload construction, regardless of recent chain conditions.
Checking your builder config
You can check that your builder is configured correctly by looking for these log messages.
On start-up, the beacon node will log if a builder is configured:
INFO Using external block builder
At regular intervals the validator client will log that it successfully registered its validators with the builder network:
INFO Published validator registrations to the builder network
When you successfully propose a block using a builder, you will see this log on the beacon node:
INFO Successfully published a block to the builder network
If you don’t see that message around the time of your proposals, check your beacon node logs
for INFO and WARN messages indicating why the builder was not used.
Examples of messages indicating fallback to a locally produced block are:
INFO Builder did not return a payload
WARN Builder error when requesting payload
WARN Builder returned invalid payload
INFO Builder payload ignored
INFO Chain is unhealthy, using local payload
Information for block builders and relays
Block builders and relays can query beacon node events from the Events API. An example of querying the payload attributes in the Events API is outlined in Beacon node API - Events API
Late Block Re-orgs
Since v3.4.0 Lighthouse will opportunistically re-org late blocks when proposing.
When Lighthouse is about to propose a new block, it quickly checks whether the block from the previous slot landed so late that hardly anyone attested to it. If that late block looks weak enough, Lighthouse may decide to “re-org” it away: instead of building on it, Lighthouse builds its new block on the grand-parent block, turning the late block into an orphan.
This feature is intended to disincentivise late blocks and improve network health. Proposing a re-orging block is also more profitable for the proposer because it increases the number of attestations and transactions that can be included.
Command line flags
There is one flag which controls the re-orging behaviour:
--disable-proposer-reorgs: turn re-orging off (it’s on by default).
This flag should be applied to lighthouse bn. The default configuration is recommended as it
balances the chance of the re-org succeeding against the chance of failure due to attestations
arriving late and making the re-org block non-viable.
Safeguards
To prevent excessive re-orgs there are several safeguards in place that limit when a re-org will be attempted.
The full conditions are described in the spec but the most important ones are:
- Only single-slot re-orgs: Lighthouse will build a block at N + 1 to re-org N by building on the parent N - 1. The result is a chain with exactly one skipped slot.
Logs
You can track the reasons for re-orgs being attempted (or not) via Lighthouse’s logs.
A pair of messages at INFO level will be logged if a re-org opportunity is detected:
INFO Attempting re-org due to weak head      threshold_weight: 45455983852725, head_weight: 0, parent: 0x09d953b69041f280758400c671130d174113bbf57c2d26553a77fb514cad4890, weak_head: 0xf64f8e5ed617dc18c1e759dab5d008369767c3678416dac2fe1d389562842b49
INFO Proposing block to re-org current head  head_to_reorg: 0xf64f…2b49, slot: 1105320
This should be followed shortly after by a INFO log indicating that a re-org occurred. This is
expected and normal:
INFO Beacon chain re-org reorg_distance: 1, new_slot: 1105320, new_head: 0x72791549e4ca792f91053bc7cf1e55c6fbe745f78ce7a16fc3acb6f09161becd, previous_slot: 1105319, previous_head: 0xf64f8e5ed617dc18c1e759dab5d008369767c3678416dac2fe1d389562842b49
In case a re-org is not viable (which should be most of the time), Lighthouse will just propose a block as normal and log the reason the re-org was not attempted at debug level:
DEBG Not attempting re-org reason: head not late
If you are interested in digging into the timing of forkchoiceUpdated messages sent to the
execution layer, there is also a debug log for the suppression of forkchoiceUpdated messages
when Lighthouse thinks that a re-org is likely:
DEBG Fork choice update overridden slot: 1105320, override: 0x09d953b69041f280758400c671130d174113bbf57c2d26553a77fb514cad4890, canonical_head: 0xf64f8e5ed617dc18c1e759dab5d008369767c3678416dac2fe1d389562842b49
Data columns
With the Fusaka upgrade, the main feature PeerDAS allows storing only a portion of blob data, known as data columns, thus reducing the storage and bandwidth requirements of a full node. This however also means that a full node will not be able to serve blobs after Fusaka. To continue serving blobs, run the beacon node with --semi-supernode or --supernode. Note that this comes at a significant increase in storage and bandwidth requirements, see this blog post about PeerDAS and Fusaka bandwidth estimation for more details.
Note: the above assumes that the beacon node has no attached validators. If the beacon node has attached validators, then it is required to custody (store) a certain number of data columns which increases with the number of staked ETH. For example, if the staked ETH is >= 2048 ETH, then due to custody requirement, it will make the beacon node a semi-supernode ; if >= 4096 ETH, the beacon node will be a supernode without needing the flag.
Table below summarizes the role of relevant flags in Lighthouse beacon node:
| Post-Deneb, Pre-Fulu | Post-Fulu | |||
|---|---|---|---|---|
| Flag | Usage | Can serve blobs? | Usage | Can serve blobs? |
| –prune-blobs false | Does not prune blobs since using the flag | Yes, for blobs since using the flag and for the past 18 days | Does not prune data columns since using the flag | No |
| –semi-supernode | - | - | Store half data columns | Yes, for blobs since using the flag for a max of 18 days |
| –supernode | - | - | Store all data columns | Yes, for blobs since using the flag for a max of 18 days |
While both --supernode and --semi-supernode can serve blobs, a supernode will be faster to respond to blobs queries as it skips the blob reconstruction step. Running a supernode also helps the network by serving the data columns to its peers.
Combining --prune-blobs false and --supernode (or --semi-supernode) implies that no data columns will be pruned, and the node will be able to serve blobs since using the flag. Note that the storage used for blobs will increase significantly as the blobs accumulate over time, in the range of several terabytes.
If you want historical blob data beyond the data availability period (18 days), you can backfill blobs or data columns with the experimental flag --complete-blob-backfill. However, do note that this is an experimental feature and it only works when the flag is present during a fresh checkpoint sync when the database is initialised. The flag will not backfill blobs if the node is already running (with an existing database). During blob backfill, the feature may cause some issues, e.g., the node may block most of its peers.
⚠️ The following section on Blobs is archived and not maintained as blobs are stored in the form of data columns after the Fulu fork ⚠️
Blobs
In the Deneb network upgrade, one of the changes is the implementation of EIP-4844, also known as Proto-danksharding. Alongside with this, a new term named blob (binary large object) is introduced. Blobs are “side-cars” carrying transaction data in a block. They are mainly used by Ethereum layer 2 operators. As far as stakers are concerned, the main difference with the introduction of blobs is the increased storage requirement.
FAQ
-
What is the storage requirement for blobs?
After Deneb, we expect an additional increase of ~50 GB of storage requirement for blobs (on top of what is required by the consensus and execution clients database). The calculation is as below:
One blob is 128 KB in size. Each block can carry a maximum of 6 blobs. Blobs will be kept for 4096 epochs and pruned afterwards. This means that the maximum increase in storage requirement will be:
2**17 bytes / blob * 6 blobs / block * 32 blocks / epoch * 4096 epochs = 96 GBHowever, the blob base fee targets 3 blobs per block and it works similarly to how EIP-1559 operates in the Ethereum gas fee. Therefore, practically it is very likely to average to 3 blobs per blocks, which translates to a storage requirement of 48 GB.
After Electra, the target blobs is increased to 6 blobs per block. This means blobs storage is expected to use ~100GB of disk space.
-
Do I have to add any flags for blobs?
No, you can use the default values for blob-related flags, which means you do not need add or remove any flags.
-
What if I want to keep all blobs?
Use the flag
--prune-blobs falsein the beacon node. The storage requirement will be:2**17 bytes * 6 blobs / block * 7200 blocks / day * 30 days = 158GB / month or 1896GB / yearTo keep blobs for a custom period, you may use the flag
--blob-prune-margin-epochs <EPOCHS>which keeps blobs for 4096+EPOCHS specified in the flag. -
How to see the info of the blobs database?
We can call the API:
curl "http://localhost:5052/lighthouse/database/info" | jqRefer to Lighthouse API for an example response.
Lighthouse CLI Reference
Ethereum 2.0 client by Sigma Prime. Provides a full-featured beacon node, a
validator client and utilities for managing validator accounts.

Usage: lighthouse [OPTIONS] [COMMAND]

Commands:
  account_manager
          Utilities for generating and managing Ethereum 2.0 accounts. [aliases:
          a, am, account]
  beacon_node
          The primary component which connects to the Ethereum 2.0 P2P network
          and downloads, verifies and stores blocks. Provides a HTTP API for
          querying the beacon chain and publishing messages to the network.
          [aliases: b, bn, beacon]
  boot_node
          Start a special Lighthouse process that only serves as a discv5
          boot-node. This process will *not* import blocks or perform most
          typical beacon node functions. Instead, it will simply run the discv5
          service and assist nodes on the network to discover each other. This
          is the recommended way to provide a network boot-node since it has a
          reduced attack surface compared to a full beacon node.
  database_manager
          Manage a beacon node database. [aliases: db]
  validator_client
          When connected to a beacon node, performs the duties of a staked
          validator (e.g., proposing blocks and attestations). [aliases: v, vc,
          validator]
  validator_manager
          Utilities for managing a Lighthouse validator client via the HTTP API.
          [aliases: vm, validator-manager]
  help
          Print this message or the help of the given subcommand(s)

Options:
  -d, --datadir <DIR>
          Used to specify a custom root data directory for lighthouse keys and
          databases. Defaults to $HOME/.lighthouse/{network} where network is
          the value of the `network` flag Note: Users should specify separate
          custom datadirs for different networks.
      --debug-level <LEVEL>
          Specifies the verbosity level used when emitting logs to the terminal.
          [default: info] [possible values: info, debug, trace, warn, error]
      --genesis-state-url <URL>
          A URL of a beacon-API compatible server from which to download the
          genesis state. Checkpoint sync server URLs can generally be used with
          this flag. If not supplied, a default URL or the --checkpoint-sync-url
          may be used. If the genesis state is already included in this binary
          then this value will be ignored.
      --genesis-state-url-timeout <SECONDS>
          The timeout in seconds for the request to --genesis-state-url.
          [default: 300]
      --log-format <FORMAT>
          Specifies the log format used when emitting logs to the terminal.
          [possible values: JSON]
      --logfile-debug-level <LEVEL>
          The verbosity level used when emitting logs to the log file. [default:
          debug] [possible values: info, debug, trace, warn, error]
      --logfile-dir <DIR>
          Directory path where the log file will be stored
      --logfile-format <FORMAT>
          Specifies the log format used when emitting logs to the logfile.
          [possible values: DEFAULT, JSON]
      --logfile-max-number <COUNT>
          The maximum number of log files that will be stored. If set to 0,
          background file logging is disabled. [default: 10]
      --logfile-max-size <SIZE>
          The maximum size (in MB) each log file can grow to before rotating. If
          set to 0, background file logging is disabled. [default: 200]
      --network <network>
          Name of the Eth2 chain Lighthouse will sync and follow. [possible
          values: mainnet, gnosis, chiado, sepolia, holesky, hoodi]
  -t, --testnet-dir <DIR>
          Path to directory containing eth2_testnet specs. Defaults to a
          hard-coded Lighthouse testnet. Only effective if there is no existing
          database.
      --telemetry-collector-url <URL>
          URL of the OpenTelemetry collector to export tracing spans (e.g.,
          http://localhost:4317). If not set, tracing export is disabled.
      --telemetry-service-name <NAME>
          Override the OpenTelemetry service name. Defaults to 'lighthouse-bn'
          for beacon node, 'lighthouse-vc' for validator client, or 'lighthouse'
          for other subcommands.
  -V, --version
          Print version

Flags:
      --disable-log-timestamp
          If present, do not include timestamps in logging output.
      --disable-malloc-tuning
          If present, do not configure the system allocator. Providing this flag
          will generally increase memory usage, it should only be provided when
          debugging specific memory allocation issues.
  -h, --help
          Prints help information
      --log-color [<log-color>]
          Enables/Disables colors for logs in terminal. Set it to false to
          disable colors. [default: true] [possible values: true, false]
      --log-extra-info
          If present, show module,file,line in logs
      --logfile-color
          Enables colors in logfile.
      --logfile-compress
          If present, compress old log files. This can help reduce the space
          needed to store old logs.
      --logfile-no-restricted-perms
          If present, log files will be generated as world-readable meaning they
          can be read by any user on the machine. Note that logs can often
          contain sensitive information about your validator and so this flag
          should be used with caution. For Windows users, the log file
          permissions will be inherited from the parent folder.
      --stdin-inputs
          If present, read all user inputs from stdin instead of tty.
Beacon Node
The primary component which connects to the Ethereum 2.0 P2P network and
downloads, verifies and stores blocks. Provides a HTTP API for querying the
beacon chain and publishing messages to the network.
Usage: lighthouse beacon_node [OPTIONS] --execution-endpoint <EXECUTION-ENDPOINT>
Options:
--auto-compact-db <auto-compact-db>
Enable or disable automatic compaction of the database on
finalization. [default: true]
--beacon-node-backend <DATABASE>
Set the database backend to be used by the beacon node. [possible
values: leveldb]
--blob-prune-margin-epochs <EPOCHS>
The margin for blob pruning in epochs. The oldest blobs are pruned up
until data_availability_boundary - blob_prune_margin_epochs. [default:
0]
--blobs-dir <DIR>
Data directory for the blobs database.
--block-cache-size <SIZE>
Specifies how many blocks the database should cache in memory
[default: 0]
--boot-nodes <ENR/MULTIADDR LIST>
One or more comma-delimited base64-encoded ENR's to bootstrap the p2p
network. Multiaddr is also supported.
--builder <builder>
The URL of a service compatible with the MEV-boost API.
--builder-disable-ssz
Disables sending requests using SSZ over the builder API.
--builder-fallback-epochs-since-finalization <builder-fallback-epochs-since-finalization>
If this node is proposing a block and the chain has not finalized
within this number of epochs, it will NOT query any connected
builders, and will use the local execution engine for payload
construction. Setting this value to anything less than 2 will cause
the node to NEVER query connected builders. Setting it to 2 will cause
this condition to be hit if there are skips slots at the start of an
epoch, right before this node is set to propose. [default: 3]
--builder-fallback-skips <builder-fallback-skips>
If this node is proposing a block and has seen this number of skip
slots on the canonical chain in a row, it will NOT query any connected
builders, and will use the local execution engine for payload
construction. [default: 3]
--builder-fallback-skips-per-epoch <builder-fallback-skips-per-epoch>
If this node is proposing a block and has seen this number of skip
slots on the canonical chain in the past `SLOTS_PER_EPOCH`, it will
NOT query any connected builders, and will use the local execution
engine for payload construction. [default: 8]
--builder-header-timeout <MILLISECONDS>
Defines a timeout value (in milliseconds) to use when fetching a block
header from the builder API. [default: 1000]
--builder-user-agent <STRING>
The HTTP user agent to send alongside requests to the builder URL. The
default is Lighthouse's version string.
--checkpoint-blobs <BLOBS_SSZ>
Set the checkpoint blobs to start syncing from. Must be aligned and
match --checkpoint-block. Using --checkpoint-sync-url instead is
recommended.
--checkpoint-block <BLOCK_SSZ>
Set a checkpoint block to start syncing from. Must be aligned and
match --checkpoint-state. Using --checkpoint-sync-url instead is
recommended.
--checkpoint-state <STATE_SSZ>
Set a checkpoint state to start syncing from. Must be aligned and
match --checkpoint-block. Using --checkpoint-sync-url instead is
recommended.
--checkpoint-sync-url <BEACON_NODE>
Set the remote beacon node HTTP endpoint to use for checkpoint sync.
--checkpoint-sync-url-timeout <SECONDS>
Set the timeout for checkpoint sync calls to remote beacon node HTTP
endpoint. [default: 180]
-d, --datadir <DIR>
Used to specify a custom root data directory for lighthouse keys and
databases. Defaults to $HOME/.lighthouse/{network} where network is
the value of the `network` flag Note: Users should specify separate
custom datadirs for different networks.
--debug-level <LEVEL>
Specifies the verbosity level used when emitting logs to the terminal.
[default: info] [possible values: info, debug, trace, warn, error]
--discovery-port <PORT>
The UDP port that discovery will listen on. Defaults to `port`
--discovery-port6 <PORT>
The UDP port that discovery will listen on over IPv6 if listening over
both IPv4 and IPv6. Defaults to `port6`
--enable-mplex [<BOOLEAN>]
Enables the mplex multiplexer alongside yamux. Yamux is preferred when
both are available. Enabled by default; set to "false" to disable.
[default: true]
--enable-partial-columns [<BOOLEAN>]
Enable partial messages for data columns. This can reduce the amount
of data sent over the network. Enabled by default on Hoodi and
Sepolia; set to "false" to opt out.
--enr-address <ADDRESS>...
The IP address/ DNS address to broadcast to other peers on how to
reach this node. If a DNS address is provided, the enr-address is set
to the IP address it resolves to and does not auto-update based on
PONG responses in discovery. Set this only if you are sure other nodes
can connect to your local node on this address. This will update the
`ip4` or `ip6` ENR fields accordingly. To update both, set this flag
twice with the different values.
--enr-quic-port <PORT>
The quic UDP4 port that will be set on the local ENR. Set this only if
you are sure other nodes can connect to your local node on this port
over IPv4.
--enr-quic6-port <PORT>
The quic UDP6 port that will be set on the local ENR. Set this only if
you are sure other nodes can connect to your local node on this port
over IPv6.
--enr-tcp-port <PORT>
The TCP4 port of the local ENR. Set this only if you are sure other
nodes can connect to your local node on this port over IPv4. The
--port flag is used if this is not set.
--enr-tcp6-port <PORT>
The TCP6 port of the local ENR. Set this only if you are sure other
nodes can connect to your local node on this port over IPv6. The
--port6 flag is used if this is not set.
--enr-udp-port <PORT>
The UDP4 port of the local ENR. Set this only if you are sure other
nodes can connect to your local node on this port over IPv4.
--enr-udp6-port <PORT>
The UDP6 port of the local ENR. Set this only if you are sure other
nodes can connect to your local node on this port over IPv6.
--epochs-per-blob-prune <EPOCHS>
The epoch interval with which to prune blobs from Lighthouse's
database when they are older than the data availability boundary
relative to the current epoch. [default: 256]
--epochs-per-migration <N>
The number of epochs to wait between running the migration of data
from the hot DB to the cold DB. Less frequent runs can be useful for
minimizing disk writes [default: 1]
--execution-endpoint <EXECUTION-ENDPOINT>
Server endpoint for an execution layer JWT-authenticated HTTP JSON-RPC
connection. Uses the same endpoint to populate the deposit cache.
--execution-jwt <EXECUTION-JWT>
File path which contains the hex-encoded JWT secret for the execution
endpoint provided in the --execution-endpoint flag.
--execution-jwt-id <EXECUTION-JWT-ID>
Used by the beacon node to communicate a unique identifier to
execution nodes during JWT authentication. It corresponds to the 'id'
field in the JWT claims object.Set to empty by default
--execution-jwt-secret-key <EXECUTION-JWT-SECRET-KEY>
Hex-encoded JWT secret for the execution endpoint provided in the
--execution-endpoint flag.
--execution-jwt-version <EXECUTION-JWT-VERSION>
Used by the beacon node to communicate a client version to execution
nodes during JWT authentication. It corresponds to the 'clv' field in
the JWT claims object.Set to empty by default
--execution-timeout-multiplier <NUM>
Unsigned integer to multiply the default execution timeouts by.
[default: 1]
--fork-choice-before-proposal-timeout <fork-choice-before-proposal-timeout>
Set the maximum number of milliseconds to wait for fork choice before
proposing a block. You can prevent waiting at all by setting the
timeout to 0, however you risk proposing atop the wrong parent block.
[default: 250]
--freezer-dir <DIR>
Data directory for the freezer database.
--genesis-state-url <URL>
A URL of a beacon-API compatible server from which to download the
genesis state. Checkpoint sync server URLs can generally be used with
this flag. If not supplied, a default URL or the --checkpoint-sync-url
may be used. If the genesis state is already included in this binary
then this value will be ignored.
--genesis-state-url-timeout <SECONDS>
The timeout in seconds for the request to --genesis-state-url.
[default: 300]
--graffiti <GRAFFITI>
Specify your custom graffiti to be included in blocks. Defaults to the
current version and commit, truncated to fit in 32 bytes.
--hdiff-buffer-cache-size <SIZE>
Number of cold hierarchical diff (hdiff) buffers to cache in memory.
Each buffer is around the size of a BeaconState so you should be
cautious about setting this value too high. This flag is irrelevant
for most nodes, which run with state pruning enabled. [default: 16]
--hierarchy-exponents <EXPONENTS>
Specifies the frequency for storing full state snapshots and
hierarchical diffs in the freezer DB. Accepts a comma-separated list
of ascending exponents. Each exponent defines an interval for storing
diffs to the layer above. The last exponent defines the interval for
full snapshots. For example, a config of '4,8,12' would store a full
snapshot every 4096 (2^12) slots, first-level diffs every 256 (2^8)
slots, and second-level diffs every 16 (2^4) slots. Cannot be changed
after initialization. [default: 5,9,11,13,16,18,21]
--historic-state-cache-size <SIZE>
Specifies how many states from the freezer database should be cached
in memory [default: 1]
--hot-hdiff-buffer-cache-size <SIZE>
Number of hot hierarchical diff (hdiff) buffers to cache in memory.
Each buffer is around the size of a BeaconState so you should be
cautious about setting this value too high. Setting this value higher
can reduce the time taken to store new states on disk at the cost of
higher memory usage. [default: 1]
--http-address <ADDRESS>
Set the listen address for the RESTful HTTP API server.
--http-allow-origin <ORIGIN>
Set the value of the Access-Control-Allow-Origin response HTTP header.
Use * to allow any origin (not recommended in production). If no value
is supplied, the CORS allowed origin is set to the listen address of
this server (e.g., http://localhost:5052).
--http-duplicate-block-status <STATUS_CODE>
Status code to send when a block that is already known is POSTed to
the HTTP API.
--http-enable-beacon-processor <BOOLEAN>
The beacon processor is a scheduler which provides quality-of-service
and DoS protection. When set to "true", HTTP API requests will be
queued and scheduled alongside other tasks. When set to "false", HTTP
API responses will be executed immediately.
--http-port <PORT>
Set the listen TCP port for the RESTful HTTP API server.
--http-sse-capacity-multiplier <N>
Multiplier to apply to the length of HTTP server-sent-event (SSE)
channels. Increasing this value can prevent messages from being
dropped.
--http-tls-cert <http-tls-cert>
The path of the certificate to be used when serving the HTTP API
server over TLS.
--http-tls-key <http-tls-key>
The path of the private key to be used when serving the HTTP API
server over TLS. Must not be password-protected.
--inbound-rate-limiter-protocols <inbound-rate-limiter-protocols>
Configures the inbound rate limiter (requests received by this
node).Rate limit quotas per protocol can be set in the form of
<protocol_name>:<tokens>/<time_in_seconds>. To set quotas for multiple
protocols, separate them by ';'. This is enabled by default, using
default quotas. To disable rate limiting use the
disable-inbound-rate-limiter flag instead.
--invalid-gossip-verified-blocks-path <PATH>
If a block succeeds gossip validation whilst failing full validation,
store the block SSZ as a file at this path. This feature is only
recommended for developers. This directory is not pruned, users should
be careful to avoid filling up their disks.
--libp2p-addresses <MULTIADDR>
One or more comma-delimited multiaddrs to manually connect to a libp2p
peer without an ENR. DEPRECATED. The --libp2p-addresses flag is
deprecated and replaced by --boot-nodes
--listen-address [<ADDRESS>...]
The address lighthouse will listen for UDP and TCP connections. To
listen over IPv4 and IPv6 set this flag twice with the different
values.
Examples:
- --listen-address '0.0.0.0' will listen over IPv4.
- --listen-address '::' will listen over IPv6.
- --listen-address '0.0.0.0' --listen-address '::' will listen over
both IPv4 and IPv6. The order of the given addresses is not relevant.
However, multiple IPv4, or multiple IPv6 addresses will not be
accepted. If omitted, Lighthouse will listen on all interfaces, for
both IPv4 and IPv6.
--log-format <FORMAT>
Specifies the log format used when emitting logs to the terminal.
[possible values: JSON]
--logfile-debug-level <LEVEL>
The verbosity level used when emitting logs to the log file. [default:
debug] [possible values: info, debug, trace, warn, error]
--logfile-dir <DIR>
Directory path where the log file will be stored
--logfile-format <FORMAT>
Specifies the log format used when emitting logs to the logfile.
[possible values: DEFAULT, JSON]
--logfile-max-number <COUNT>
The maximum number of log files that will be stored. If set to 0,
background file logging is disabled. [default: 10]
--logfile-max-size <SIZE>
The maximum size (in MB) each log file can grow to before rotating. If
set to 0, background file logging is disabled. [default: 200]
--max-skip-slots <NUM_SLOTS>
Refuse to skip more than this many slots when processing an
attestation. This prevents nodes on minority forks from wasting our
time and disk space, but could also cause unnecessary consensus
failures, so is disabled by default.
--metrics-address <ADDRESS>
Set the listen address for the Prometheus metrics HTTP server.
--metrics-allow-origin <ORIGIN>
Set the value of the Access-Control-Allow-Origin response HTTP header.
Use * to allow any origin (not recommended in production). If no value
is supplied, the CORS allowed origin is set to the listen address of
this server (e.g., http://localhost:5054).
--metrics-port <PORT>
Set the listen TCP port for the Prometheus metrics HTTP server.
--monitoring-endpoint <ADDRESS>
Enables the monitoring service for sending system metrics to a remote
endpoint. This can be used to monitor your setup on certain services
(e.g. beaconcha.in). This flag sets the endpoint where the beacon node
metrics will be sent. Note: This will send information to a remote
sever which may identify and associate your validators, IP address and
other personal information. Always use a HTTPS connection and never
provide an untrusted URL.
--monitoring-endpoint-period <SECONDS>
Defines how many seconds to wait between each message sent to the
monitoring-endpoint. Default: 60s
--network <network>
Name of the Eth2 chain Lighthouse will sync and follow. [possible
values: mainnet, gnosis, chiado, sepolia, holesky, hoodi]
--network-dir <DIR>
Data directory for network keys. Defaults to network/ inside the
beacon node dir.
--port <PORT>
The TCP/UDP ports to listen on. There are two UDP ports. The discovery
UDP port will be set to this value and the Quic UDP port will be set
to this value + 1. The discovery port can be modified by the
--discovery-port flag and the quic port can be modified by the
--quic-port flag. If listening over both IPv4 and IPv6 the --port flag
will apply to the IPv4 address and --port6 to the IPv6 address.
[default: 9000]
--port6 <PORT>
The TCP/UDP ports to listen on over IPv6 when listening over both IPv4
and IPv6. Defaults to --port. The Quic UDP port will be set to this
value + 1.
--prepare-payload-lookahead <MILLISECONDS>
The time before the start of a proposal slot at which payload
attributes should be sent. Low values are useful for execution nodes
which don't improve their payload after the first call, and high
values are useful for ensuring the EL is given ample notice. Default:
1/3 of a slot.
--proposer-reorg-cutoff <MILLISECONDS>
DEPRECATED. This flag has no effect.
--proposer-reorg-disallowed-offsets <N1,N2,...>
DEPRECATED. This flag has no effect.
--proposer-reorg-epochs-since-finalization <EPOCHS>
DEPRECATED. This flag has no effect.
--proposer-reorg-parent-threshold <PERCENT>
DEPRECATED. This flag has no effect.
--proposer-reorg-threshold <PERCENT>
DEPRECATED. This flag has no effect.
--prune-blobs <BOOLEAN>
Prune blobs from Lighthouse's database when they are older than the
data data availability boundary relative to the current epoch.
[default: true]
--prune-payloads <prune-payloads>
Prune execution payloads from Lighthouse's database. This saves space
but imposes load on the execution client, as payloads need to be
reconstructed and sent to syncing peers. [default: true]
--quic-port <PORT>
The UDP port that quic will listen on. Defaults to `port` + 1
--quic-port6 <PORT>
The UDP port that quic will listen on over IPv6 if listening over both
IPv4 and IPv6. Defaults to `port6` + 1
--self-limiter-protocols <self-limiter-protocols>
Enables the outbound rate limiter (requests made by this node).Rate
limit quotas per protocol can be set in the form of
<protocol_name>:<tokens>/<time_in_seconds>. To set quotas for multiple
protocols, separate them by ';'. If the self rate limiter is enabled
and a protocol is not present in the configuration, the quotas used
for the inbound rate limiter will be used.
--shuffling-cache-size <shuffling-cache-size>
Some HTTP API requests can be optimised by caching the shufflings at
each epoch. This flag allows the user to set the shuffling cache size
in epochs. Shufflings are dependent on validator count and setting
this value to a large number can consume a large amount of memory.
--slasher-att-cache-size <COUNT>
Set the maximum number of attestation roots for the slasher to cache
--slasher-backend <DATABASE>
Set the database backend to be used by the slasher. [possible values:
lmdb, disabled]
--slasher-broadcast [<slasher-broadcast>]
Broadcast slashings found by the slasher to the rest of the network
[Enabled by default]. [default: true]
--slasher-chunk-size <EPOCHS>
Number of epochs per validator per chunk stored on disk.
--slasher-dir <PATH>
Set the slasher's database directory.
--slasher-history-length <EPOCHS>
Configure how many epochs of history the slasher keeps. Immutable
after initialization.
--slasher-max-db-size <GIGABYTES>
Maximum size of the MDBX database used by the slasher.
--slasher-slot-offset <SECONDS>
Set the delay from the start of the slot at which the slasher should
ingest attestations. Only effective if the slasher-update-period is a
multiple of the slot duration.
--slasher-update-period <SECONDS>
Configure how often the slasher runs batch processing.
--slasher-validator-chunk-size <NUM_VALIDATORS>
Number of validators per chunk stored on disk.
--slots-per-restore-point <SLOT_COUNT>
DEPRECATED. This flag has no effect.
--state-cache-headroom <N>
Minimum number of states to cull from the state cache when it gets
full [default: 1]
--state-cache-size <STATE_CACHE_SIZE>
Specifies the size of the state cache [default: 128]
--suggested-fee-recipient <SUGGESTED-FEE-RECIPIENT>
Emergency fallback fee recipient for use in case the validator client
does not have one configured. You should set this flag on the
validator client instead of (or in addition to) setting it here.
-t, --testnet-dir <DIR>
Path to directory containing eth2_testnet specs. Defaults to a
hard-coded Lighthouse testnet. Only effective if there is no existing
database.
--target-peers <target-peers>
The target number of peers.
--telemetry-collector-url <URL>
URL of the OpenTelemetry collector to export tracing spans (e.g.,
http://localhost:4317). If not set, tracing export is disabled.
--telemetry-service-name <NAME>
Override the OpenTelemetry service name. Defaults to 'lighthouse-bn'
for beacon node, 'lighthouse-vc' for validator client, or 'lighthouse'
for other subcommands.
--trusted-peers <TRUSTED_PEERS>
One or more comma-delimited trusted peer ids which always have the
highest score according to the peer scoring system.
--trusted-setup-file-override <FILE>
Path to a json file containing the trusted setup params. NOTE: This
will override the trusted setup that is generated from the mainnet kzg
ceremony. Use with caution
--validator-monitor-file <PATH>
As per --validator-monitor-pubkeys, but the comma-separated list is
contained within a file at the given path.
--validator-monitor-individual-tracking-threshold <INTEGER>
Once the validator monitor reaches this number of local validators it
will stop collecting per-validator Prometheus metrics and issuing
per-validator logs. Instead, it will provide aggregate metrics and
logs. This avoids infeasibly high cardinality in the Prometheus
database and high log volume when using many validators. Defaults to
64.
--validator-monitor-pubkeys <PUBKEYS>
A comma-separated list of 0x-prefixed validator public keys. These
validators will receive special monitoring and additional logging.
--wss-checkpoint <WSS_CHECKPOINT>
Specify a weak subjectivity checkpoint in `block_root:epoch` format to
verify the node's sync against. The block root should be 0x-prefixed.
Note that this flag is for verification only, to perform a checkpoint
sync from a recent state use --checkpoint-sync-url.
-V, --version
Print version
Flags:
--allow-insecure-genesis-sync
Enable syncing from genesis, which is generally insecure and
incompatible with data availability checks. Checkpoint syncing is the
preferred method for syncing a node. Only use this flag when testing.
DO NOT use on mainnet!
--always-prepare-payload
Send payload attributes with every fork choice update. This is
intended for use by block builders, relays and developers. You should
set a fee recipient on this BN and also consider adjusting the
--prepare-payload-lookahead flag.
--archive
Store all beacon states in the database. When checkpoint syncing,
states are reconstructed after backfill completes. This requires
syncing all the way back to genesis.
--builder-fallback-disable-checks
This flag disables all checks related to chain health. This means the
builder API will always be used for payload construction, regardless
of recent chain conditions.
--compact-db
If present, apply compaction to the database on start-up. Use with
caution. It is generally not recommended unless auto-compaction is
disabled.
--disable-backfill-rate-limiting
Disable the backfill sync rate-limiting. This allow users to just sync
the entire chain as fast as possible, however it can result in
resource contention which degrades staking performance. Stakers should
generally choose to avoid this flag since backfill sync is not
required for staking.
--disable-enr-auto-update
Discovery automatically updates the nodes local ENR with an external
IP address and port as seen by other peers on the network. This
disables this feature, fixing the ENR's IP/PORT to those specified on
boot.
--disable-get-blobs
Disables the getBlobs optimisation to fetch blobs from the EL mempool
--disable-inbound-rate-limiter
Disables the inbound rate limiter (requests received by this node).
--disable-light-client-server
Disables light client support on the p2p network
--disable-log-timestamp
If present, do not include timestamps in logging output.
--disable-malloc-tuning
If present, do not configure the system allocator. Providing this flag
will generally increase memory usage, it should only be provided when
debugging specific memory allocation issues.
--disable-optimistic-finalized-sync
Force Lighthouse to verify every execution block hash with the
execution client during finalized sync. By default block hashes will
be checked in Lighthouse and only passed to the EL if initial
verification fails.
--disable-packet-filter
Disables the discovery packet filter. Useful for testing in smaller
networks
--disable-proposer-reorgs
Do not attempt to reorg late blocks from other validators when
proposing.
--disable-quic
Disables the quic transport. The node will rely solely on the TCP
transport for libp2p connections.
--disable-self-limiter
Disables the outbound rate limiter (requests sent by this node).
--disable-upnp
Disables UPnP support. Setting this will prevent Lighthouse from
attempting to automatically establish external port mappings.
-e, --enr-match
Sets the local ENR IP address and port to match those set for
lighthouse. Specifically, the IP address will be the value of
--listen-address and the UDP port will be --discovery-port.
--enable-fast-confirmation
Enable the Fast Confirmation Rule (FCR). When enabled, FCR provides
faster block confirmation (typically within 1-2 slots of the head) by
computing a confirmed root that is fed into the execution layer's
safe_block_hash.
--enable-private-discovery
Lighthouse by default does not discover private IP addresses. Set this
flag to enable connection attempts to local addresses.
--genesis-backfill
Attempts to download blocks all the way back to genesis when
checkpoint syncing.
--gui
Enable the graphical user interface and all its requirements. This
enables --http and --validator-monitor-auto and enables SSE logging.
-h, --help
Prints help information
--http
Enable the RESTful HTTP API server. Disabled by default.
--http-enable-tls
Serves the RESTful HTTP API server over TLS. This feature is currently
experimental.
--ignore-ws-check
Using this flag allows a node to run in a state that may expose it to
long-range attacks. For more information please read this blog post:
https://blog.ethereum.org/2014/11/25/proof-stake-learned-love-weak-subjectivity
If you understand the risks, you can use this flag to disable the Weak
Subjectivity check at startup.
--import-all-attestations
Import and aggregate all attestations, regardless of validator
subscriptions. This will only import attestations from
already-subscribed subnets, use with --subscribe-all-subnets to ensure
all attestations are received for import.
--log-color [<log-color>]
Enables/Disables colors for logs in terminal. Set it to false to
disable colors. [default: true] [possible values: true, false]
--log-extra-info
If present, show module,file,line in logs
--logfile-color
Enables colors in logfile.
--logfile-compress
If present, compress old log files. This can help reduce the space
needed to store old logs.
--logfile-no-restricted-perms
If present, log files will be generated as world-readable meaning they
can be read by any user on the machine. Note that logs can often
contain sensitive information about your validator and so this flag
should be used with caution. For Windows users, the log file
permissions will be inherited from the parent folder.
--metrics
Enable the Prometheus metrics HTTP server. Disabled by default.
--private
Prevents sending various client identification information.
--proposer-only
Sets this beacon node at be a block proposer only node. This will run
the beacon node in a minimal configuration that is sufficient for
block publishing only. This flag should be used for a beacon node
being referenced by validator client using the --proposer-node flag.
This configuration is for enabling more secure setups.
--purge-db
If present, the chain database will be deleted. Requires manual
confirmation.
--purge-db-force
If present, the chain database will be deleted without confirmation.
Use with caution.
--reset-payload-statuses
When present, Lighthouse will forget the payload statuses of any
already-imported blocks. This can assist in the recovery from a
consensus failure caused by the execution layer.
--semi-supernode
Run in minimal reconstruction mode. This node will subscribe to and
custody half of the data columns (enough for reconstruction), enabling
efficient data availability with lower bandwidth and storage
requirements compared to a supernode, while still supporting full blob
reconstruction.
--shutdown-after-sync
Shutdown beacon node as soon as sync is completed. Backfill sync will
not be performed before shutdown.
--slasher
Run a slasher alongside the beacon node. It is currently only
recommended for expert users because of the immaturity of the slasher
UX and the extra resources required.
--staking
Standard option for a staking beacon node. This will enable the HTTP
server on localhost:5052 and import deposit logs from the execution
node.
--stdin-inputs
If present, read all user inputs from stdin instead of tty.
--subscribe-all-subnets
Subscribe to all subnets regardless of validator count. This will also
advertise the beacon node as being long-lived subscribed to all
subnets.
--supernode
Run as a voluntary supernode. This node will subscribe to all data
column subnets, custody all data columns, and perform reconstruction
and cross-seeding. This requires significantly more bandwidth,
storage, and computation requirements but the node will have direct
access to all blobs via the beacon API and it helps network resilience
by serving all data columns to syncing peers.
--validator-monitor-auto
Enables the automatic detection and monitoring of validators connected
to the HTTP API and using the subnet subscription endpoint. This
generally has the effect of providing additional logging and metrics
for locally controlled validators.
-z, --zero-ports
Sets all listening TCP/UDP ports to 0, allowing the OS to choose some
arbitrary free ports.
Validator Client
When connected to a beacon node, performs the duties of a staked validator
(e.g., proposing blocks and attestations).

Usage: lighthouse validator_client [OPTIONS]

Options:
      --beacon-nodes <NETWORK_ADDRESSES>
          Comma-separated addresses to one or more beacon node HTTP APIs.
          Default is http://localhost:5052.
      --beacon-nodes-tls-certs <CERTIFICATE-FILES>
          Comma-separated paths to custom TLS certificates to use when
          connecting to a beacon node (and/or proposer node). These certificates
          must be in PEM format and are used in addition to the OS trust store.
          Commas must only be used as a delimiter, and must not be part of the
          certificate path.
      --broadcast <API_TOPICS>
          Comma-separated list of beacon API topics to broadcast to all beacon
          nodes. Default (when flag is omitted) is to broadcast subscriptions
          only. [possible values: none, attestations, blocks, subscriptions,
          sync-committee]
      --builder-boost-factor <UINT64>
          Defines the boost factor, a percentage multiplier to apply to the
          builder's payload value when choosing between a builder payload header
          and payload from the local execution node.
      --builder-registration-timestamp-override <UNIX-TIMESTAMP>
          This flag takes a unix timestamp value that will be used to override
          the timestamp used in the builder api registration.
  -d, --datadir <DIR>
          Used to specify a custom root data directory for lighthouse keys and
          databases. Defaults to $HOME/.lighthouse/{network} where network is
          the value of the `network` flag Note: Users should specify separate
          custom datadirs for different networks.
      --debug-level <LEVEL>
          Specifies the verbosity level used when emitting logs to the terminal.
          [default: info] [possible values: info, debug, trace, warn, error]
      --gas-limit <INTEGER>
          The gas limit to be used in all builder proposals for all validators
          managed by this validator client. Note this will not necessarily be
          used if the gas limit set here moves too far from the previous block's
          gas limit. [default: 60000000]
      --genesis-state-url <URL>
          A URL of a beacon-API compatible server from which to download the
          genesis state. Checkpoint sync server URLs can generally be used with
          this flag. If not supplied, a default URL or the --checkpoint-sync-url
          may be used. If the genesis state is already included in this binary
          then this value will be ignored.
      --genesis-state-url-timeout <SECONDS>
          The timeout in seconds for the request to --genesis-state-url.
          [default: 300]
      --graffiti <GRAFFITI>
          Specify your custom graffiti to be included in blocks.
      --graffiti-file <GRAFFITI-FILE>
          Specify a graffiti file to load validator graffitis from.
      --http-address <ADDRESS>
          Set the address for the HTTP address. The HTTP server is not encrypted
          and therefore it is unsafe to publish on a public network. When this
          flag is used, it additionally requires the explicit use of the
          `--unencrypted-http-transport` flag to ensure the user is aware of the
          risks involved. For access via the Internet, users should apply
          transport-layer security like a HTTPS reverse-proxy or SSH tunnelling.
      --http-allow-origin <ORIGIN>
          Set the value of the Access-Control-Allow-Origin response HTTP header.
          Use * to allow any origin (not recommended in production). If no value
          is supplied, the CORS allowed origin is set to the listen address of
          this server (e.g., http://localhost:5062).
      --http-port <PORT>
          Set the listen TCP port for the RESTful HTTP API server. [default:
          5062]
      --http-token-path <HTTP_TOKEN_PATH>
          Path to file containing the HTTP API token for validator client
          authentication. If not specified, defaults to
          {validators-dir}/api-token.txt.
      --log-format <FORMAT>
          Specifies the log format used when emitting logs to the terminal.
          [possible values: JSON]
      --logfile-debug-level <LEVEL>
          The verbosity level used when emitting logs to the log file. [default:
          debug] [possible values: info, debug, trace, warn, error]
      --logfile-dir <DIR>
          Directory path where the log file will be stored
      --logfile-format <FORMAT>
          Specifies the log format used when emitting logs to the logfile.
          [possible values: DEFAULT, JSON]
      --logfile-max-number <COUNT>
          The maximum number of log files that will be stored. If set to 0,
          background file logging is disabled. [default: 10]
      --logfile-max-size <SIZE>
          The maximum size (in MB) each log file can grow to before rotating. If
          set to 0, background file logging is disabled. [default: 200]
      --metrics-address <ADDRESS>
          Set the listen address for the Prometheus metrics HTTP server.
          [default: 127.0.0.1]
      --metrics-allow-origin <ORIGIN>
          Set the value of the Access-Control-Allow-Origin response HTTP header.
          Use * to allow any origin (not recommended in production). If no value
          is supplied, the CORS allowed origin is set to the listen address of
          this server (e.g., http://localhost:5064).
      --metrics-port <PORT>
          Set the listen TCP port for the Prometheus metrics HTTP server.
          [default: 5064]
      --monitoring-endpoint <ADDRESS>
          Enables the monitoring service for sending system metrics to a remote
          endpoint. This can be used to monitor your setup on certain services
          (e.g. beaconcha.in). This flag sets the endpoint where the beacon node
          metrics will be sent. Note: This will send information to a remote
          sever which may identify and associate your validators, IP address and
          other personal information. Always use a HTTPS connection and never
          provide an untrusted URL.
      --monitoring-endpoint-period <SECONDS>
          Defines how many seconds to wait between each message sent to the
          monitoring-endpoint. [default: 60]
      --network <network>
          Name of the Eth2 chain Lighthouse will sync and follow. [possible
          values: mainnet, gnosis, chiado, sepolia, holesky, hoodi]
      --proposer-nodes <NETWORK_ADDRESSES>
          Comma-separated addresses to one or more beacon node HTTP APIs. These
          specify nodes that are used to send beacon block proposals. A failure
          will revert back to the standard beacon nodes specified in
          --beacon-nodes.
      --secrets-dir <SECRETS_DIRECTORY>
          The directory which contains the password to unlock the validator
          voting keypairs. Each password should be contained in a file where the
          name is the 0x-prefixed hex representation of the validators voting
          public key. Defaults to ~/.lighthouse/{network}/secrets.
      --suggested-fee-recipient <FEE-RECIPIENT>
          Once the merge has happened, this address will receive transaction
          fees from blocks proposed by this validator client. If a fee recipient
          is configured in the validator definitions it takes priority over this
          value.
  -t, --testnet-dir <DIR>
          Path to directory containing eth2_testnet specs. Defaults to a
          hard-coded Lighthouse testnet. Only effective if there is no existing
          database.
      --telemetry-collector-url <URL>
          URL of the OpenTelemetry collector to export tracing spans (e.g.,
          http://localhost:4317). If not set, tracing export is disabled.
      --telemetry-service-name <NAME>
          Override the OpenTelemetry service name. Defaults to 'lighthouse-bn'
          for beacon node, 'lighthouse-vc' for validator client, or 'lighthouse'
          for other subcommands.
      --validator-registration-batch-size <INTEGER>
          Defines the number of validators per validator/register_validator
          request sent to the BN. This value can be reduced to avoid timeouts
          from builders. [default: 500]
      --validators-dir <VALIDATORS_DIR>
          The directory which contains the validator keystores, deposit data for
          each validator along with the common slashing protection database and
          the validator_definitions.yml
      --web3-signer-keep-alive-timeout <MILLIS>
          Keep-alive timeout for each web3signer connection. Set to '0' to never
          timeout. [default: 20000]
      --web3-signer-max-idle-connections <COUNT>
          Maximum number of idle connections to maintain per web3signer host.
          Default is unlimited.

Flags:
      --beacon-nodes-sync-tolerances <SYNC_TOLERANCES>
          A comma-separated list of 3 values which sets the size of each sync
          distance range when determining the health of each connected beacon
          node. The first value determines the `Synced` range. If a connected
          beacon node is synced to within this number of slots it is considered
          'Synced'. The second value determines the `Small` sync distance range.
          This range starts immediately after the `Synced` range. The third
          value determines the `Medium` sync distance range. This range starts
          immediately after the `Small` range. Any sync distance value beyond
          that is considered `Large`. For example, a value of `8,8,48` would
          have ranges like the following: `Synced`: 0..=8 `Small`: 9..=16
          `Medium`: 17..=64 `Large`: 65.. These values are used to determine
          what ordering beacon node fallbacks are used in. Generally, `Synced`
          nodes are preferred over `Small` and so on. Nodes in the `Synced`
          range will tie-break based on their ordering in `--beacon-nodes`. This
          ensures the primary beacon node is prioritised. [default: 8,8,48]
      --builder-proposals
          If this flag is set, Lighthouse will query the Beacon Node for only
          block headers during proposals and will sign over headers. Useful for
          outsourcing execution payload construction during proposals.
      --disable-attesting
          Disable the performance of attestation duties (and sync committee
          duties). This flag should only be used in emergencies to prioritise
          block proposal duties.
      --disable-auto-discover
          If present, do not attempt to discover new validators in the
          validators-dir. Validators will need to be manually added to the
          validator_definitions.yml file.
      --disable-beacon-head-monitor
          Disable the beacon head monitor which tries to attest as soon as any
          of the configured beacon nodes sends a head event. Leaving the service
          enabled is recommended, but disabling it can lead to reduced bandwidth
          and more predictable usage of the primary beacon node (rather than the
          fastest BN).
      --disable-latency-measurement-service
          Disables the service that periodically attempts to measure latency to
          BNs.
      --disable-log-timestamp
          If present, do not include timestamps in logging output.
      --disable-malloc-tuning
          If present, do not configure the system allocator. Providing this flag
          will generally increase memory usage, it should only be provided when
          debugging specific memory allocation issues.
      --disable-proposer-duties-v2
          Fetch proposer duties using the v1 beacon node endpoint instead of v2.
          The v1 endpoint reports an incorrect dependent root which causes
          spurious proposer duty re-org warnings. Only enable this flag if your
          beacon node does not serve the v2 proposer duties endpoint.
      --disable-slashing-protection-web3signer
          Disable Lighthouse's slashing protection for all web3signer keys. This
          can reduce the I/O burden on the VC but is only safe if slashing
          protection is enabled on the remote signer and is implemented
          correctly. DO NOT ENABLE THIS FLAG UNLESS YOU ARE CERTAIN THAT
          SLASHING PROTECTION IS ENABLED ON THE REMOTE SIGNER. YOU WILL GET
          SLASHED IF YOU USE THIS FLAG WITHOUT ENABLING WEB3SIGNER'S SLASHING
          PROTECTION.
      --distributed
          Enables functionality required for running the validator in a
          distributed validator cluster.
      --enable-doppelganger-protection
          If this flag is set, Lighthouse will delay startup for three epochs
          and monitor for messages on the network by any of the validators
          managed by this client. This will result in three (possibly four)
          epochs worth of missed attestations. If an attestation is detected
          during this period, it means it is very likely that you are running a
          second validator client with the same keys. This validator client will
          immediately shutdown if this is detected in order to avoid potentially
          committing a slashable offense. Use this flag in order to ENABLE this
          functionality, without this flag Lighthouse will begin attesting
          immediately.
      --enable-high-validator-count-metrics
          Enable per validator metrics for > 64 validators. Note: This flag is
          automatically enabled for <= 64 validators. Enabling this metric for
          higher validator counts will lead to higher volume of prometheus
          metrics being collected.
      --graffiti-append [<GRAFFITI_APPEND>]
          Client version info will be appended to user custom graffiti, with a
          space in between. This should only be set to false when using a
          Lighthouse beacon node. [default: true] [possible values: true, false]
  -h, --help
          Prints help information
      --http
          Enable the RESTful HTTP API server. Disabled by default.
      --http-allow-keystore-export
          If present, allow access to the DELETE /lighthouse/keystores HTTP API
          method, which allows exporting keystores and passwords to HTTP API
          consumers who have access to the API token. This method is useful for
          exporting validators, however it should be used with caution since it
          exposes private key data to authorized users.
      --http-store-passwords-in-secrets-dir
          If present, any validators created via the HTTP will have keystore
          passwords stored in the secrets-dir rather than the validator
          definitions file.
      --init-slashing-protection
          If present, do not require the slashing protection database to exist
          before running. You SHOULD NOT use this flag unless you're certain
          that a new slashing protection database is required. Usually, your
          database will have been initialized when you imported your validator
          keys. If you misplace your database and then run with this flag you
          risk being slashed.
      --log-color [<log-color>]
          Enables/Disables colors for logs in terminal. Set it to false to
          disable colors. [default: true] [possible values: true, false]
      --log-extra-info
          If present, show module,file,line in logs
      --logfile-color
          Enables colors in logfile.
      --logfile-compress
          If present, compress old log files. This can help reduce the space
          needed to store old logs.
      --logfile-no-restricted-perms
          If present, log files will be generated as world-readable meaning they
          can be read by any user on the machine. Note that logs can often
          contain sensitive information about your validator and so this flag
          should be used with caution. For Windows users, the log file
          permissions will be inherited from the parent folder.
      --long-timeouts-multiplier <LONG_TIMEOUTS_MULTIPLIER>
          If present, the validator client will use a multiplier for the timeout
          when making requests to the beacon node. This only takes effect when
          the `--use-long-timeouts` flag is present. The timeouts will be the
          slot duration multiplied by this value. This flag is generally not
          recommended, longer timeouts can cause missed duties when fallbacks
          are used. [default: 1]
      --metrics
          Enable the Prometheus metrics HTTP server. Disabled by default.
      --prefer-builder-proposals
          If this flag is set, Lighthouse will always prefer blocks constructed
          by builders, regardless of payload value.
      --stdin-inputs
          If present, read all user inputs from stdin instead of tty.
      --unencrypted-http-transport
          This is a safety flag to ensure that the user is aware that the http
          transport is unencrypted and using a custom HTTP address is unsafe.
      --use-long-timeouts
          If present, the validator client will use longer timeouts for requests
          made to the beacon node. This flag is generally not recommended,
          longer timeouts can cause missed duties when fallbacks are used.
Validator Manager
Utilities for managing a Lighthouse validator client via the HTTP API.

Usage: lighthouse validator_manager [OPTIONS] [COMMAND]

Commands:
  create
          Creates new validators from BIP-39 mnemonic. A JSON file will be
          created which contains all the validator keystores and other validator
          data. This file can then be imported to a validator client using the
          "import-validators" command. Another, optional JSON file is created
          which contains a list of validator deposits in the same format as the
          "ethstaker-deposit-cli" tool.
  import
          Uploads validators to a validator client using the HTTP API. The
          validators are defined in a JSON file which can be generated using the
          "create-validators" command.
  move
          Uploads validators to a validator client using the HTTP API. The
          validators are defined in a JSON file which can be generated using the
          "create-validators" command. This command only supports validators
          signing via a keystore on the local file system (i.e., not Web3Signer
          validators).
  list
          Lists all validators in a validator client using the HTTP API.
  delete
          Deletes one or more validators from a validator client using the HTTP
          API.
  exit
          Exits one or more validators using the HTTP API. It can also be used
          to generate a presigned voluntary exit message for a particular future
          epoch.
  help
          Print this message or the help of the given subcommand(s)

Options:
  -d, --datadir <DIR>
          Used to specify a custom root data directory for lighthouse keys and
          databases. Defaults to $HOME/.lighthouse/{network} where network is
          the value of the `network` flag Note: Users should specify separate
          custom datadirs for different networks.
      --debug-level <LEVEL>
          Specifies the verbosity level used when emitting logs to the terminal.
          [default: info] [possible values: info, debug, trace, warn, error]
      --genesis-state-url <URL>
          A URL of a beacon-API compatible server from which to download the
          genesis state. Checkpoint sync server URLs can generally be used with
          this flag. If not supplied, a default URL or the --checkpoint-sync-url
          may be used. If the genesis state is already included in this binary
          then this value will be ignored.
      --genesis-state-url-timeout <SECONDS>
          The timeout in seconds for the request to --genesis-state-url.
          [default: 300]
      --log-format <FORMAT>
          Specifies the log format used when emitting logs to the terminal.
          [possible values: JSON]
      --logfile-debug-level <LEVEL>
          The verbosity level used when emitting logs to the log file. [default:
          debug] [possible values: info, debug, trace, warn, error]
      --logfile-dir <DIR>
          Directory path where the log file will be stored
      --logfile-format <FORMAT>
          Specifies the log format used when emitting logs to the logfile.
          [possible values: DEFAULT, JSON]
      --logfile-max-number <COUNT>
          The maximum number of log files that will be stored. If set to 0,
          background file logging is disabled. [default: 10]
      --logfile-max-size <SIZE>
          The maximum size (in MB) each log file can grow to before rotating. If
          set to 0, background file logging is disabled. [default: 200]
      --network <network>
          Name of the Eth2 chain Lighthouse will sync and follow. [possible
          values: mainnet, gnosis, chiado, sepolia, holesky, hoodi]
  -t, --testnet-dir <DIR>
          Path to directory containing eth2_testnet specs. Defaults to a
          hard-coded Lighthouse testnet. Only effective if there is no existing
          database.
      --telemetry-collector-url <URL>
          URL of the OpenTelemetry collector to export tracing spans (e.g.,
          http://localhost:4317). If not set, tracing export is disabled.
      --telemetry-service-name <NAME>
          Override the OpenTelemetry service name. Defaults to 'lighthouse-bn'
          for beacon node, 'lighthouse-vc' for validator client, or 'lighthouse'
          for other subcommands.

Flags:
      --disable-log-timestamp
          If present, do not include timestamps in logging output.
      --disable-malloc-tuning
          If present, do not configure the system allocator. Providing this flag
          will generally increase memory usage, it should only be provided when
          debugging specific memory allocation issues.
  -h, --help
          Prints help information
      --log-color [<log-color>]
          Enables/Disables colors for logs in terminal. Set it to false to
          disable colors. [default: true] [possible values: true, false]
      --log-extra-info
          If present, show module,file,line in logs
      --logfile-color
          Enables colors in logfile.
      --logfile-compress
          If present, compress old log files. This can help reduce the space
          needed to store old logs.
      --logfile-no-restricted-perms
          If present, log files will be generated as world-readable meaning they
          can be read by any user on the machine. Note that logs can often
          contain sensitive information about your validator and so this flag
          should be used with caution. For Windows users, the log file
          permissions will be inherited from the parent folder.
      --stdin-inputs
          If present, read all user inputs from stdin instead of tty.
Validator Manager Create
Creates new validators from BIP-39 mnemonic. A JSON file will be created which
contains all the validator keystores and other validator data. This file can
then be imported to a validator client using the "import-validators" command.
Another, optional JSON file is created which contains a list of validator
deposits in the same format as the "ethstaker-deposit-cli" tool.

Usage: lighthouse validator_manager create [OPTIONS] --output-path <DIRECTORY>

Options:
      --beacon-node <HTTP_ADDRESS>
          A HTTP(S) address of a beacon node using the beacon-API. If this value
          is provided, an error will be raised if any validator key here is
          already known as a validator by that beacon node. This helps prevent
          the same validator being created twice and therefore slashable
          conditions.
      --builder-boost-factor <UINT64>
          Defines the boost factor, a percentage multiplier to apply to the
          builder's payload value when choosing between a builder payload header
          and payload from the local execution node.
      --builder-proposals <builder-proposals>
          When provided, all created validators will attempt to create blocks
          via builder rather than the local EL. [possible values: true, false]
      --count <VALIDATOR_COUNT>
          The number of validators to create, regardless of how many already
          exist
  -d, --datadir <DIR>
          Used to specify a custom root data directory for lighthouse keys and
          databases. Defaults to $HOME/.lighthouse/{network} where network is
          the value of the `network` flag Note: Users should specify separate
          custom datadirs for different networks.
      --debug-level <LEVEL>
          Specifies the verbosity level used when emitting logs to the terminal.
          [default: info] [possible values: info, debug, trace, warn, error]
      --deposit-gwei <DEPOSIT_GWEI>
          The GWEI value of the deposit amount. Defaults to the minimum amount
          required for an active validator (MAX_EFFECTIVE_BALANCE)
      --eth1-withdrawal-address <ETH1_ADDRESS>
          If this field is set, the given eth1 address will be used to create
          the withdrawal credentials. Otherwise, it will generate withdrawal
          credentials with the mnemonic-derived withdrawal public key in
          EIP-2334 format.
      --first-index <FIRST_INDEX>
          The first of consecutive key indexes you wish to create. [default: 0]
      --gas-limit <UINT64>
          All created validators will use this gas limit. It is recommended to
          leave this as the default value by not specifying this flag.
      --genesis-state-url <URL>
          A URL of a beacon-API compatible server from which to download the
          genesis state. Checkpoint sync server URLs can generally be used with
          this flag. If not supplied, a default URL or the --checkpoint-sync-url
          may be used. If the genesis state is already included in this binary
          then this value will be ignored.
      --genesis-state-url-timeout <SECONDS>
          The timeout in seconds for the request to --genesis-state-url.
          [default: 300]
      --log-format <FORMAT>
          Specifies the log format used when emitting logs to the terminal.
          [possible values: JSON]
      --logfile-debug-level <LEVEL>
          The verbosity level used when emitting logs to the log file. [default:
          debug] [possible values: info, debug, trace, warn, error]
      --logfile-dir <DIR>
          Directory path where the log file will be stored
      --logfile-format <FORMAT>
          Specifies the log format used when emitting logs to the logfile.
          [possible values: DEFAULT, JSON]
      --logfile-max-number <COUNT>
          The maximum number of log files that will be stored. If set to 0,
          background file logging is disabled. [default: 10]
      --logfile-max-size <SIZE>
          The maximum size (in MB) each log file can grow to before rotating. If
          set to 0, background file logging is disabled. [default: 200]
      --mnemonic-path <MNEMONIC_PATH>
          If present, the mnemonic will be read in from this file.
      --network <network>
          Name of the Eth2 chain Lighthouse will sync and follow. [possible
          values: mainnet, gnosis, chiado, sepolia, holesky, hoodi]
      --output-path <DIRECTORY>
          The path to a directory where the validator and (optionally) deposits
          files will be created. The directory will be created if it does not
          exist.
      --prefer-builder-proposals <prefer-builder-proposals>
          If this flag is set, Lighthouse will always prefer blocks constructed
          by builders, regardless of payload value. [possible values: true,
          false]
      --suggested-fee-recipient <ETH1_ADDRESS>
          All created validators will use this value for the suggested fee
          recipient. Omit this flag to use the default value from the VC.
  -t, --testnet-dir <DIR>
          Path to directory containing eth2_testnet specs. Defaults to a
          hard-coded Lighthouse testnet. Only effective if there is no existing
          database.
      --telemetry-collector-url <URL>
          URL of the OpenTelemetry collector to export tracing spans (e.g.,
          http://localhost:4317). If not set, tracing export is disabled.
      --telemetry-service-name <NAME>
          Override the OpenTelemetry service name. Defaults to 'lighthouse-bn'
          for beacon node, 'lighthouse-vc' for validator client, or 'lighthouse'
          for other subcommands.

Flags:
      --disable-deposits
          When provided don't generate the deposits JSON file that is commonly
          used for submitting validator deposits via a web UI. Using this flag
          will save several seconds per validator if the user has an alternate
          strategy for submitting deposits. If used, the
          --force-bls-withdrawal-credentials is also required to ensure users
          are aware that an --eth1-withdrawal-address is not set.
      --disable-log-timestamp
          If present, do not include timestamps in logging output.
      --disable-malloc-tuning
          If present, do not configure the system allocator. Providing this flag
          will generally increase memory usage, it should only be provided when
          debugging specific memory allocation issues.
      --force-bls-withdrawal-credentials
          If present, allows BLS withdrawal credentials rather than an execution
          address. This is not recommended.
  -h, --help
          Prints help information
      --log-color [<log-color>]
          Enables/Disables colors for logs in terminal. Set it to false to
          disable colors. [default: true] [possible values: true, false]
      --log-extra-info
          If present, show module,file,line in logs
      --logfile-color
          Enables colors in logfile.
      --logfile-compress
          If present, compress old log files. This can help reduce the space
          needed to store old logs.
      --logfile-no-restricted-perms
          If present, log files will be generated as world-readable meaning they
          can be read by any user on the machine. Note that logs can often
          contain sensitive information about your validator and so this flag
          should be used with caution. For Windows users, the log file
          permissions will be inherited from the parent folder.
      --specify-voting-keystore-password
          If present, the user will be prompted to enter the voting keystore
          password that will be used to encrypt the voting keystores. If this
          flag is not provided, a random password will be used. It is not
          necessary to keep backups of voting keystore passwords if the mnemonic
          is safely backed up.
      --stdin-inputs
          If present, read all user inputs from stdin instead of tty.
Validator Manager Import
Uploads validators to a validator client using the HTTP API. The validators are
defined in a JSON file which can be generated using the "create-validators"
command.

Usage: lighthouse validator_manager import [OPTIONS]

Options:
      --builder-boost-factor <UINT64>
          When provided, the imported validator will use this percentage
          multiplier to apply to the builder's payload value when choosing
          between a builder payload header and payload from the local execution
          node.
      --builder-proposals <builder-proposals>
          When provided, the imported validator will attempt to create blocks
          via builder rather than the local EL. [possible values: true, false]
  -d, --datadir <DIR>
          Used to specify a custom root data directory for lighthouse keys and
          databases. Defaults to $HOME/.lighthouse/{network} where network is
          the value of the `network` flag Note: Users should specify separate
          custom datadirs for different networks.
      --debug-level <LEVEL>
          Specifies the verbosity level used when emitting logs to the terminal.
          [default: info] [possible values: info, debug, trace, warn, error]
      --enabled <enabled>
          When provided, the imported validator will be enabled or disabled.
          [possible values: true, false]
      --gas-limit <UINT64>
          When provided, the imported validator will use this gas limit. It is
          recommended to leave this as the default value by not specifying this
          flag.
      --genesis-state-url <URL>
          A URL of a beacon-API compatible server from which to download the
          genesis state. Checkpoint sync server URLs can generally be used with
          this flag. If not supplied, a default URL or the --checkpoint-sync-url
          may be used. If the genesis state is already included in this binary
          then this value will be ignored.
      --genesis-state-url-timeout <SECONDS>
          The timeout in seconds for the request to --genesis-state-url.
          [default: 300]
      --keystore-file <PATH_TO_KEYSTORE_FILE>
          The path to a keystore JSON file to be imported to the validator
          client. This file is usually created using ethstaker-deposit-cli
      --log-format <FORMAT>
          Specifies the log format used when emitting logs to the terminal.
          [possible values: JSON]
      --logfile-debug-level <LEVEL>
          The verbosity level used when emitting logs to the log file. [default:
          debug] [possible values: info, debug, trace, warn, error]
      --logfile-dir <DIR>
          Directory path where the log file will be stored
      --logfile-format <FORMAT>
          Specifies the log format used when emitting logs to the logfile.
          [possible values: DEFAULT, JSON]
      --logfile-max-number <COUNT>
          The maximum number of log files that will be stored. If set to 0,
          background file logging is disabled. [default: 10]
      --logfile-max-size <SIZE>
          The maximum size (in MB) each log file can grow to before rotating. If
          set to 0, background file logging is disabled. [default: 200]
      --network <network>
          Name of the Eth2 chain Lighthouse will sync and follow. [possible
          values: mainnet, gnosis, chiado, sepolia, holesky, hoodi]
      --password <STRING>
          Password of the keystore file.
      --prefer-builder-proposals <prefer-builder-proposals>
          When provided, the imported validator will always prefer blocks
          constructed by builders, regardless of payload value. [possible
          values: true, false]
      --suggested-fee-recipient <ETH1_ADDRESS>
          When provided, the imported validator will use the suggested fee
          recipient. Omit this flag to use the default value from the VC.
  -t, --testnet-dir <DIR>
          Path to directory containing eth2_testnet specs. Defaults to a
          hard-coded Lighthouse testnet. Only effective if there is no existing
          database.
      --telemetry-collector-url <URL>
          URL of the OpenTelemetry collector to export tracing spans (e.g.,
          http://localhost:4317). If not set, tracing export is disabled.
      --telemetry-service-name <NAME>
          Override the OpenTelemetry service name. Defaults to 'lighthouse-bn'
          for beacon node, 'lighthouse-vc' for validator client, or 'lighthouse'
          for other subcommands.
      --validators-file <PATH_TO_JSON_FILE>
          The path to a JSON file containing a list of validators to be imported
          to the validator client. This file is usually named "validators.json".
      --vc-token <PATH>
          The file containing a token required by the validator client.
      --vc-url <HTTP_ADDRESS>
          A HTTP(S) address of a validator client using the keymanager-API.
          [default: http://localhost:5062]

Flags:
      --disable-log-timestamp
          If present, do not include timestamps in logging output.
      --disable-malloc-tuning
          If present, do not configure the system allocator. Providing this flag
          will generally increase memory usage, it should only be provided when
          debugging specific memory allocation issues.
  -h, --help
          Prints help information
      --ignore-duplicates
          If present, ignore any validators which already exist on the VC.
          Without this flag, the process will terminate without making any
          changes. This flag should be used with caution, whilst it does not
          directly cause slashable conditions, it might be an indicator that
          something is amiss. Users should also be careful to avoid submitting
          duplicate deposits for validators that already exist on the VC.
      --log-color [<log-color>]
          Enables/Disables colors for logs in terminal. Set it to false to
          disable colors. [default: true] [possible values: true, false]
      --log-extra-info
          If present, show module,file,line in logs
      --logfile-color
          Enables colors in logfile.
      --logfile-compress
          If present, compress old log files. This can help reduce the space
          needed to store old logs.
      --logfile-no-restricted-perms
          If present, log files will be generated as world-readable meaning they
          can be read by any user on the machine. Note that logs can often
          contain sensitive information about your validator and so this flag
          should be used with caution. For Windows users, the log file
          permissions will be inherited from the parent folder.
      --stdin-inputs
          If present, read all user inputs from stdin instead of tty.
Validator Manager Move
Uploads validators to a validator client using the HTTP API. The validators are
defined in a JSON file which can be generated using the "create-validators"
command. This command only supports validators signing via a keystore on the
local file system (i.e., not Web3Signer validators).

Usage: lighthouse validator_manager move [OPTIONS] --src-vc-token <PATH> --src-vc-url <HTTP_ADDRESS> --dest-vc-token <PATH> --dest-vc-url <HTTP_ADDRESS>

Options:
      --builder-boost-factor <UINT64>
          Defines the boost factor, a percentage multiplier to apply to the
          builder's payload value when choosing between a builder payload header
          and payload from the local execution node.
      --builder-proposals <builder-proposals>
          When provided, all created validators will attempt to create blocks
          via builder rather than the local EL. [possible values: true, false]
      --count <VALIDATOR_COUNT>
          The number of validators to move.
  -d, --datadir <DIR>
          Used to specify a custom root data directory for lighthouse keys and
          databases. Defaults to $HOME/.lighthouse/{network} where network is
          the value of the `network` flag Note: Users should specify separate
          custom datadirs for different networks.
      --debug-level <LEVEL>
          Specifies the verbosity level used when emitting logs to the terminal.
          [default: info] [possible values: info, debug, trace, warn, error]
      --dest-vc-token <PATH>
          The file containing a token required by the destination validator
          client.
      --dest-vc-url <HTTP_ADDRESS>
          A HTTP(S) address of a validator client using the keymanager-API. This
          validator client is the "destination" and will have new validators
          added as they are removed from the "source" validator client.
      --gas-limit <UINT64>
          All created validators will use this gas limit. It is recommended to
          leave this as the default value by not specifying this flag.
      --genesis-state-url <URL>
          A URL of a beacon-API compatible server from which to download the
          genesis state. Checkpoint sync server URLs can generally be used with
          this flag. If not supplied, a default URL or the --checkpoint-sync-url
          may be used. If the genesis state is already included in this binary
          then this value will be ignored.
      --genesis-state-url-timeout <SECONDS>
          The timeout in seconds for the request to --genesis-state-url.
          [default: 300]
      --log-format <FORMAT>
          Specifies the log format used when emitting logs to the terminal.
          [possible values: JSON]
      --logfile-debug-level <LEVEL>
          The verbosity level used when emitting logs to the log file. [default:
          debug] [possible values: info, debug, trace, warn, error]
      --logfile-dir <DIR>
          Directory path where the log file will be stored
      --logfile-format <FORMAT>
          Specifies the log format used when emitting logs to the logfile.
          [possible values: DEFAULT, JSON]
      --logfile-max-number <COUNT>
          The maximum number of log files that will be stored. If set to 0,
          background file logging is disabled. [default: 10]
      --logfile-max-size <SIZE>
          The maximum size (in MB) each log file can grow to before rotating. If
          set to 0, background file logging is disabled. [default: 200]
      --network <network>
          Name of the Eth2 chain Lighthouse will sync and follow. [possible
          values: mainnet, gnosis, chiado, sepolia, holesky, hoodi]
      --prefer-builder-proposals <prefer-builder-proposals>
          If this flag is set, Lighthouse will always prefer blocks constructed
          by builders, regardless of payload value. [possible values: true,
          false]
      --src-vc-token <PATH>
          The file containing a token required by the source validator client.
      --src-vc-url <HTTP_ADDRESS>
          A HTTP(S) address of a validator client using the keymanager-API. This
          validator client is the "source" and contains the validators that are
          to be moved.
      --suggested-fee-recipient <ETH1_ADDRESS>
          All created validators will use this value for the suggested fee
          recipient. Omit this flag to use the default value from the VC.
  -t, --testnet-dir <DIR>
          Path to directory containing eth2_testnet specs. Defaults to a
          hard-coded Lighthouse testnet. Only effective if there is no existing
          database.
      --telemetry-collector-url <URL>
          URL of the OpenTelemetry collector to export tracing spans (e.g.,
          http://localhost:4317). If not set, tracing export is disabled.
      --telemetry-service-name <NAME>
          Override the OpenTelemetry service name. Defaults to 'lighthouse-bn'
          for beacon node, 'lighthouse-vc' for validator client, or 'lighthouse'
          for other subcommands.
      --validators <STRING>
          The validators to be moved. Either a list of 0x-prefixed validator
          pubkeys or the keyword "all".

Flags:
      --disable-log-timestamp
          If present, do not include timestamps in logging output.
      --disable-malloc-tuning
          If present, do not configure the system allocator. Providing this flag
          will generally increase memory usage, it should only be provided when
          debugging specific memory allocation issues.
  -h, --help
          Prints help information
      --log-color [<log-color>]
          Enables/Disables colors for logs in terminal. Set it to false to
          disable colors. [default: true] [possible values: true, false]
      --log-extra-info
          If present, show module,file,line in logs
      --logfile-color
          Enables colors in logfile.
      --logfile-compress
          If present, compress old log files. This can help reduce the space
          needed to store old logs.
      --logfile-no-restricted-perms
          If present, log files will be generated as world-readable meaning they
          can be read by any user on the machine. Note that logs can often
          contain sensitive information about your validator and so this flag
          should be used with caution. For Windows users, the log file
          permissions will be inherited from the parent folder.
      --stdin-inputs
          If present, read all user inputs from stdin instead of tty.
Contributing to Lighthouse
Lighthouse welcomes contributions. If you are interested in contributing to the Ethereum ecosystem, and you want to learn Rust, Lighthouse is a great project to work on.
To start contributing,
- Read our how to contribute document.
- Setup a development environment.
- Browse through the open issues (tip: look for the good first issue tag).
- Comment on an issue before starting work.
- Share your work via a pull-request.
If you have questions, please reach out via Discord.
Branches
Lighthouse maintains two permanent branches:
stable: Always points to the latest stable release.- This is ideal for most users.
unstable: Used for development, contains the latest PRs.- Developers should base their PRs on this branch.
Ethereum consensus client
Lighthouse is an implementation of the Ethereum proof-of-stake consensus specification, as defined in the ethereum/consensus-specs repository.
We recommend reading Danny Ryan’s (incomplete) Phase 0 for Humans before diving into the canonical spec.
Rust
Lighthouse adheres to Rust code conventions as outlined in the Rust Styleguide.
Please use clippy and rustfmt to detect common mistakes and inconsistent code formatting:
cargo clippy --all
cargo fmt --all --check
Panics
Generally, panics should be avoided at all costs. Lighthouse operates in an adversarial environment (the Internet) and it’s a severe vulnerability if people on the Internet can cause Lighthouse to crash via a panic.
Always prefer returning a Result or Option over causing a panic. For
example, prefer array.get(1)? over array[1].
If you know there won’t be a panic but can’t express that to the compiler,
use .expect("Helpful message") instead of .unwrap(). Always provide
detailed reasoning in a nearby comment when making assumptions about panics.
TODOs
All TODO statements should be accompanied by a GitHub issue.
#![allow(unused)]
fn main() {
pub fn my_function(&mut self, _something &[u8]) -> Result<String, Error> {
  // TODO: something_here
  // https://github.com/sigp/lighthouse/issues/XX
}
}
Comments
General Comments
- Prefer line (
//) comments to block comments (/* ... */) - Comments can appear on the line prior to the item or after a trailing space.
#![allow(unused)]
fn main() {
// Comment for this struct
struct Lighthouse {}
fn make_blockchain() {} // A comment on the same line after a space
}
Doc Comments
- The
///is used to generate comments for Docs. - The comments should come before attributes.
#![allow(unused)]
fn main() {
/// Stores the core configuration for this Lighthouse instance.
/// This struct is general, other components may implement more
/// specialized config structs.
#[derive(Clone)]
pub struct LighthouseConfig {
    pub data_dir: PathBuf,
    pub p2p_listen_port: u16,
}
}
Rust Resources
Rust is an extremely powerful, low-level programming language that provides freedom and performance to create powerful projects. The Rust Book provides insight into the Rust language and some of the coding style to follow (As well as acting as a great introduction and tutorial for the language).
Rust has a steep learning curve, but there are many resources to help. We suggest:
- Rust Book
- Rust by example
- Learning Rust With Entirely Too Many Linked Lists
- Rustlings
- Rust Exercism
- Learn X in Y minutes - Rust
Development Environment
Most Lighthouse developers work on Linux or MacOS, however Windows should still be suitable.
First, follow the Installation Guide to install
Lighthouse. This will install Lighthouse to your PATH, which is not
particularly useful for development but still a good way to ensure you have the
base dependencies.
The additional requirements for developers are:
cmake. Used by some dependencies. SeeInstallation Guidefor more info.java 17 runtime. 17 is the minimum, used by web3signer_tests.
Using make
Commands to run the test suite are available via the Makefile in the
project root for the benefit of CI/CD. We list some of these commands below so
you can run them locally and avoid CI failures:
$ make cargo-fmt: (fast) runs a Rust code formatting check.$ make lint: (fast) runs a Rust code linter.$ make test: (medium) runs unit tests across the whole project using nextest.$ make test-ef: (medium) runs the Ethereum Foundation test vectors.$ make test-full: (slow) runs the full test suite (including all previous commands). This is approximately everything that is required to pass CI.
The lighthouse test suite is quite extensive, running the whole suite may take 30+ minutes.
Testing
Lighthouse uses cargo nextest for unit and integration tests. Nextest provides better parallelization and is used by CI. For example, to test the safe_arith crate run:
$ cd consensus/safe_arith
$ cargo nextest run
    Finished test [unoptimized + debuginfo] target(s) in 0.43s
    ------------
     Nextest run ID: 01234567-89ab-cdef-0123-456789abcdef
     Starting 8 tests across 1 binary
        PASS [   0.001s] safe_arith tests::test_safe_add_u64
        PASS [   0.001s] safe_arith tests::test_safe_mul_u64
        <snip>
    ------------
     Summary [ 0.012s] 8 tests run: 8 passed, 0 skipped
Alternatively, since lighthouse is a cargo workspace you can use -p safe_arith where
safe_arith is the package name as defined in /consensus/safe_arith/Cargo.toml:
$ head -2 consensus/safe_arith/Cargo.toml
[package]
name = "safe_arith"
$ cargo nextest run -p safe_arith
    Finished test [unoptimized + debuginfo] target(s) in 0.43s
    ------------
     Nextest run ID: 01234567-89ab-cdef-0123-456789abcdef
     Starting 8 tests across 1 binary
        PASS [   0.001s] safe_arith tests::test_safe_add_u64
        PASS [   0.001s] safe_arith tests::test_safe_mul_u64
        <snip>
    ------------
     Summary [ 0.012s] 8 tests run: 8 passed, 0 skipped
Integration tests
Due to the size and complexity of the test suite, Lighthouse uses a pattern that differs from how integration tests are usually defined. This pattern helps manage large test suites more effectively and ensures tests only run in release mode to avoid stack overflow issues.
The “main pattern”
For packages with integration tests that require more than one file, Lighthouse uses the following structure:
-
A
main.rsfile is defined atpackage/tests/main.rsthat declares other test files as modules -
In
package/Cargo.toml, integration tests are explicitly configured:[package] autotests = false [[test]] name = "package_tests" path = "tests/main.rs"
Rust Analyzer configuration
This pattern, combined with #![cfg(not(debug_assertions))] directives in test files (which
prevent tests from running in debug mode), causes Rust Analyzer to not provide IDE services like
autocomplete and error checking in integration test files by default.
To enable IDE support for these test files, configure Rust Analyzer to disable debug assertions.
For VSCode users, this is already configured in the repository’s .vscode/settings.json file:
{
    "rust-analyzer.cargo.cfgs": [
        "!debug_assertions"
    ]
}
Logging in tests
By default, when running tests, the logs will not be printed if the tests passed. For example, to run the tests for the beacon_chain package:
cargo test --release -p beacon_chain
To always show the logs, run the tests with -- --nocapture.
cargo test --release -p beacon_chain -- --nocapture
By default, the log shown is DEBUG level. This can be overridden using the environment variable RUST_LOG. For example, to only show logs with INFO level and above:
RUST_LOG=info cargo test --release -p beacon_chain -- --nocapture
To only show logs from the beacon_chain crate and with INFO level and above:
RUST_LOG=beacon_chain=info cargo test --release -p beacon_chain -- --nocapture
Consensus Spec Tests
The ethereum/consensus-spec-tests repository contains a large set of tests that verify Lighthouse behaviour against the Ethereum Foundation specifications.
These tests are quite large (100’s of MB) so they’re only downloaded if you run
$ make test-ef (or anything that runs it). You may want to avoid
downloading these tests if you’re on a slow or metered Internet connection. CI
will require them to pass, though.
Local Testnets
During development and testing it can be useful to start a small, local testnet.
The scripts/local_testnet/ directory contains several scripts and a README that should make this process easy.
Frequently Asked Questions
Beacon Node
- I see beacon logs showing
WARN: Execution engine called failed, what should I do? - I see beacon logs showing
Error during execution engine upcheck, what should I do? - My beacon node is stuck at downloading historical block using checkpoint sync. What should I do?
- I proposed a block but the beacon node shows
could not publish messagewith errorduplicateas below, should I be worried? - I see beacon node logs
Head is optimisticand I am missing attestations. What should I do? - My beacon node logs
WARN BlockProcessingFailure outcome: MissingBeaconBlock, what should I do? - After checkpoint sync, the progress of
downloading historical blocksis slow. Why? - My beacon node logs
WARN Error processing HTTP API request, what should I do? - My beacon node logs
WARN Error signalling fork choice waiter, what should I do? - My beacon node logs
ERRO Aggregate attestation queue full, what should I do? - My beacon node logs
WARN Failed to finalize deposit cache, what should I do? - How can I construct only partial state history?
Validator
- Can I use redundancy in my staking setup?
- I am missing attestations. Why?
- Sometimes I miss the attestation head vote, resulting in penalty. Is this normal?
- Can I submit a voluntary exit message without a beacon node?
- Does increasing the number of validators increase the CPU and other computer resources used?
- I want to add new validators. Do I have to reimport the existing keys?
- Do I have to stop
lighthouse vcthe when importing new validator keys? - How can I delete my validator once it is imported?
Network, Monitoring and Maintenance
- I have a low peer count and it is not increasing
- How do I update lighthouse?
- Do I need to set up any port mappings (port forwarding)?
- How can I monitor my validators?
- My beacon node and validator client are on different servers. How can I point the validator client to the beacon node?
- Should I do anything to the beacon node or validator client settings if I have a relocation of the node / change of IP address?
- How to change the TCP/UDP port 9000 that Lighthouse listens on?
- Lighthouse
v4.3.0introduces a change where a node will subscribe to only 2 subnets in total. I am worried that this will impact my validators return. - How to know how many of my peers are connected through QUIC?
Miscellaneous
- What should I do if I lose my slashing protection database?
- I can’t compile lighthouse
- How do I check the version of Lighthouse that is running?
- Does Lighthouse have pruning function like the execution client to save disk space?
- Can I use a HDD for the freezer database and only have the hot db on SSD?
- Can Lighthouse log in local timestamp instead of UTC?
- My hard disk is full and my validator is down. What should I do?
Beacon Node
I see beacon logs showing WARN: Execution engine called failed, what should I do?
The WARN Execution engine called failed log is shown when the beacon node cannot reach the execution engine. When this warning occurs, it will be followed by a detailed message. A frequently encountered example of the error message is:
error: HttpClient(url: http://127.0.0.1:8551/, kind: timeout, detail: operation timed out), service: exec
which says TimedOut at the end of the message. This means that the execution engine has not responded in time to the beacon node. One option is to add the flag --execution-timeout-multiplier 3 to the beacon node. However, if the error persists, it is worth digging further to find out the cause. There are a few reasons why this can occur:
- The execution engine is not synced. Check the log of the execution engine to make sure that it is synced. If it is syncing, wait until it is synced and the error will disappear. You will see the beacon node logs
INFO Execution engine onlinewhen it is synced. - The computer is overloaded. Check the CPU and RAM usage to see if it has overloaded. You can use
htopto check for CPU and RAM usage. - Your SSD is slow. Check if your SSD is in “The Bad” list here. If your SSD is in “The Bad” list, it means it cannot keep in sync to the network and you may want to consider upgrading to a better SSD.
If the reason for the error message is caused by no. 1 above, you may want to look further. If the execution engine is out of sync suddenly, it is usually caused by ungraceful shutdown. The common causes for ungraceful shutdown are:
- Power outage. If power outages are an issue at your place, consider getting a UPS to avoid ungraceful shutdown of services.
- The service file is not stopped properly. To overcome this, make sure that the process is stopped properly, e.g., during client updates.
- Out of memory (oom) error. This can happen when the system memory usage has reached its maximum and causes the execution engine to be killed. To confirm that the error is due to oom, run
sudo dmesg -T | grep killedto look for killed processes. If you are using Geth as the execution client, a short term solution is to reduce the resources used. For example, you can reduce the cache by adding the flag--cache 2048. If the oom occurs rather frequently, a long term solution is to increase the memory capacity of the computer.
I see beacon logs showing Error during execution engine upcheck, what should I do?
An example of the full error is:
ERRO Error during execution engine upcheck error: HttpClient(url: http://127.0.0.1:8551/, kind: request, detail: error trying to connect: tcp connect error: Connection refused (os error 111)), service: exec
Connection refused means the beacon node cannot reach the execution client. This could be due to the execution client is offline or the configuration is wrong. If the execution client is offline, run the execution engine and the error will disappear.
If it is a configuration issue, ensure that the execution engine can be reached. The standard endpoint to connect to the execution client is --execution-endpoint http://localhost:8551. If the execution client is on a different host, the endpoint to connect to it will change, e.g., --execution-endpoint http://IP_address:8551 where IP_address is the IP of the execution client node (you may also need additional flags to be set). If it is using another port, the endpoint link needs to be changed accordingly. Once the execution client/beacon node is configured correctly, the error will disappear.
My beacon node is stuck at downloading historical block using checkpoint sync. What should I do?
After checkpoint forwards sync completes, the beacon node will start to download historical blocks. The log will look like:
INFO Downloading historical blocks est_time: --, distance: 4524545 slots (89 weeks 5 days), service: slot_notifier
If the same log appears every minute and you do not see progress in downloading historical blocks, check the number of peers you are connected to. If you have low peers (less than 50), try to do port forwarding on the ports 9000 TCP/UDP and 9001 UDP to increase peer count.
I proposed a block but the beacon node shows could not publish message with error duplicate as below, should I be worried?
INFO Block from HTTP API already known`
WARN Could not publish message error: Duplicate, service: libp2p
This error usually happens when users are running mev-boost. The relay will publish the block on the network before returning it back to you. After the relay published the block on the network, it will propagate through nodes, and it happens quite often that your node will receive the block from your connected peers via gossip first, before getting the block from the relay, hence the message duplicate.
In short, it is nothing to worry about.
I see beacon node logs Head is optimistic, and I am missing attestations. What should I do?
The log looks like:
WARN Head is optimistic execution_block_hash: 0x47e7555f1d4215d1ad409b1ac188b008fcb286ed8f38d3a5e8078a0af6cbd6e1, info: chain not fully verified, block and attestation production disabled until execution engine syncs, service: slot_notifier
It means the beacon node will follow the chain, but it will not be able to attest or produce blocks. This is because the execution client is not synced, so the beacon chain cannot verify the authenticity of the chain head, hence the word optimistic. What you need to do is to make sure that the execution client is up and syncing. Once the execution client is synced, the error will disappear.
My beacon node logs WARN BlockProcessingFailure outcome: MissingBeaconBlock, what should I do?
An example of the full log is shown below:
WARN BlockProcessingFailure outcome: MissingBeaconBlock(0xbdba211f8d72029554e405d8e4906690dca807d1d7b1bc8c9b88d7970f1648bc), msg: unexpected condition in processing block.
MissingBeaconBlock suggests that the database has corrupted. You should wipe the database and use Checkpoint Sync to resync the beacon chain.
After checkpoint sync, the progress of downloading historical blocks is slow. Why?
This is a normal behaviour. Since v4.1.0, Lighthouse implements rate-limited backfill sync to mitigate validator performance issues after a checkpoint sync. This is not something to worry about since backfill sync / historical data is not required for staking. However, if you opt to sync the chain as fast as possible, you can add the flag --disable-backfill-rate-limiting to the beacon node.
My beacon node logs WARN Error processing HTTP API request, what should I do?
An example of the log is shown below
WARN Error processing HTTP API request method: GET, path: /eth/v1/validator/attestation_data, status: 500 Internal Server Error, elapsed: 305.65µs
This warning usually happens when the validator client sends a request to the beacon node, but the beacon node is unable to fulfil the request. This can be due to the execution client is not synced/is syncing and/or the beacon node is syncing. The error show go away when the node is synced.
My beacon node logs WARN Error signalling fork choice waiter, what should I do?
An example of the full log is shown below:
WARN Error signalling fork choice waiter slot: 6763073, error: ForkChoiceSignalOutOfOrder { current: Slot(6763074), latest: Slot(6763073) }, service: state_advance
This suggests that the computer resources are being overwhelmed. It could be due to high CPU usage or high disk I/O usage. This can happen, e.g., when the beacon node is downloading historical blocks, or when the execution client is syncing. The error will disappear when the resources used return to normal or when the node is synced.
My beacon node logs ERRO Aggregate attestation queue full, what should I do?
Some examples of the full log is shown below:
ERRO Aggregate attestation queue full, queue_len: 4096, msg: the system has insufficient resources for load, module: network::beacon_processor:1542
ERRO Attestation delay queue is full         msg: system resources may be saturated, queue_size: 16384, service: bproc
This suggests that the computer resources are being overwhelmed. It could be due to high CPU usage or high disk I/O usage. Some common reasons are:
- when the beacon node is downloading historical blocks
- the execution client is syncing
- disk IO is being overwhelmed
- parallel API queries to the beacon node
If the node is syncing or downloading historical blocks, the error should disappear when the resources used return to normal or when the node is synced.
My beacon node logs WARN Failed to finalize deposit cache, what should I do?
This is a known bug that will fix by itself.
How can I construct only partial state history?
Lighthouse prunes finalized states by default. Nevertheless, it is quite often that users may be interested in the state history of a few epochs before finalization. To have access to these pruned states, Lighthouse typically requires a full reconstruction of states using the flag --archive (which will usually take a week). Partial state history can be achieved with some “tricks”. Here are the general steps:
-
Delete the current database. You can do so with
--purge-db-forceor manually deleting the database from the data directory:$datadir/beacon. -
If you are interested in the states from the current slot and beyond, perform a checkpoint sync with the flag
--archive, then you can skip the following and jump straight to Step 5 to check the database.If you are interested in the states before the current slot, identify the slot to perform a manual checkpoint sync. With the default configuration, this slot should be divisible by 221, as this is where a full state snapshot is stored. With the flag
--archive, the state upper limit will be adjusted to the next full snapshot slot, a slot that satisfies:slot % 2**21 == 0. In other words, to have the state history available before the current slot, we have to checkpoint sync 221 slots before the next full snapshot slot.Example: Say the current mainnet is at slot
12000000. As the next full state snapshot is at slot12582912, the slot that we want is slot10485760. You can calculate this (in Python) using12000000 // 2**21 * 2**21. -
Export the blobs, block and state data for the slot identified in Step 2. This can be done from another beacon node that you have access to, or you could use any available public beacon API, e.g., QuickNode.
-
Perform a manual checkpoint sync using the data from the previous step, and provide the flag
--archive. -
Check the database:
curl "http://localhost:5052/lighthouse/database/info" | jq '.anchor'
and look for the field state_upper_limit. It should show the slot of the snapshot:
"state_upper_limit": "10485760",
Lighthouse will now start to reconstruct historic states from slot 10485760. At this point, if you do not want a full state reconstruction, you may remove the flag --archive (and restart). When the process is completed, you will have the state data from slot 10485760. Going forward, Lighthouse will continue retaining all historical states newer than the snapshot. Eventually this can lead to increased disk usage, which presently can only be reduced by repeating the process starting from a more recent snapshot.
Note: You may only be interested in very recent historic states. To do so, you may configure the full snapshot to be, for example, every 211 slots, see database configuration for more details. This can be configured with the flag
--hierarchy-exponents 5,7,11together with the flag--archive. This will affect the slot number in Step 2, while other steps remain the same. Note that this comes at the expense of a higher storage requirement.
With
--hierarchy-exponents 5,7,11, using the same example as above, the next full state snapshot is at slot12001280. So the slot to checkpoint sync from is: slot11999232.
Validator
Can I use redundancy in my staking setup?
You should never use duplicate/redundant validator keypairs or validator clients (i.e., don’t
duplicate your JSON keystores and don’t run lighthouse vc twice). This will lead to slashing.
However, there are some components which can be configured with redundancy. See the Redundancy guide for more information.
I am missing attestations. Why?
The first thing is to ensure both consensus and execution clients are synced with the network. If they are synced, there may still be some issues with the node setup itself that is causing the missed attestations. Check the setup to ensure that:
- the clock is synced
- the computer has sufficient resources and is not overloaded
- the internet is working well
- you have sufficient peers
You can see more information on the EthStaker KB.
Another cause for missing attestations is the block arriving late, or there are delays during block processing.
An example of the log: (debug logs can be found under $datadir/beacon/logs):
DEBG Delayed head block, set_as_head_time_ms: 37, imported_time_ms: 1824, attestable_delay_ms: 3660, available_delay_ms: 3491, execution_time_ms: 78, consensus_time_ms: 161, blob_delay_ms: 3291, observed_delay_ms: 3250, total_delay_ms: 5352, slot: 11429888, proposer_index: 778696, block_root: 0x34cc0675ad5fd052699af2ff37b858c3eb8186c5b29fdadb1dabd246caf79e43, service: beacon, module: beacon_chain::canonical_head:1440
The field to look for is attestable_delay, which defines the time when a block is ready for the validator to attest. If the attestable_delay is greater than 4s then it has missed the window for attestation, and the attestation will fail. In the above example, the delay is mostly caused by a late block observed by the node, as shown in observed_delay. The observed_delay is determined mostly by the proposer and partly by your networking setup (e.g., how long it took for the node to receive the block). Ideally, observed_delay should be less than 3 seconds. In this example, the validator failed to attest to the block due to the block arriving late.
Another example of log:
DEBG Delayed head block, set_as_head_time_ms: 22, imported_time_ms: 312, attestable_delay_ms: 7052, available_delay_ms: 6874, execution_time_ms: 4694, consensus_time_ms: 232, blob_delay_ms: 2159, observed_delay_ms: 2179, total_delay_ms: 7209, slot: 1885922, proposer_index: 606896, block_root: 0x9966df24d24e722d7133068186f0caa098428696e9f441ac416d0aca70cc0a23, service: beacon, module: beacon_chain::canonical_head:1441
/159.69.68.247/tcp/9000, service: libp2p, module: lighthouse_network::service:1811
In this example, we see that the execution_time_ms is 4694ms. The execution_time_ms is how long the node took to process the block. The execution_time_ms of larger than 1 second suggests that there is slowness in processing the block. If the execution_time_ms is high, it could be due to high CPU usage, high I/O disk usage or the clients are doing some background maintenance processes.
Sometimes I miss the attestation head vote, resulting in penalty. Is this normal?
In general, it is unavoidable to have some penalties occasionally. This is particularly the case when you are assigned to attest on the first slot of an epoch and if the proposer of that slot releases the block late, then you will get penalised for missing the target and head votes. Your attestation performance does not only depend on your own setup, but also on everyone else’s performance.
You could also check for the sync aggregate participation percentage on block explorers such as beaconcha.in. A low sync aggregate participation percentage (e.g., 60-70%) indicates that the block that you are assigned to attest to may be published late. As a result, your validator fails to correctly attest to the block.
Another possible reason for missing the head vote is due to a chain “reorg”. A reorg can happen if the proposer publishes block n late, and the proposer of block n+1 builds upon block n-1 instead of n. This is called a “reorg”. Due to the reorg, block n was never included in the chain. If you are assigned to attest at slot n, it is possible you may still attest to block n despite most of the network recognizing the block as being late. In this case you will miss the head reward.
Can I submit a voluntary exit message without running a beacon node?
Yes. Beaconcha.in provides the tool to broadcast the message. You can create the voluntary exit message file with ethdo and submit the message via the beaconcha.in website. A guide on how to use ethdo to perform voluntary exit can be found here.
It is also noted that you can submit your BLS-to-execution-change message to update your withdrawal credentials from type 0x00 to 0x01 using the same link.
If you would like to still use Lighthouse to submit the message, you will need to run a beacon node and an execution client. For the beacon node, you can use checkpoint sync to quickly sync the chain under a minute. On the other hand, the execution client can be syncing and needs not be synced. This implies that it is possible to broadcast a voluntary exit message within a short time by quickly spinning up a node.
Does increasing the number of validators increase the CPU and other computer resources used?
A computer with hardware specifications stated in the Recommended System Requirements can run hundreds validators with only marginal increase in CPU usage.
I want to add new validators. Do I have to reimport the existing keys?
No. You can just import new validator keys to the destination directory. If the validator_keys folder contains existing keys, that’s fine as well because Lighthouse will skip importing existing keys.
Do I have to stop lighthouse vc when importing new validator keys?
Generally yes.
If you do not want to stop lighthouse vc, you can use the key manager API to import keys.
How can I delete my validator once it is imported?
You can use the lighthouse vm delete command to delete validator keys, see validator manager delete.
If you are looking to delete the validators in one node and import it to another, you can use the validator-manager to move the validators across nodes without the hassle of deleting and importing the keys.
Network, Monitoring and Maintenance
I have a low peer count and it is not increasing
If you cannot find ANY peers at all, it is likely that you have incorrect
network configuration settings. Ensure that the network you wish to connect to
is correct (the beacon node outputs the network it is connecting to in the
initial boot-up log lines). On top of this, ensure that you are not using the
same datadir as a previous network, i.e., if you have been running the
Hoodi testnet and are now trying to join a new network but using the same
datadir (the datadir is also printed out in the beacon node’s logs on
boot-up).
If you find yourself with a low peer count and it’s not reaching the target you expect, there are a few things to check on:
-
Ensure that port forward was correctly set up as described here.
To check that the ports are forwarded, run the command:
curl http://localhost:5052/lighthouse/natIt should return
{"data":true}. If it returns{"data":false}, you may want to double check if the port forward was correctly set up.If the ports are open, you should have incoming peers. To check that you have incoming peers, run the command:
curl localhost:5052/lighthouse/peers | jq '.[] | select(.peer_info.connection_direction=="Incoming")'If you have incoming peers, it should return a lot of data containing information of peers. If the response is empty, it means that you have no incoming peers and there the ports are not open. You may want to double check if the port forward was correctly set up.
-
Check that you do not lower the number of peers using the flag
--target-peers. The default is 200. A lower value set will lower the maximum number of peers your node can connect to, which may potentially interrupt the validator performance. We recommend users to leave the--target peersuntouched to keep a diverse set of peers. -
Ensure that you have a quality router for the internet connection. For example, if you connect the router to many devices including the node, it may be possible that the router cannot handle all routing tasks, hence struggling to keep up the number of peers. Therefore, using a quality router for the node is important to keep a healthy number of peers.
How do I update lighthouse?
If you are updating to new release binaries, it will be the same process as described here.
If you are updating by rebuilding from source, see here.
If you are running the docker image provided by Sigma Prime on Dockerhub, you can update to specific versions, for example:
docker pull sigp/lighthouse:v1.0.0
If you are building a docker image, the process will be similar to the one described here. You just need to make sure the code you have checked out is up to date.
Do I need to set up any port mappings (port forwarding)?
It is not strictly required to open any ports for Lighthouse to connect and participate in the network. Lighthouse should work out-of-the-box. However, if your node is not publicly accessible (you are behind a NAT or router that has not been configured to allow access to Lighthouse ports) you will only be able to reach peers who have a set up that is publicly accessible.
There are a number of undesired consequences of not making your Lighthouse node publicly accessible.
Firstly, it will make it more difficult for your node to find peers, as your node will not be added to the global DHT and other peers will not be able to initiate connections with you. Secondly, the peers in your peer store are more likely to end connections with you and be less performant as these peers will likely be overloaded with subscribing peers. The reason being, that peers that have correct port forwarding (publicly accessible) are in higher demand than regular peers as other nodes behind NAT’s will also be looking for these peers. Finally, not making your node publicly accessible degrades the overall network, making it more difficult for other peers to join and degrades the overall connectivity of the global network.
For these reasons, we recommend that you make your node publicly accessible.
Lighthouse supports UPnP. If you are behind a NAT with a router that supports UPnP, you can simply ensure UPnP is enabled (Lighthouse will inform you in its initial logs if a route has been established). You can also manually set up port mappings/port forwarding in your router to your local Lighthouse instance. By default, Lighthouse uses port 9000 for both TCP and UDP, and optionally 9001 UDP for QUIC support. Opening these ports will make your Lighthouse node maximally contactable.
How can I monitor my validators?
Apart from using block explorers, you may use the “Validator Monitor” built into Lighthouse which provides logging and Prometheus/Grafana metrics for individual validators. See Validator Monitoring for more information. Lighthouse has also developed Lighthouse UI (Siren) to monitor performance, see Lighthouse UI (Siren).
My beacon node and validator client are on different servers. How can I point the validator client to the beacon node?
The setting on the beacon node is the same for both cases below. In the beacon node, specify lighthouse bn --http-address local_IP so that the beacon node is listening on the local network rather than localhost. You can find the local_IP by running the command hostname -I | awk '{print $1}' on the server running the beacon node.
-
If the beacon node and validator clients are on different servers in the same network, the setting in the validator client is as follows:
Use the flag
--beacon-nodesto point to the beacon node. For example,lighthouse vc --beacon-nodes http://local_IP:5052wherelocal_IPis the local IP address of the beacon node and5052is the defaulthttp-portof the beacon node.If you have firewall setup, e.g.,
ufw, you will need to allow port 5052 (assuming that the default port is used) withsudo ufw allow 5052. Note: this will allow all IP addresses to access the HTTP API of the beacon node. If you are on an untrusted network (e.g., a university or public WiFi) or the host is exposed to the internet, use apply IP-address filtering as described later in this section.You can test that the setup is working with by running the following command on the validator client host:
curl "http://local_IP:5052/eth/v1/node/version"You can refer to Redundancy for more information.
-
If the beacon node and validator clients are on different servers and different networks, it is necessary to perform port forwarding of the SSH port (e.g., the default port 22) on the router, and also allow firewall on the SSH port. The connection can be established via port forwarding on the router.
In the validator client, use the flag
--beacon-nodesto point to the beacon node. However, since the beacon node and the validator client are on different networks, the IP address to use is the public IP address of the beacon node, i.e.,lighthouse vc --beacon-nodes http://public_IP:5052. You can get the public IP address of the beacon node by running the commanddig +short myip.opendns.com @resolver1.opendns.comon the server running the beacon node.Additionally, port forwarding of port 5052 on the router connected to the beacon node is required for the vc to connect to the bn. To do port forwarding, refer to how to open ports.
If you have firewall setup, e.g.,
ufw, you will need to allow connections to port 5052 (assuming that the default port is used). Since the beacon node HTTP/HTTPS API is public-facing (i.e., the 5052 port is now exposed to the internet due to port forwarding), we strongly recommend users to apply IP-address filtering to the BN/VC connection from malicious actors. This can be done using the command:sudo ufw allow from vc_IP_address proto tcp to any port 5052where
vc_IP_addressis the public IP address of the validator client. The command will only allow connections to the beacon node from the validator client IP address to prevent malicious attacks on the beacon node over the internet.
It is also worth noting that the --beacon-nodes flag can also be used for redundancy of beacon nodes. For example, let’s say you have a beacon node and a validator client running on the same host, and a second beacon node on another server as a backup. In this case, you can use lighthouse vc --beacon-nodes http://localhost:5052, http://IP-address:5052 on the validator client.
Should I do anything to the beacon node or validator client settings if I have a relocation of the node / change of IP address?
No. Lighthouse will auto-detect the change and update your Ethereum Node Record (ENR). You just need to make sure you are not manually setting the ENR with --enr-address (which, for common use cases, this flag is not used).
How to change the TCP/UDP port 9000 that Lighthouse listens on?
Use the flag --port <PORT> in the beacon node. This flag can be useful when you are running two beacon nodes at the same time. You can leave one beacon node as the default port 9000, and configure the second beacon node to listen on, e.g., --port 9100.
Since V4.5.0, Lighthouse supports QUIC and by default will use the value of --port + 1 to listen via UDP (default 9001).
This can be configured by using the flag --quic-port. Refer to Advanced Networking for more information.
Lighthouse v4.3.0 introduces a change where a node will subscribe to only 2 subnets in total. I am worried that this will impact my validators return
Previously, having more validators means subscribing to more subnets. Since the change, a node will now only subscribe to 2 subnets in total. This will bring about significant reductions in bandwidth for nodes with multiple validators.
While subscribing to more subnets can ensure you have peers on a wider range of subnets, these subscriptions consume resources and bandwidth. This does not significantly increase the performance of the node, however it does benefit other nodes on the network.
If you would still like to subscribe to all subnets, you can use the flag subscribe-all-subnets. This may improve the block rewards by 1-5%, though it comes at the cost of a much higher bandwidth requirement.
How to know how many of my peers are connected via QUIC?
With --metrics enabled in the beacon node, the Grafana Network dashboard displays the connected by transport, which will show the number of peers connected via QUIC.
Alternatively, you can find the number of peers connected via QUIC manually using:
curl -s "http://localhost:5054/metrics" | grep 'transport="quic"'
A response example is:
libp2p_peers_multi{direction="inbound",transport="quic"} 27
libp2p_peers_multi{direction="none",transport="quic"} 0
libp2p_peers_multi{direction="outbound",transport="quic"} 9
which shows that there are a total of 36 peers connected via QUIC.
Miscellaneous
What should I do if I lose my slashing protection database?
See here.
I can’t compile lighthouse
See here.
How do I check the version of Lighthouse that is running?
If you build Lighthouse from source, run lighthouse --version. Example of output:
Lighthouse v4.1.0-693886b
BLS library: blst-modern
SHA256 hardware acceleration: false
Allocator: jemalloc
Specs: mainnet (true), minimal (false), gnosis (true)
If you download the binary file, navigate to the location of the directory, for example, the binary file is in /usr/local/bin, run /usr/local/bin/lighthouse --version, the example of output is the same as above.
Alternatively, if you have Lighthouse running, on the same computer, you can run:
curl "http://127.0.0.1:5052/eth/v1/node/version"
Example of output:
{"data":{"version":"Lighthouse/v4.1.0-693886b/x86_64-linux"}}
which says that the version is v4.1.0.
Does Lighthouse have pruning function like the execution client to save disk space?
Yes, Lighthouse supports state pruning which can help to save disk space.
Can I use a HDD for the freezer database and only have the hot db on SSD?
Yes, you can do so by using the flag --freezer-dir /path/to/freezer_db in the beacon node.
Can Lighthouse log in local timestamp instead of UTC?
The reason why Lighthouse logs in UTC is due to the dependency on an upstream library that is yet to be resolved. Alternatively, using the flag disable-log-timestamp in combination with systemd will suppress the UTC timestamps and print the logs in local timestamps.
My hard disk is full and my validator is down. What should I do?
A quick way to get the validator back online is by removing the Lighthouse beacon node database and resync Lighthouse using checkpoint sync. A guide to do this can be found in the Lighthouse Discord server. With some free space left, you will then be able to prune the execution client database to free up more space.
For Protocol Developers
Documentation for protocol developers.
This section lists Lighthouse-specific decisions that are not strictly spec’d and may be useful for other protocol developers wishing to interact with lighthouse.
Custom ENR Fields
Lighthouse currently uses the following ENR fields:
Ethereum Consensus Specified
| Field | Description |
|---|---|
eth2 | The ENRForkId in SSZ bytes specifying which fork the node is on |
attnets | An SSZ bitfield which indicates which of the 64 subnets the node is subscribed to for an extended period of time |
syncnets | An SSZ bitfield which indicates which of the sync committee subnets the node is subscribed to |
Lighthouse Custom Fields
Lighthouse is currently using the following custom ENR fields.
| Field | Description |
|---|---|
quic | The UDP port on which the QUIC transport is listening on IPv4 |
quic6 | The UDP port on which the QUIC transport is listening on IPv6 |
Custom RPC Messages
The specification leaves room for implementation-specific errors. Lighthouse uses the following custom RPC error messages.
Goodbye Reason Codes
| Code | Message | Description |
|---|---|---|
| 128 | Unable to Verify Network | Teku uses this, so we adopted it. It relates to having a fork mismatch |
| 129 | Too Many Peers | Lighthouse can close a connection because it has reached its peer-limit and pruned excess peers |
| 250 | Bad Score | The node has been dropped due to having a bad peer score |
| 251 | Banned | The peer has been banned and disconnected |
| 252 | Banned IP | The IP the node is connected to us with has been banned |
Error Codes
| Code | Message | Description |
|---|---|---|
| 139 | Rate Limited | The peer has been rate limited so we return this error as a response |
| 140 | Blobs Not Found For Block | We do not possess the blobs for the requested block |
Lighthouse architecture
A technical walkthrough of Lighthouse’s architecture can be found at: Lighthouse technical walkthrough
Security
Lighthouse takes security seriously. Please see our security policy on GitHub for our PGP key and information on reporting vulnerabilities:
Past Security Assessments
Reports from previous security assessments can be found below:
Archived
This section keeps the topics that are deprecated. Documentation in this section is for informational purposes only and will not be maintained.
Merge Migration
The Merge has occurred on mainnet on 15th September 2022. This document provides detail of what users need to do in the past (before The Merge) to run a Lighthouse node on a post-merge Ethereum network. This document now serves as a record of the milestone upgrade.
Necessary Configuration
There are two configuration changes required for a Lighthouse node to operate correctly throughout the merge:
- You must run your own execution engine such as Besu, Erigon, Reth, Geth or Nethermind alongside Lighthouse.
You must update your
lighthouse bnconfiguration to connect to the execution engine using new flags which are documented on this page in the Connecting to an execution engine section. - If your Lighthouse node has validators attached you must nominate an Ethereum address to
receive transactions tips from blocks proposed by your validators. These changes should
be made to your
lighthouse vcconfiguration, and are covered on the Suggested fee recipient page.
Additionally, you must update Lighthouse to v3.0.0 (or later), and must update your execution engine to a merge-ready version.
When?
All networks (Mainnet, Goerli (Prater), Ropsten, Sepolia, Kiln, Chiado, Gnosis) have successfully undergone the Bellatrix fork and transitioned to a post-merge Network. Your node must have a merge-ready configuration to continue operating. Table below lists the date at which Bellatrix and The Merge occurred:
| Network | Bellatrix | The Merge | Remark |
|---|---|---|---|
| Ropsten | 2nd June 2022 | 8th June 2022 | Deprecated |
| Sepolia | 20th June 2022 | 6th July 2022 | |
| Goerli | 4th August 2022 | 10th August 2022 | Previously named Prater |
| Mainnet | 6th September 2022 | 15th September 2022 | |
| Chiado | 10th October 2022 | 4th November 2022 | |
| Gnosis | 30th November 2022 | 8th December 2022 |
Connecting to an execution engine
The Lighthouse beacon node must connect to an execution engine in order to validate the transactions present in post-merge blocks. Two new flags are used to configure this connection:
--execution-endpoint <URL>: the URL of the execution engine API. Often this will behttp://localhost:8551.--execution-jwt <FILE>: the path to the file containing the JWT secret shared by Lighthouse and the execution engine.
If you set up an execution engine with --execution-endpoint then you must provide a JWT secret
using --execution-jwt. This is a mandatory form of authentication that ensures that Lighthouse
has the authority to control the execution engine.
Tip: the –execution-jwt-secret-key
flag can be used instead of –execution-jwt . This is useful, for example, for users who wish to inject the value into a Docker container without needing to pass a jwt secret file.
The execution engine connection must be exclusive, i.e. you must have one execution node per beacon node. The reason for this is that the beacon node controls the execution node. Please see the FAQ for further information about why many:1 and 1:many configurations are not supported.
Execution engine configuration
Each execution engine has its own flags for configuring the engine API and JWT. Please consult the relevant page for your execution engine for the required flags:
- Geth: Connecting to Consensus Clients
- Reth: Running the Consensus Layer
- Nethermind: Running Nethermind Post Merge
- Besu: Prepare For The Merge
- Erigon: Beacon Chain (Consensus Layer)
Once you have configured your execution engine to open up the engine API (usually on port 8551) you
should add the URL to your lighthouse bn flags with --execution-endpoint <URL>, as well as
the path to the JWT secret with --execution-jwt <FILE>.
There are merge-ready releases of all compatible execution engines available now.
Example
Let us look at an example of the command line arguments for a pre-merge production staking BN:
lighthouse \
    --network mainnet \
    beacon_node \
    --http \
    --eth1-endpoints http://localhost:8545,https://mainnet.infura.io/v3/TOKEN
Converting the above to a post-merge configuration would render:
lighthouse \
    --network mainnet \
    beacon_node \
    --http \
    --execution-endpoint http://localhost:8551
    --execution-jwt /path/to/jwtsecret
The changes here are:
- Remove
--eth1-endpoints- The endpoint at
localhostcan be retained, it is our local execution engine. Once it is upgraded to a merge-compatible release it will be used in the post-merge environment. - The
infura.ioendpoint will be abandoned, Infura and most other third-party node providers are not compatible with post-merge BNs.
- The endpoint at
- Add the
--execution-endpointflag.- We have reused the node at
localhost, however we’ve switched to the authenticated engine API port8551. All execution engines will have a specific port for this API, however it might not be8551, see their documentation for details.
- We have reused the node at
- Add the
--execution-jwtflag.- This is the path to a file containing a 32-byte secret for authenticating the BN with the execution engine. It is critical that both the BN and execution engine reference a file with the same value, otherwise they’ll fail to communicate.
Note that the --network and --http flags haven’t changed. The only changes required for the
merge are ensuring that --execution-endpoint and --execution-jwt flags are provided! In fact,
you can even leave the --eth1-endpoints flag there, it will be ignored. This is not recommended as
a deprecation warning will be logged and Lighthouse may remove these flags in the future.
The relationship between --eth1-endpoints and --execution-endpoint
Pre-merge users will be familiar with the --eth1-endpoints flag. This provides a list of Ethereum
“eth1” nodes (Besu, Erigon, Reth, Geth or Nethermind). Each beacon node (BN) can have multiple eth1 endpoints
and each eth1 endpoint can have many BNs connection (many-to-many relationship). The eth1 node
provides a source of truth for the deposit
contract and beacon chain proposers include this
information in beacon blocks in order to on-board new validators. BNs exclusively use the eth
namespace on the eth1 JSON-RPC API to
achieve this.
To progress through the Bellatrix upgrade nodes will need a new connection to an “eth1” node;
--execution-endpoint. This connection has a few different properties. Firstly, the term “eth1
node” has been deprecated and replaced with “execution engine”. Whilst “eth1 node” and “execution
engine” still refer to the same projects (Besu, Erigon, Reth, Geth or Nethermind), the former refers to the pre-merge
versions and the latter refers to post-merge versions. Secondly, there is a strict one-to-one
relationship between Lighthouse and the execution engine; only one Lighthouse node can connect to
one execution engine. Thirdly, it is impossible to fully verify the post-merge chain without an
execution engine. It was possible to verify the pre-merge chain without an eth1 node, it was just
impossible to reliably propose blocks without it.
Since an execution engine is a hard requirement in the post-merge chain and the execution engine
contains the transaction history of the Ethereum chain, there is no longer a need for the
--eth1-endpoints flag for information about the deposit contract. The --execution-endpoint can
be used for all such queries. Therefore we can say that where --execution-endpoint is included,
--eth1-endpoints should be omitted.
FAQ
How do I know if my node is set up correctly?
Lighthouse will log a message indicating that it is ready for the merge:
INFO Ready for the merge, current_difficulty: 10789363, terminal_total_difficulty: 10790000
Once the merge has occurred you should see that Lighthouse remains in sync and marks blocks
as verified indicating that they have been processed successfully by the execution engine:
INFO Synced, slot: 3690668, block: 0x1244…cb92, epoch: 115333, finalized_epoch: 115331, finalized_root: 0x0764…2a3d, exec_hash: 0x929c…1ff6 (verified), peers: 78
Can I still use the --staking flag?
Yes. The --staking flag is just an alias for --http --eth1. The --eth1 flag is now superfluous
so --staking is equivalent to --http. You need either --staking or --http for the validator
client to be able to connect to the beacon node.
Can I use http://localhost:8545 for the execution endpoint?
Most execution nodes use port 8545 for the Ethereum JSON-RPC API. Unless custom configuration is
used, an execution node will not provide the necessary engine API on port 8545. You should
not attempt to use http://localhost:8545 as your engine URL and should instead use
http://localhost:8551.
Can I share an execution node between multiple beacon nodes (many:1)?
It is not possible to connect more than one beacon node to the same execution engine. There must be a 1:1 relationship between beacon nodes and execution nodes.
The beacon node controls the execution node via the engine API, telling it which block is the current head of the chain. If multiple beacon nodes were to connect to a single execution node they could set conflicting head blocks, leading to frequent re-orgs on the execution node.
We imagine that in future there will be HTTP proxies available which allow users to nominate a single controlling beacon node, while allowing consistent updates from other beacon nodes.
What about multiple execution endpoints (1:many)?
It is not possible to connect one beacon node to more than one execution engine. There must be a 1:1 relationship between beacon nodes and execution nodes.
Since an execution engine can only have one controlling BN, the value of having multiple execution engines connected to the same BN is very low. An execution engine cannot be shared between BNs to reduce costs.
Whilst having multiple execution engines connected to a single BN might be useful for advanced testing scenarios, Lighthouse (and other consensus clients) have decided to support only one execution endpoint. Such scenarios could be resolved with a custom-made HTTP proxy.
Additional Resources
There are several community-maintained guides which provide more background information, as well as guidance for specific setups.
- Ethereum.org: The Merge
- Ethereum Staking Launchpad: Merge Readiness.
- CoinCashew: Ethereum Merge Upgrade Checklist
- EthDocker: Merge Preparation
Raspberry Pi 4 Installation
Note: This page is left here for archival purposes. As the number of validators on mainnet has increased significantly, so does the requirement for hardware (e.g., RAM). Running Ethereum mainnet on a Raspberry Pi 4 is no longer recommended.
Tested on:
- Raspberry Pi 4 Model B (4GB)
Ubuntu 20.04 LTS (GNU/Linux 5.4.0-1011-raspi aarch64)
Note: Lighthouse supports cross-compiling to target a
Raspberry Pi (aarch64). Compiling on a faster machine (i.e., x86_64
desktop) may be convenient.
1. Install Ubuntu
Follow the Ubuntu Raspberry Pi installation instructions. A 64-bit version is required
A graphical environment is not required in order to use Lighthouse. Only the terminal and an Internet connection are necessary.
2. Install Packages
Install the Ubuntu dependencies:
sudo apt update && sudo apt install -y git gcc g++ make cmake pkg-config llvm-dev libclang-dev clang
Tips:
- If there are difficulties, try updating the package manager with
sudo apt update.
3. Install Rust
Install Rust as per rustup:
curl --proto '=https' --tlsv1.2 -sSf https://sh.rustup.rs | sh
Tips:
- During installation, when prompted, enter
1for the default installation.- After Rust installation completes, try running
cargo version. If it cannot be found, runsource $HOME/.cargo/env. After that, runningcargo versionshould return the version, for examplecargo 1.68.2.- It’s generally advisable to append
source $HOME/.cargo/envto~/.bashrc.
4. Install Lighthouse
git clone https://github.com/sigp/lighthouse.git
cd lighthouse
git checkout stable
make
Compiling Lighthouse can take up to an hour. The safety guarantees provided by the Rust language unfortunately result in a lengthy compilation time on a low-spec CPU like a Raspberry Pi. For faster compilation on low-spec hardware, try cross-compiling on a more powerful computer (e.g., compile for RasPi from your desktop computer).
Once installation has finished, confirm Lighthouse is installed by viewing the
usage instructions with lighthouse --help.
Key Management
⚠️ The information on this page refers to tooling and process that have been deprecated. Please read the “Deprecation Notice”. ⚠️
Deprecation Notice
This page recommends the use of the lighthouse account-manager tool to create
validators. This tool will always generate keys with the withdrawal credentials
of type 0x00. This means the users who created keys using lighthouse account-manager will have to update their withdrawal credentials in a
separate step to receive staking rewards.
In addition, Lighthouse generates the deposit data file in the form of *.rlp,
which cannot be uploaded to the Staking launchpad that accepts only
*.json file. This means that users have to directly interact with the deposit
contract to be able to submit the deposit if they were to generate the files
using Lighthouse.
Rather than continuing to read this page, we recommend users visit either:
- The Staking Launchpad for detailed, beginner-friendly instructions.
- The ethstaker-deposit-cli for a CLI tool used by the Staking Launchpad.
- The validator-manager documentation for a Lighthouse-specific tool for streamlined validator management tools.
The lighthouse account-manager
Lighthouse uses a hierarchical key management system for producing validator keys. It is hierarchical because each validator key can be derived from a master key, making the validators keys children of the master key. This scheme means that a single 24-word mnemonic can be used to back up all of your validator keys without providing any observable link between them (i.e., it is privacy-retaining). Hierarchical key derivation schemes are common-place in cryptocurrencies, they are already used by most hardware and software wallets to secure BTC, ETH and many other coins.
Key Concepts
We defined some terms in the context of validator key management:
- Mnemonic: a string of 24 words that is designed to be easy to write down
and remember. E.g., “radar fly lottery mirror fat icon bachelor sadness
type exhaust mule six beef arrest you spirit clog mango snap fox citizen
already bird erase”.
- Defined in BIP-39
- Wallet: a wallet is a JSON file which stores an
encrypted version of a mnemonic.
- Defined in EIP-2386
- Keystore: typically created by wallet, it contains a single encrypted BLS
keypair.
- Defined in EIP-2335.
- Voting Keypair: a BLS public and private keypair which is used for signing blocks, attestations and other messages on regular intervals in the beacon chain.
- Withdrawal Keypair: a BLS public and private keypair which will be required after Phase 0 to manage ETH once a validator has exited.
Create a validator
There are 2 steps involved to create a validator key using Lighthouse:
The following example demonstrates how to create a single validator key.
Step 1: Create a wallet and record the mnemonic
A wallet allows for generating practically unlimited validators from an easy-to-remember 24-word string (a mnemonic). As long as that mnemonic is backed up, all validator keys can be trivially re-generated.
Whilst the wallet stores the mnemonic, it does not store it in plain-text: the mnemonic is encrypted with a password. It is the responsibility of the user to define a strong password. The password is only required for interacting with the wallet, it is not required for recovering keys from a mnemonic.
To create a wallet, use the lighthouse account wallet command. For example, if we wish to create a new wallet for the Hoodi testnet named wally and saves it in ~/.lighthouse/hoodi/wallets with a randomly generated password saved
to ./wallet.pass:
lighthouse --network hoodi account wallet create --name wally --password-file wally.pass
Using the above command, a wallet will be created in ~/.lighthouse/hoodi/wallets with the name
wally. It is encrypted using the password defined in the
wally.pass file.
During the wallet creation process, a 24-word mnemonic will be displayed. Record the mnemonic because it allows you to recreate the files in the case of data loss.
Notes:
- When navigating to the directory
~/.lighthouse/hoodi/wallets, one will not see the wallet namewally, but a hexadecimal folder containing the wallet file. However, when interacting withlighthousein the CLI, the namewallywill be used.- The password is not
wally.pass, it is the content of thewally.passfile.- If
wally.passalready exists, the wallet password will be set to the content of that file.
Step 2: Create a validator
Validators are fundamentally represented by a BLS keypair. In Lighthouse, we use a wallet to generate these keypairs. Once a wallet exists, the lighthouse account validator create command can be used to generate the BLS keypair and all necessary information to submit a validator deposit. With the wally wallet created in Step 1, we can create a validator with the command:
lighthouse --network hoodi account validator create --wallet-name wally --wallet-password wally.pass --count 1
This command will:
- Derive a single new BLS keypair from wallet
wallyin~/.lighthouse/hoodi/wallets, updating it so that it generates a new key next time. - Create a new directory
~/.lighthouse/hoodi/validatorscontaining:- An encrypted keystore file
voting-keystore.jsoncontaining the validator’s voting keypair.- An
eth1_deposit_data.rlpassuming the default deposit amount (32 ETH) which can be submitted to the deposit contract for the Goerli testnet. Other networks can be set via the--networkparameter.
- An
- An encrypted keystore file
- Create a new directory
~/.lighthouse/hoodi/secretswhich stores a password to the validator’s voting keypair.
If you want to create another validator in the future, repeat Step 2. The wallet keeps track of how many validators it has generated and ensures that a new validator is generated each time. The important thing is to keep the 24-word mnemonic safe so that it can be used to generate new validator keys if needed.
Detail
Directory Structure
There are three important directories in Lighthouse validator key management:
wallets/: contains encrypted wallets which are used for hierarchical key derivation.- Defaults to
~/.lighthouse/{network}/wallets
- Defaults to
validators/: contains a directory for each validator containing encrypted keystores and other validator-specific data.- Defaults to
~/.lighthouse/{network}/validators
- Defaults to
secrets/: since the validator signing keys are “hot”, the validator process needs access to the passwords to decrypt the keystores in the validators directory. These passwords are stored here.- Defaults to
~/.lighthouse/{network}/secrets
- Defaults to
where {network} is the name of the network passed in the --network parameter.
When the validator client boots, it searches the validators/ for directories
containing voting keystores. When it discovers a keystore, it searches the
secrets/ directory for a file with the same name as the 0x-prefixed validator public key. If it finds this file, it attempts
to decrypt the keystore using the contents of this file as the password. If it
fails, it logs an error and moves onto the next keystore.
The validators/ and secrets/ directories are kept separate to allow for
ease-of-backup; you can safely backup validators/ without worrying about
leaking private key data.